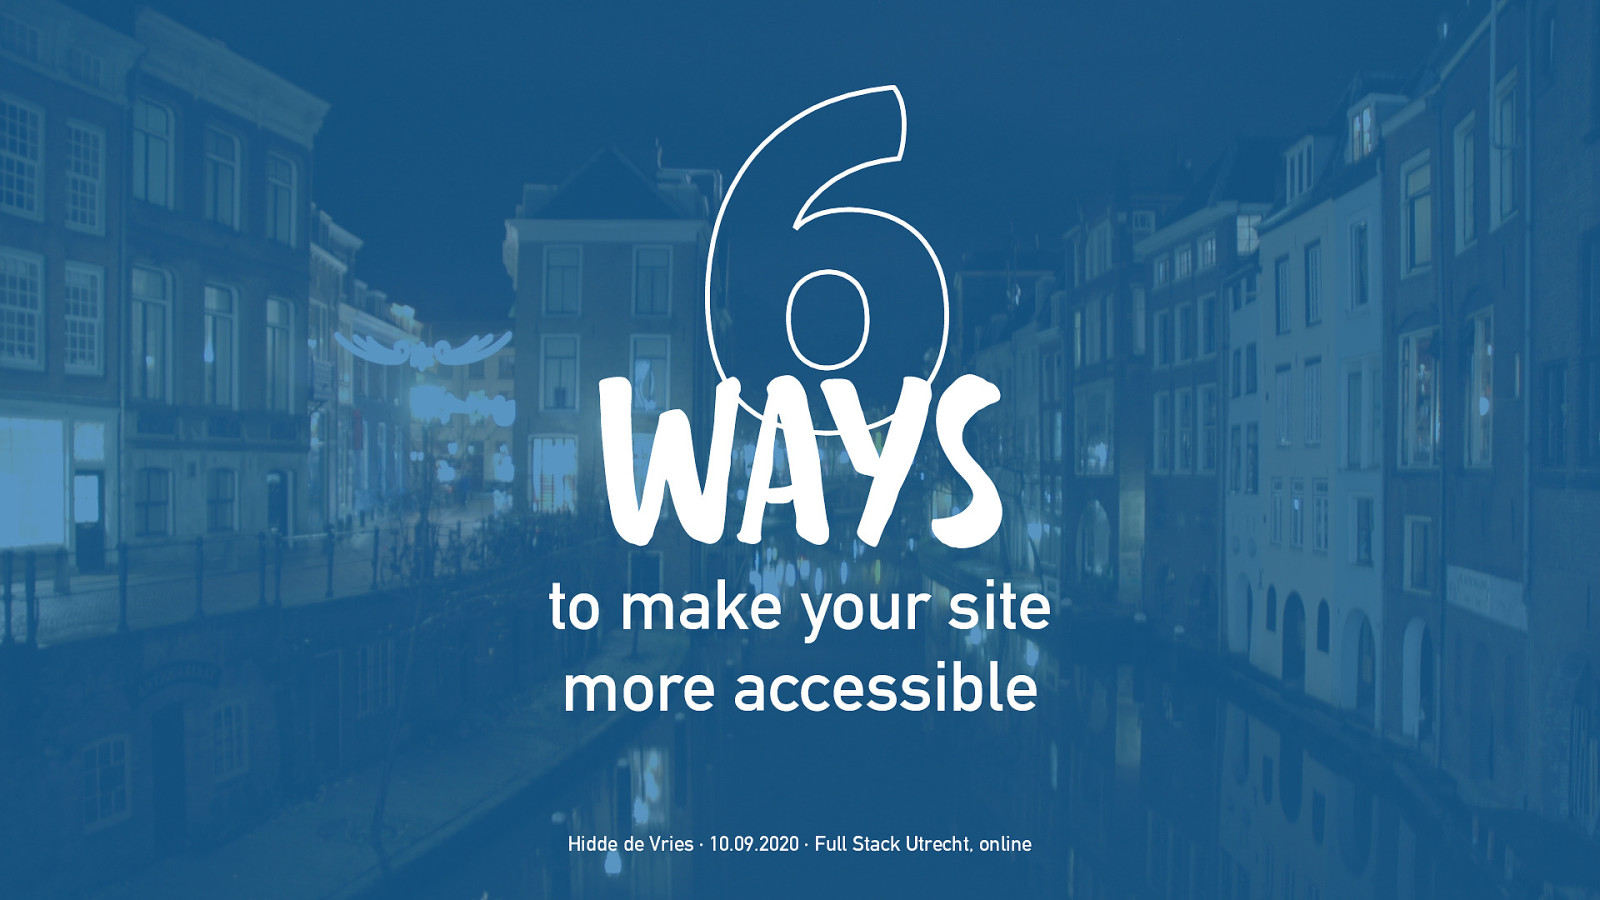
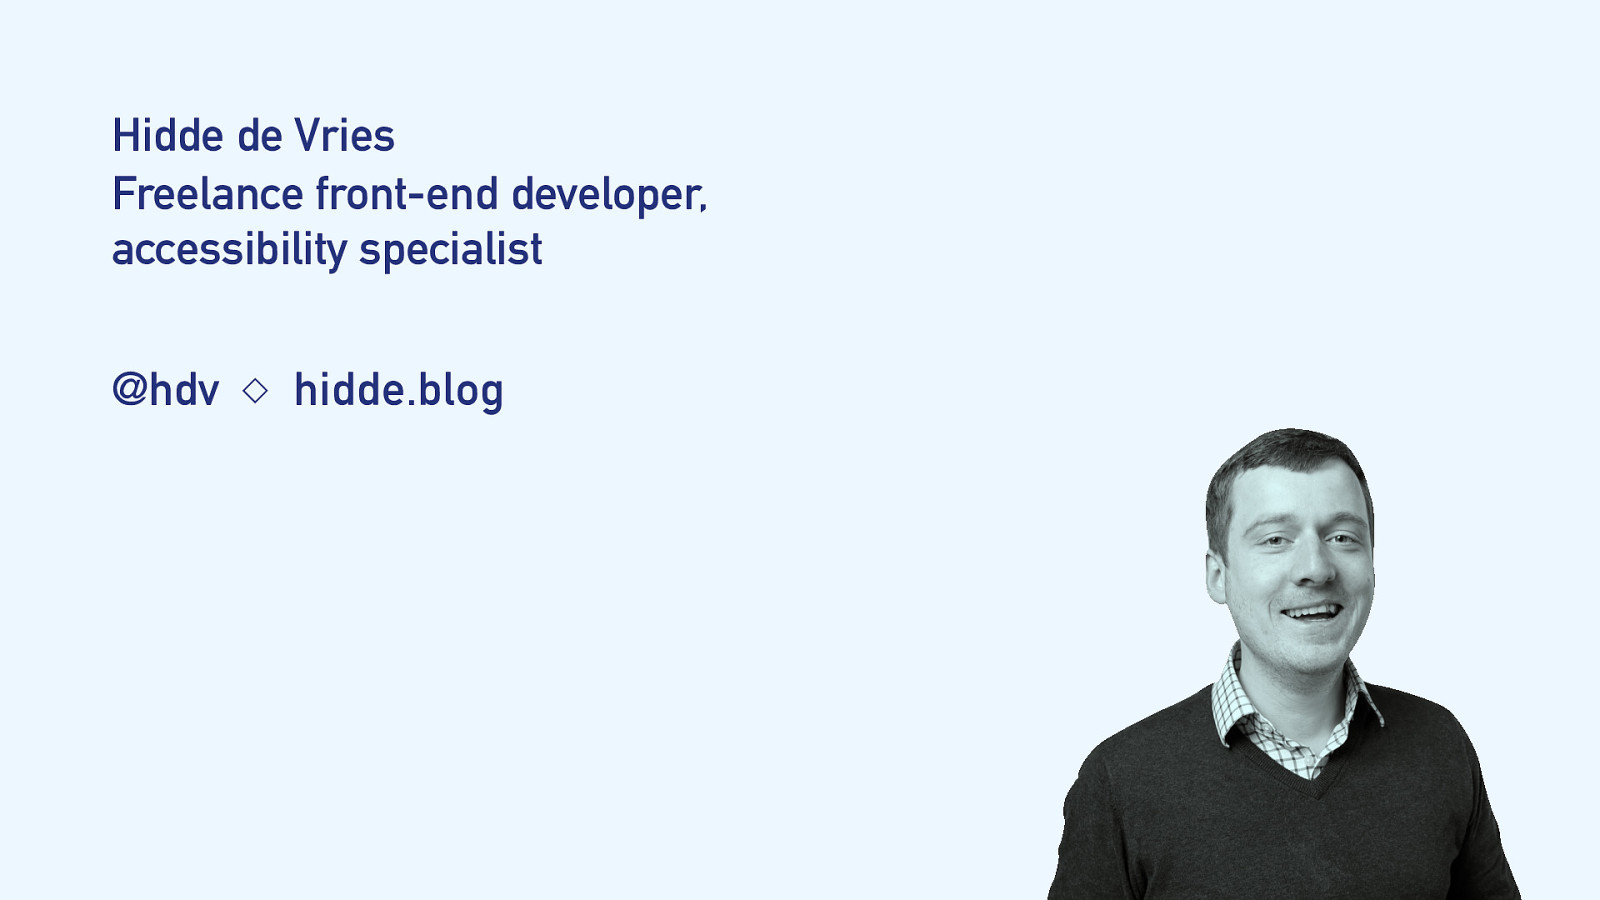
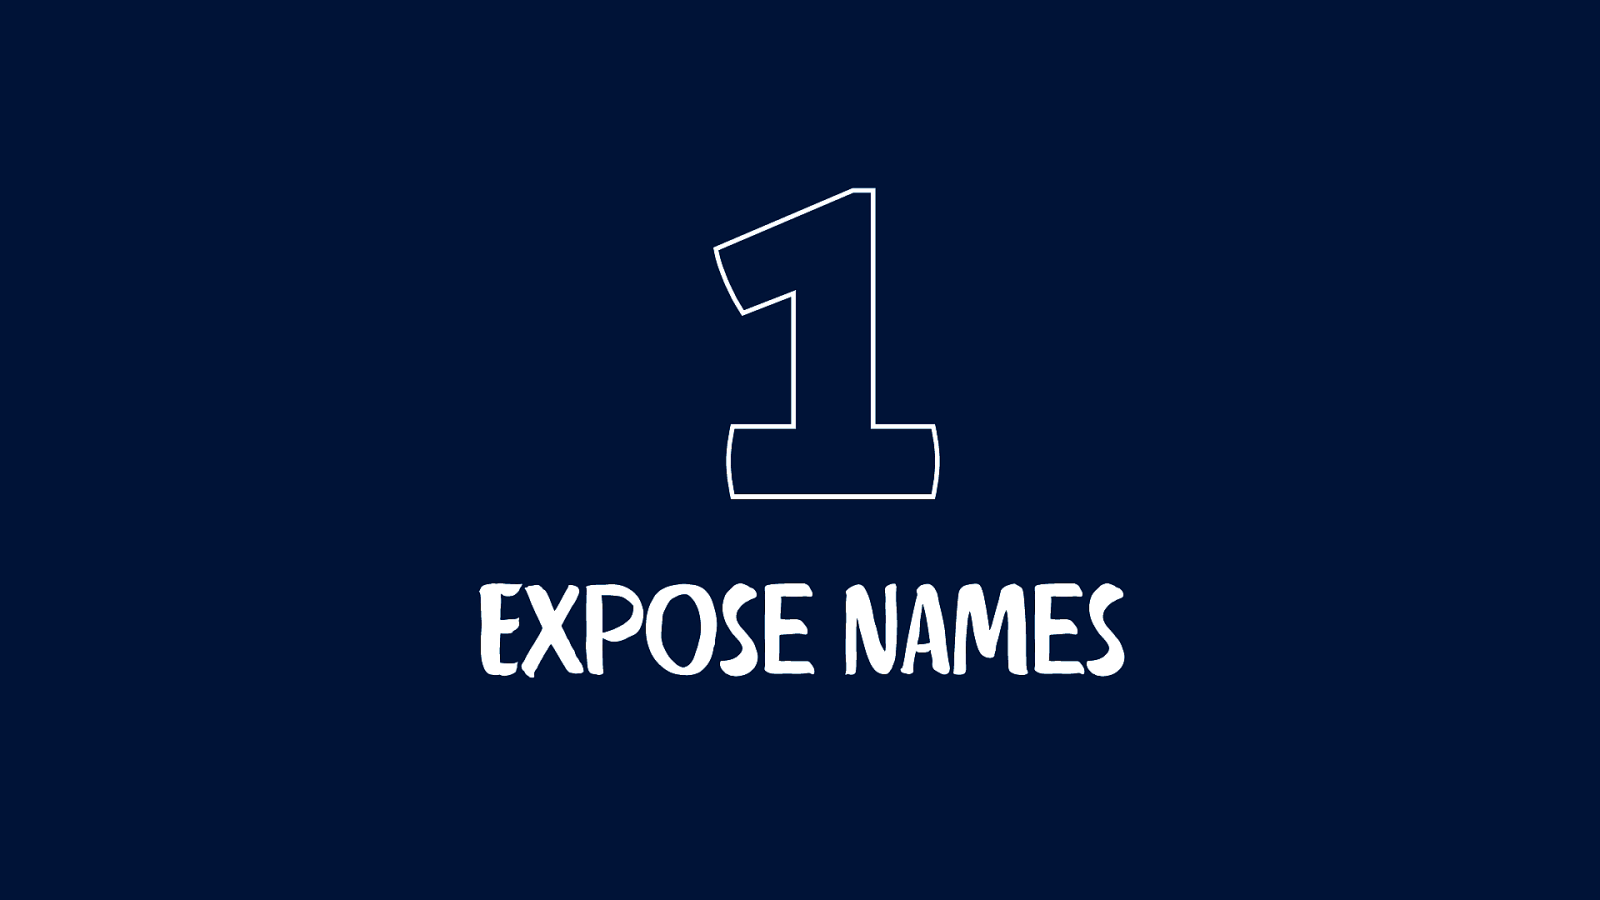
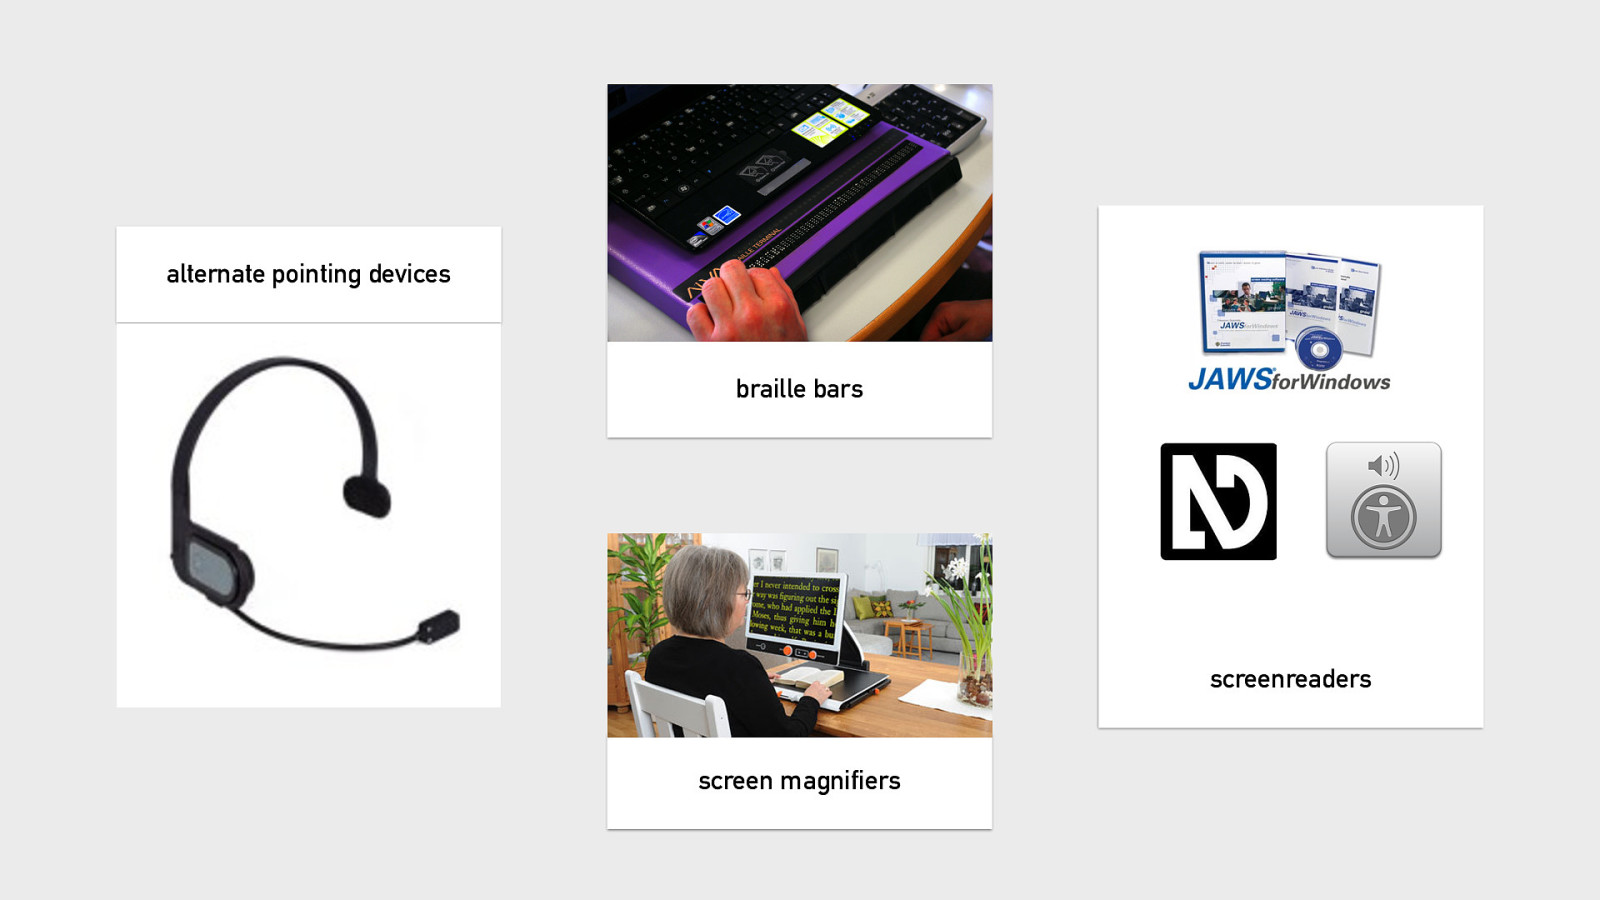
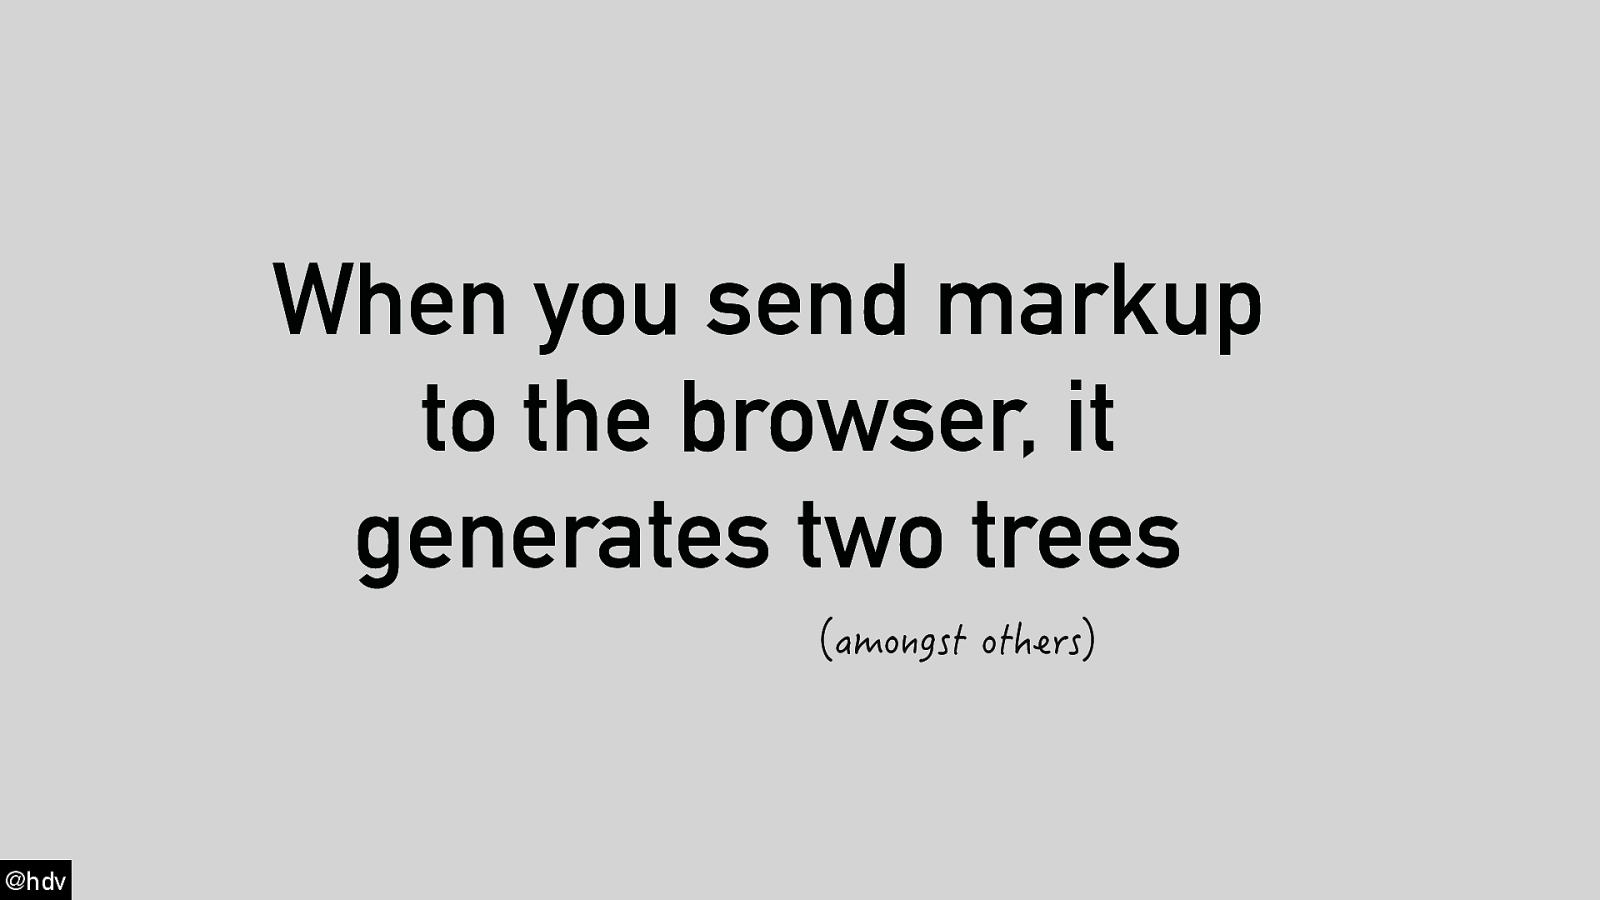
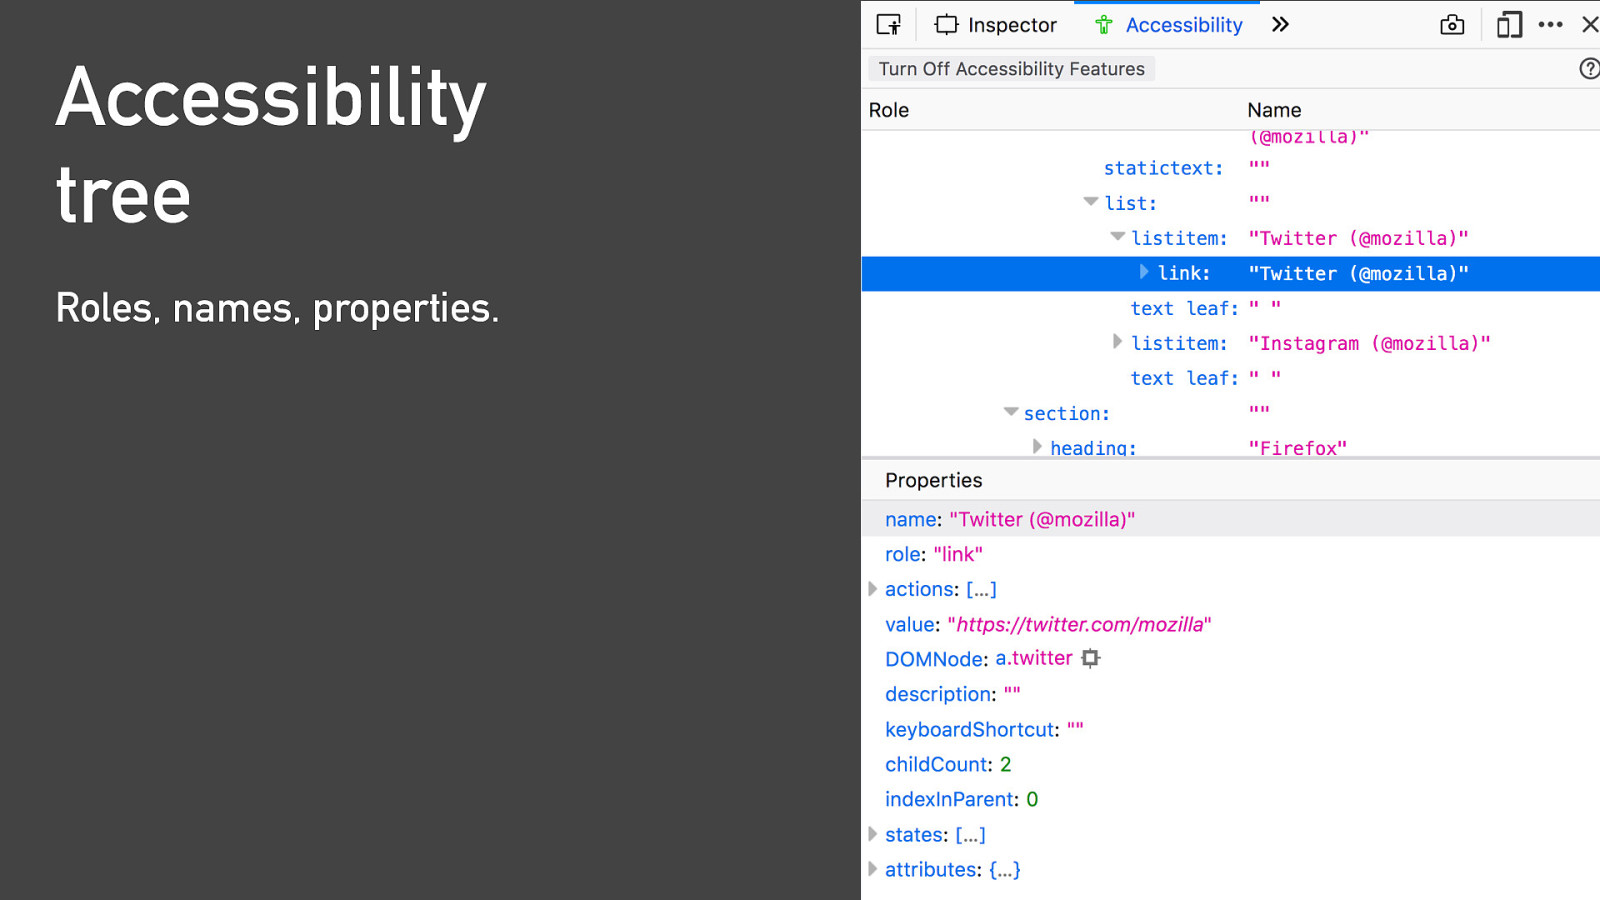
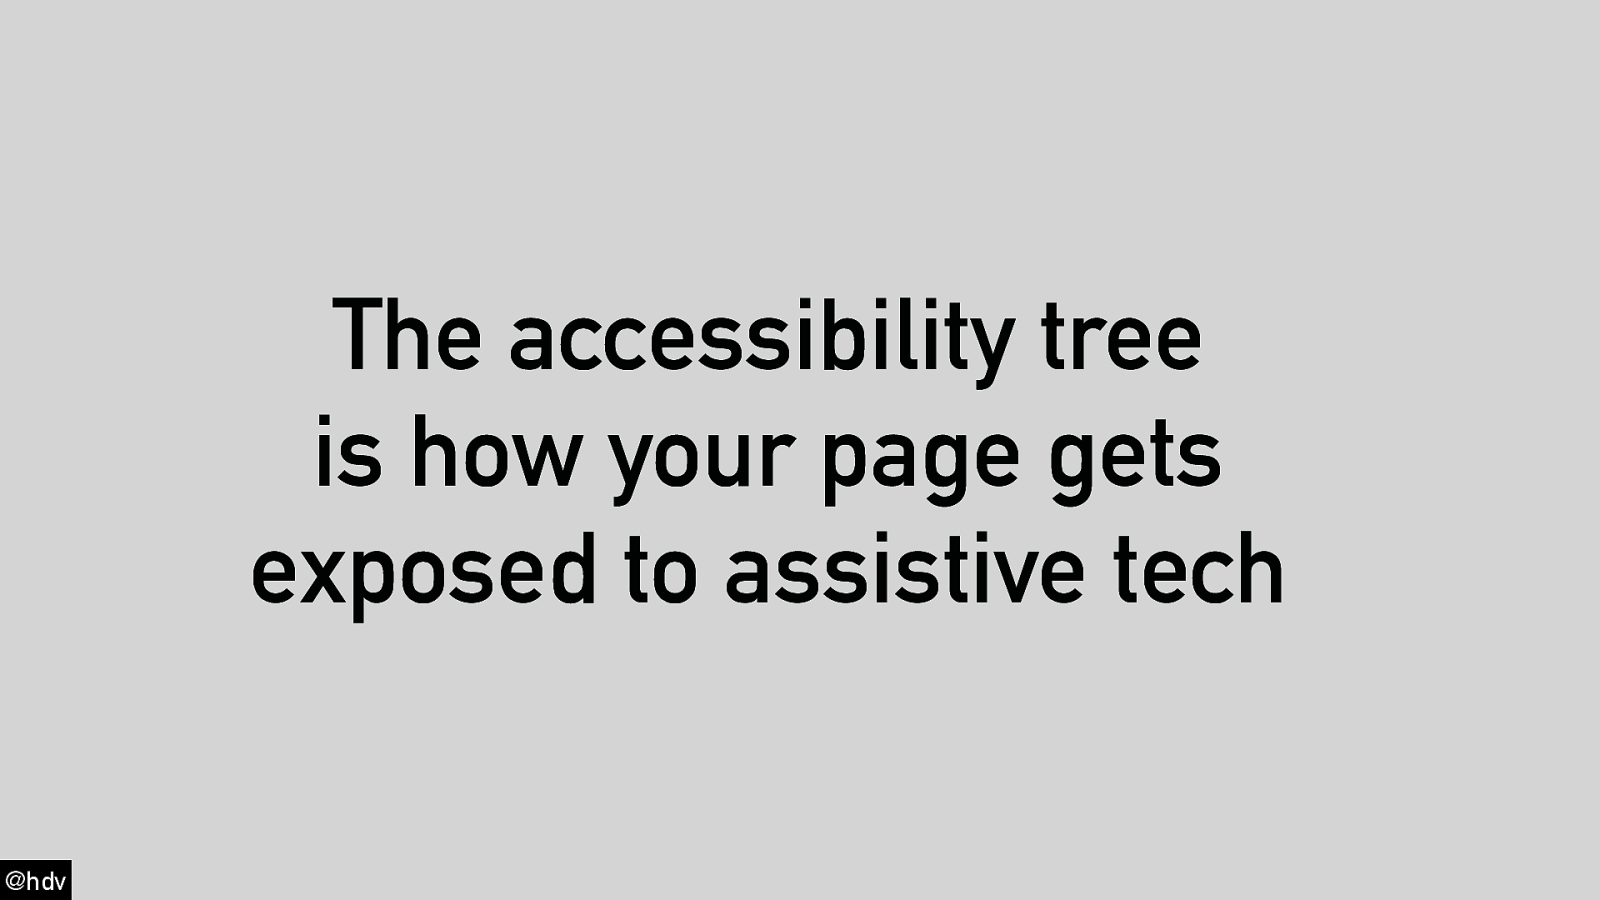
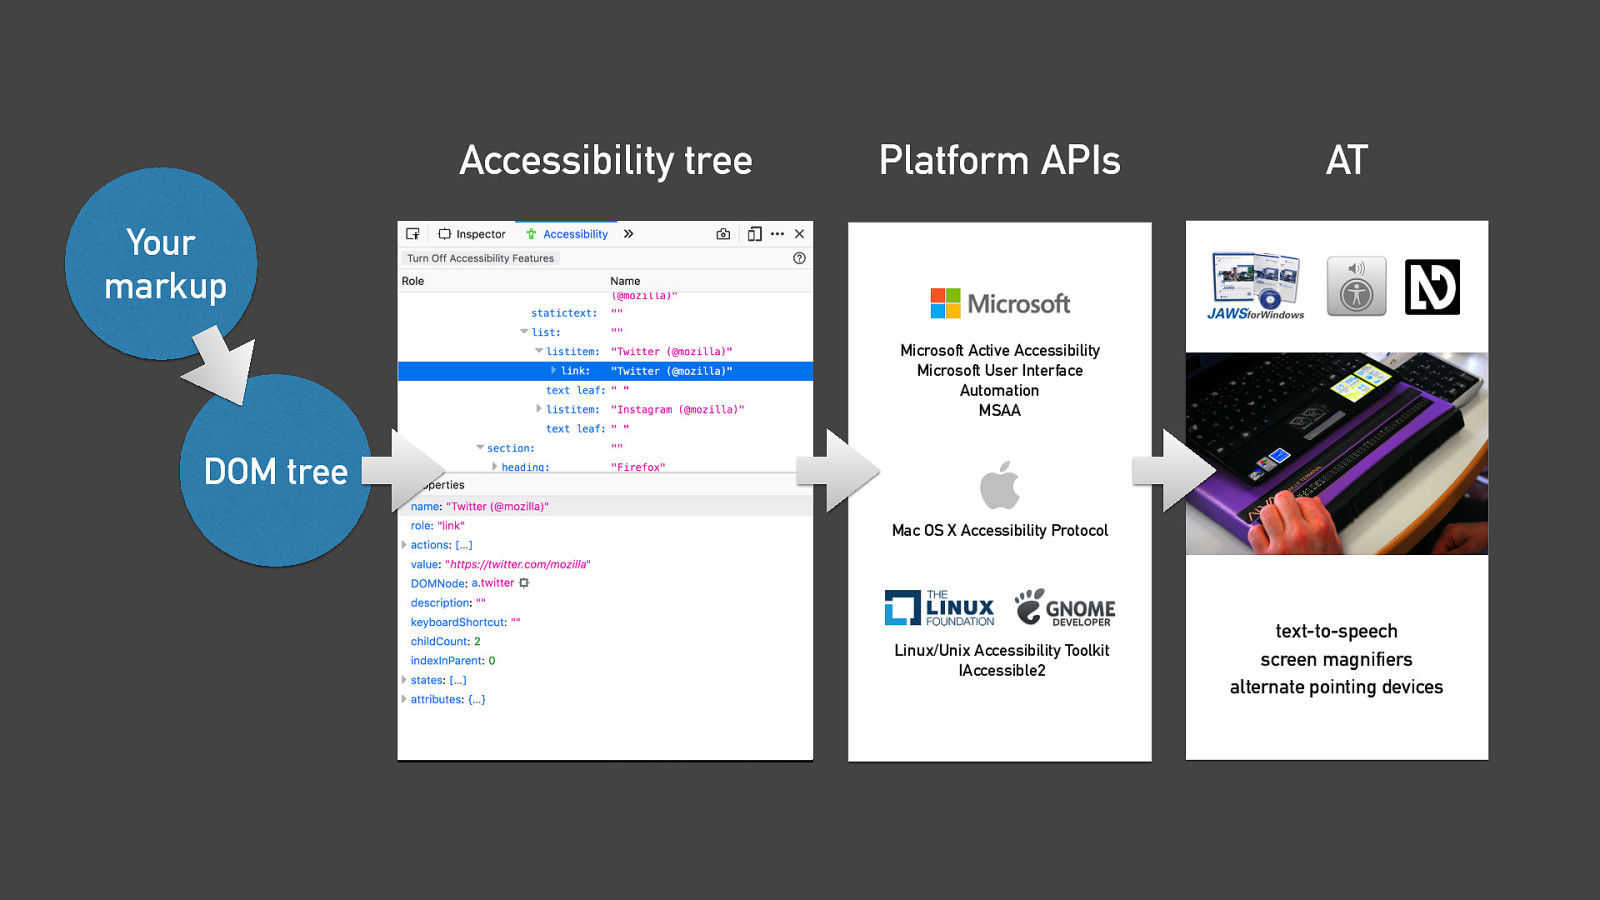
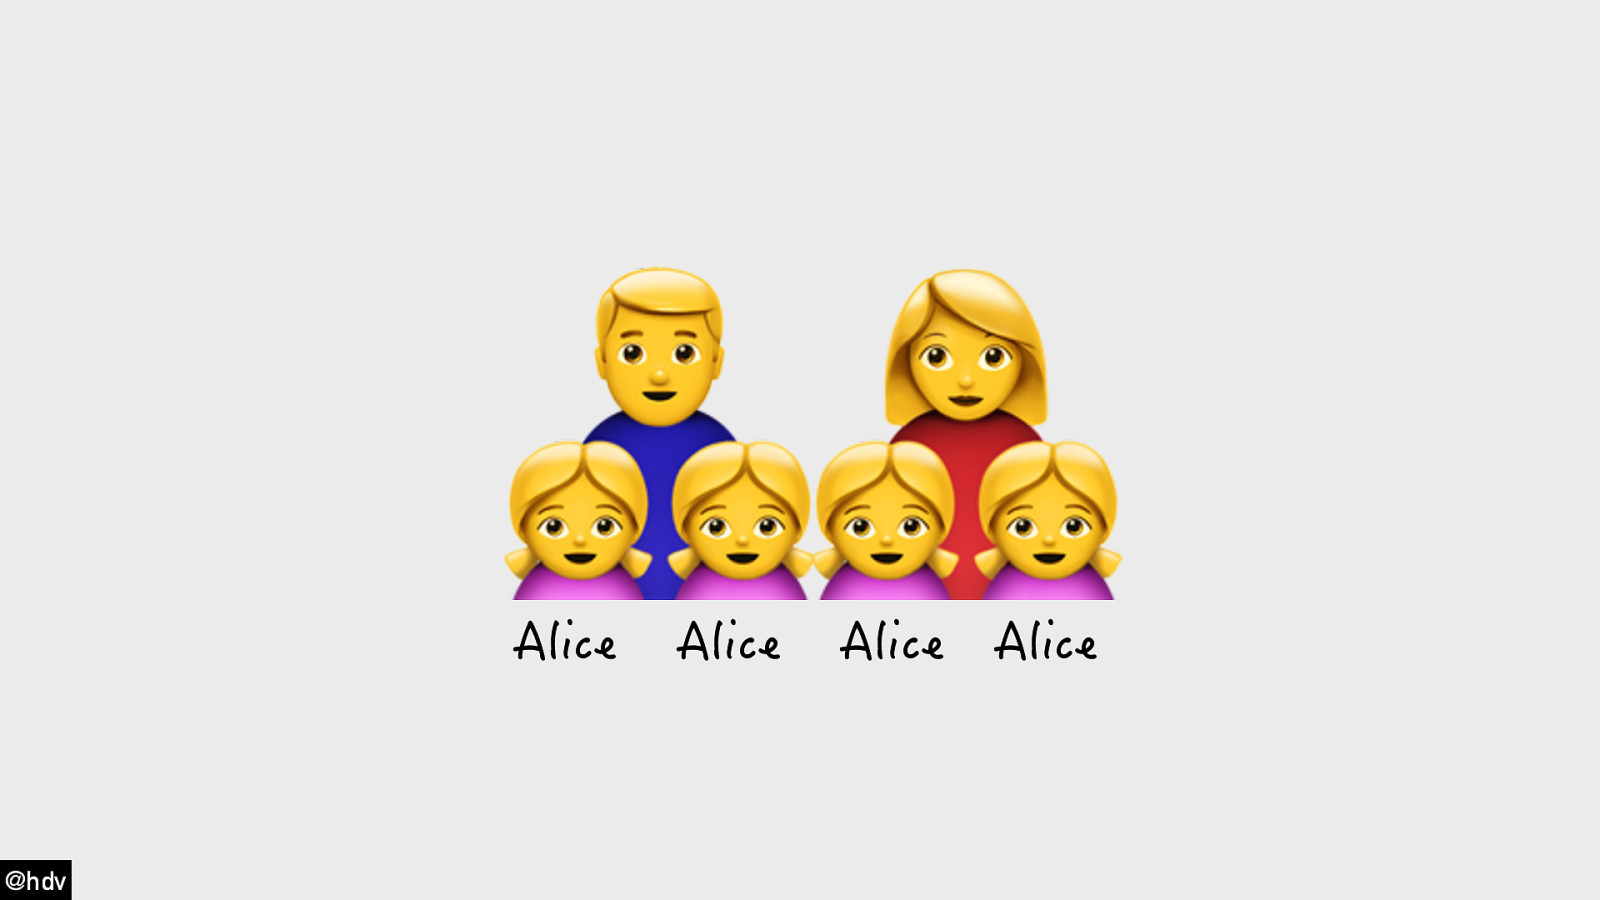
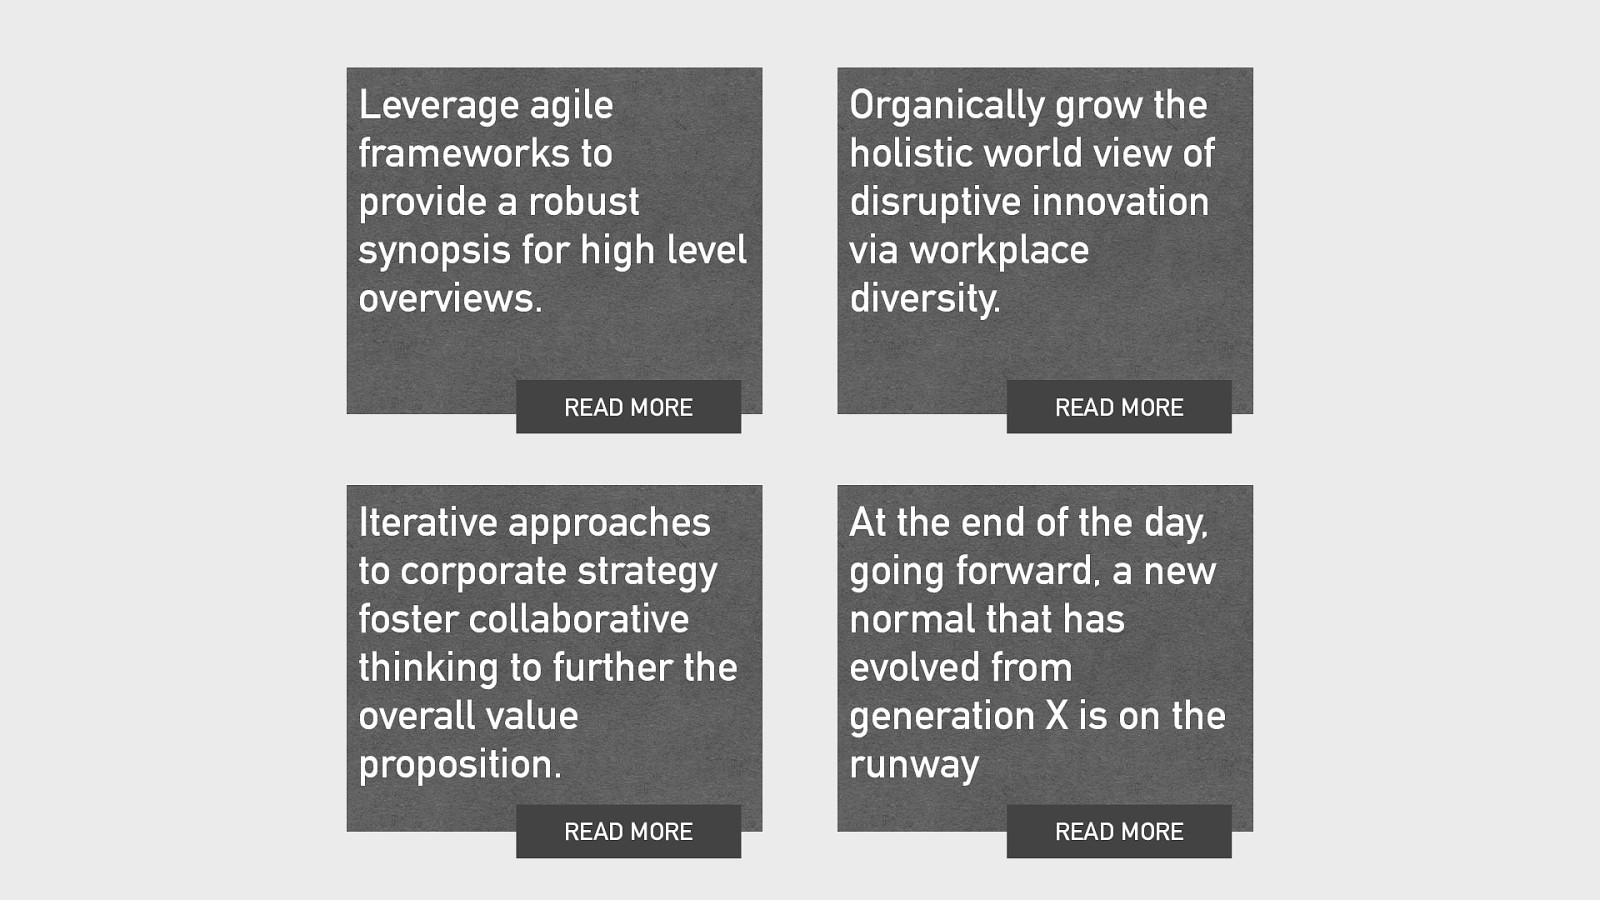
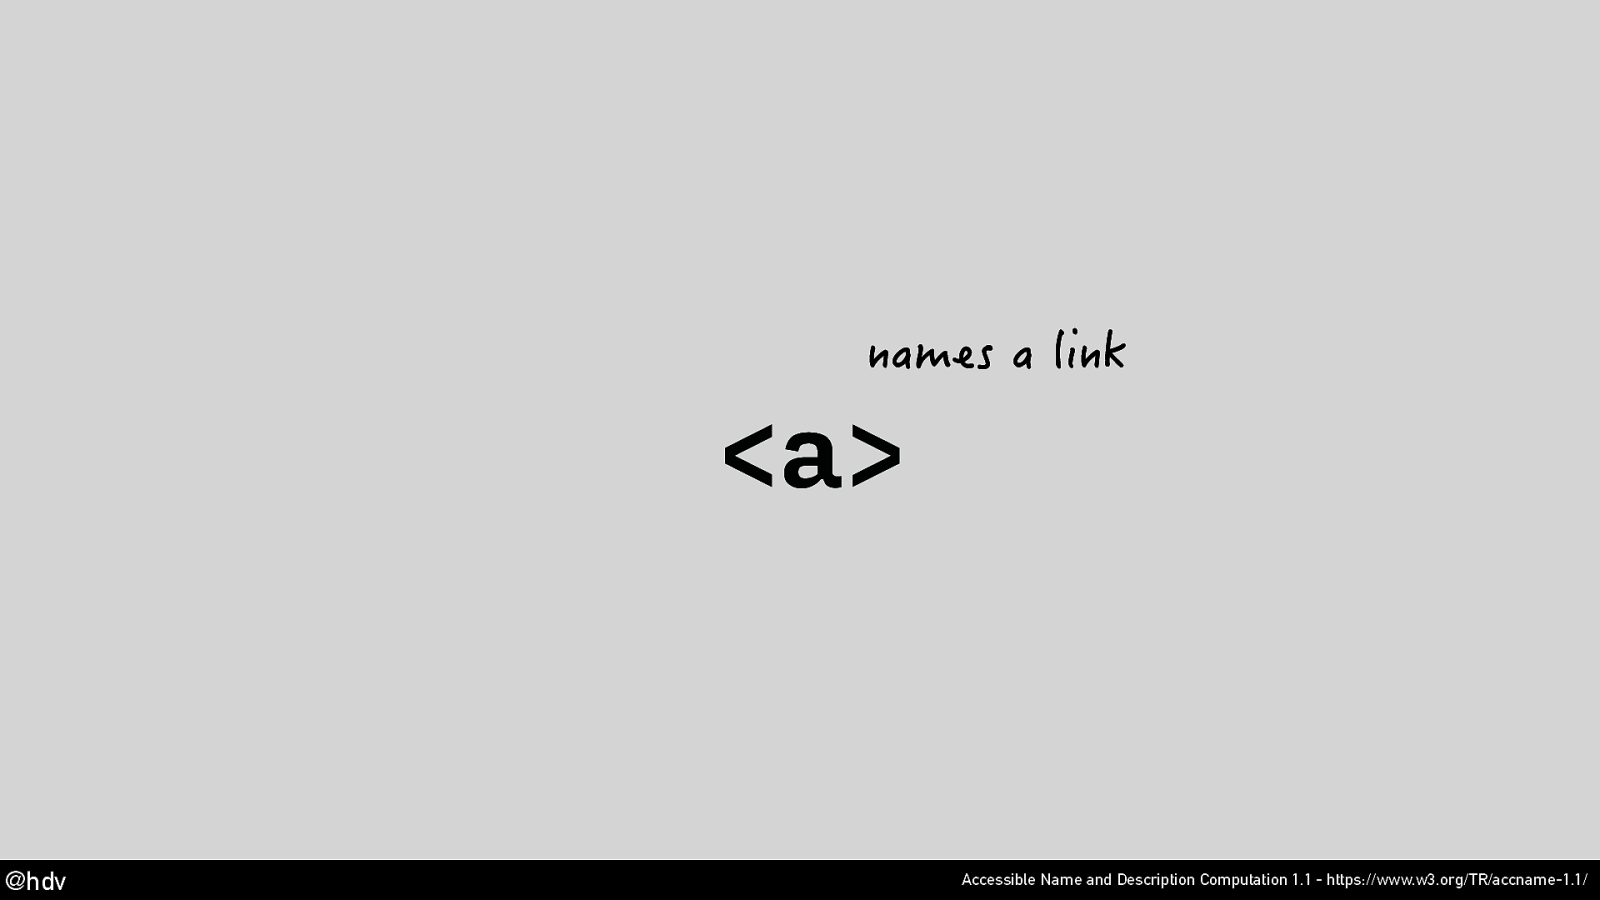
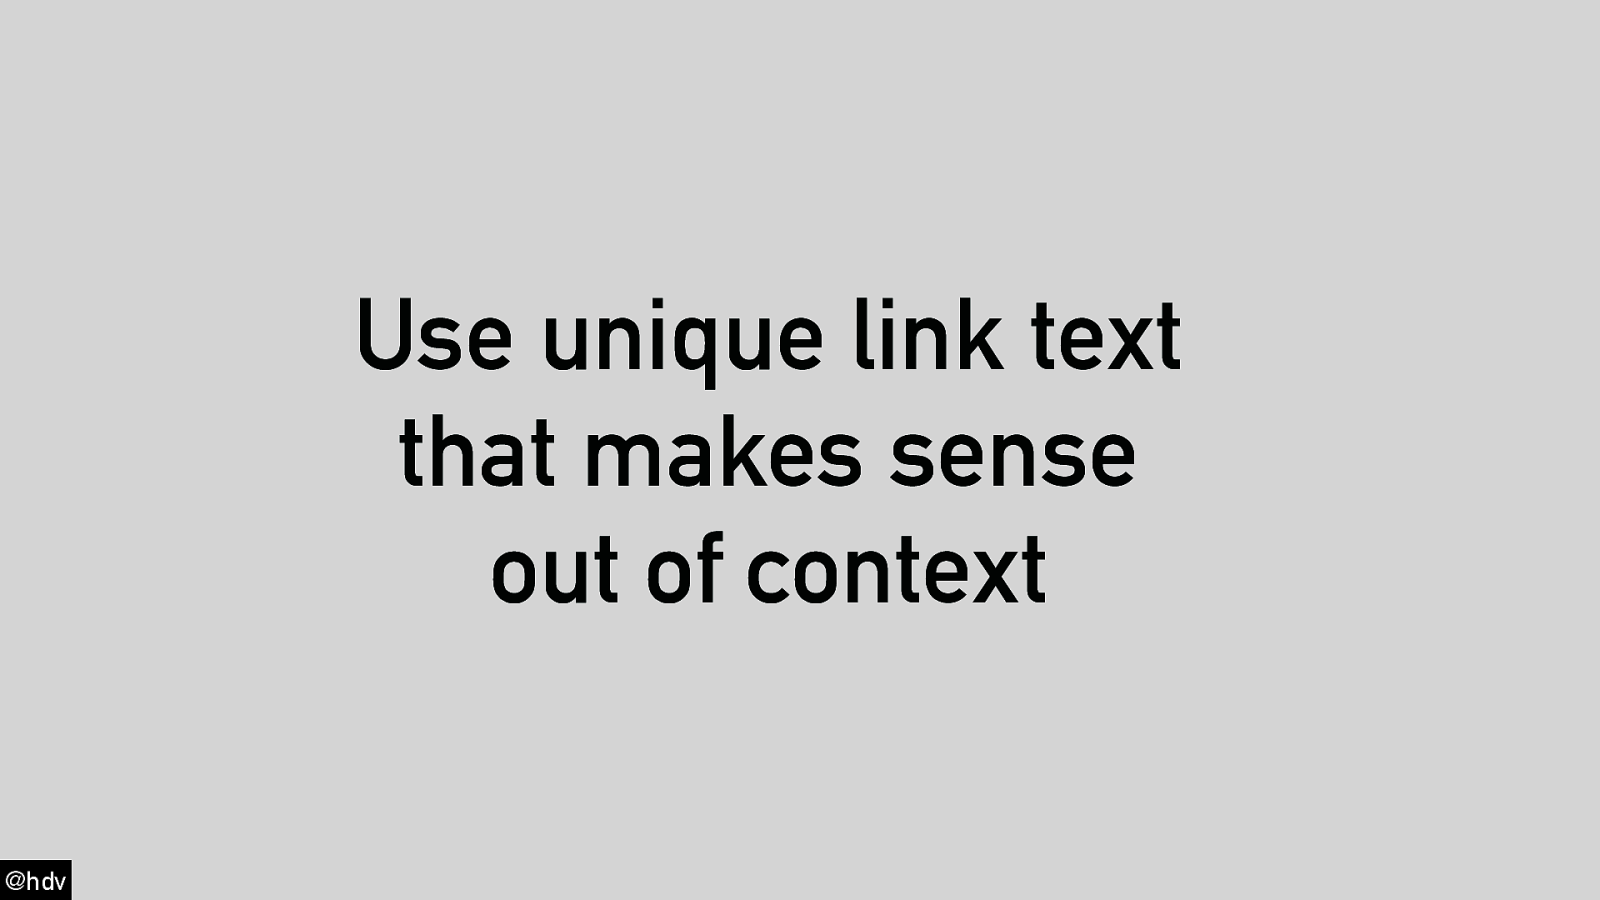
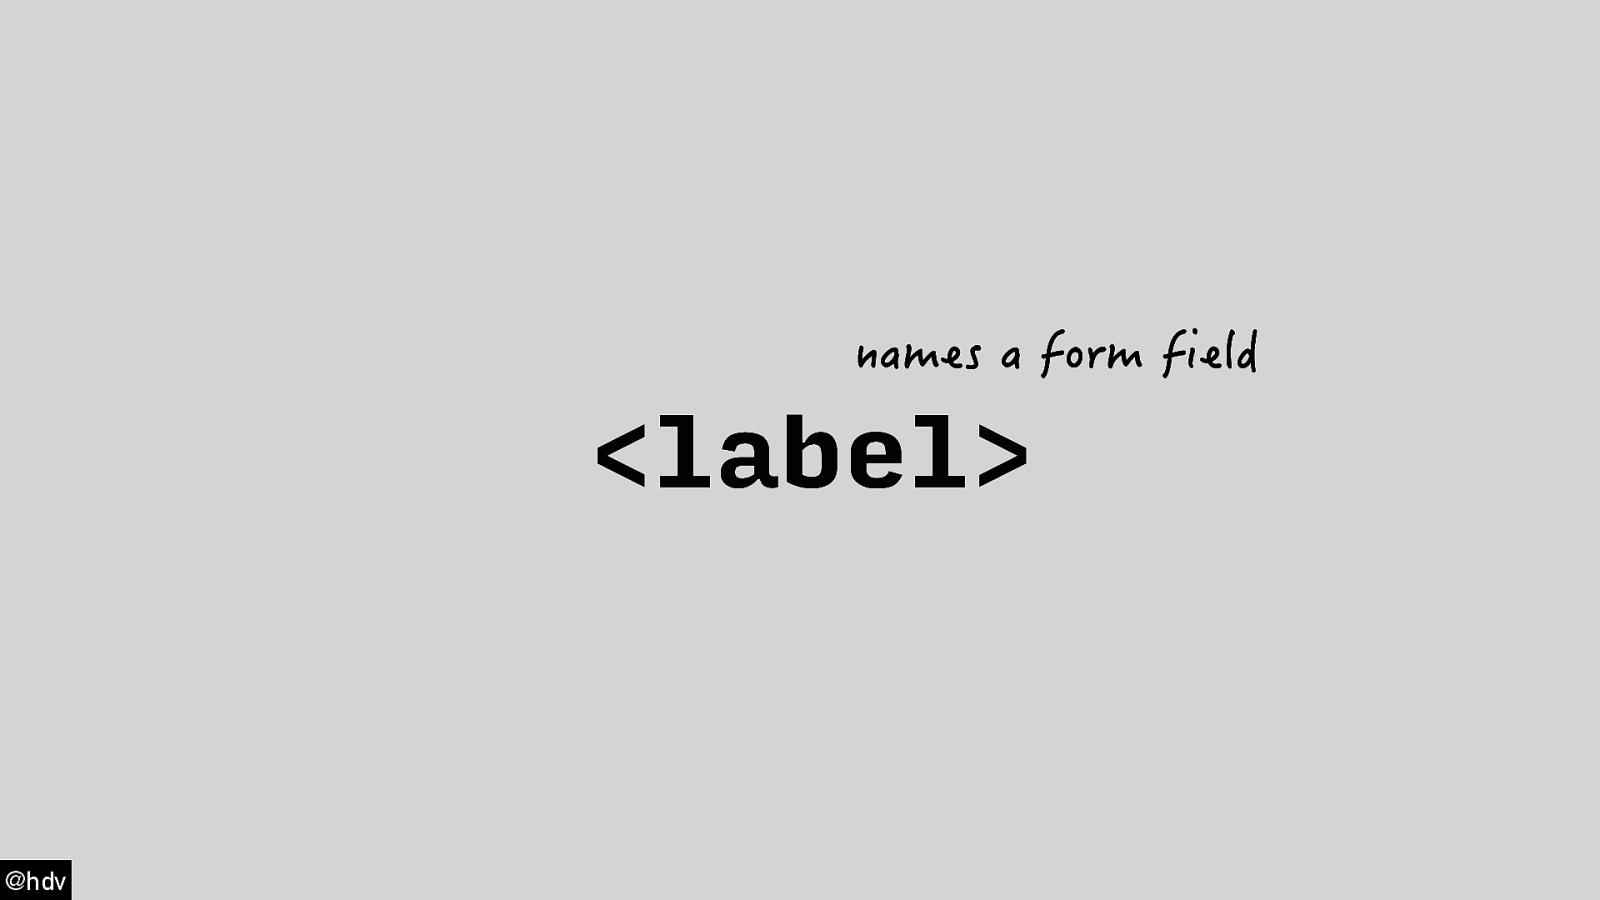
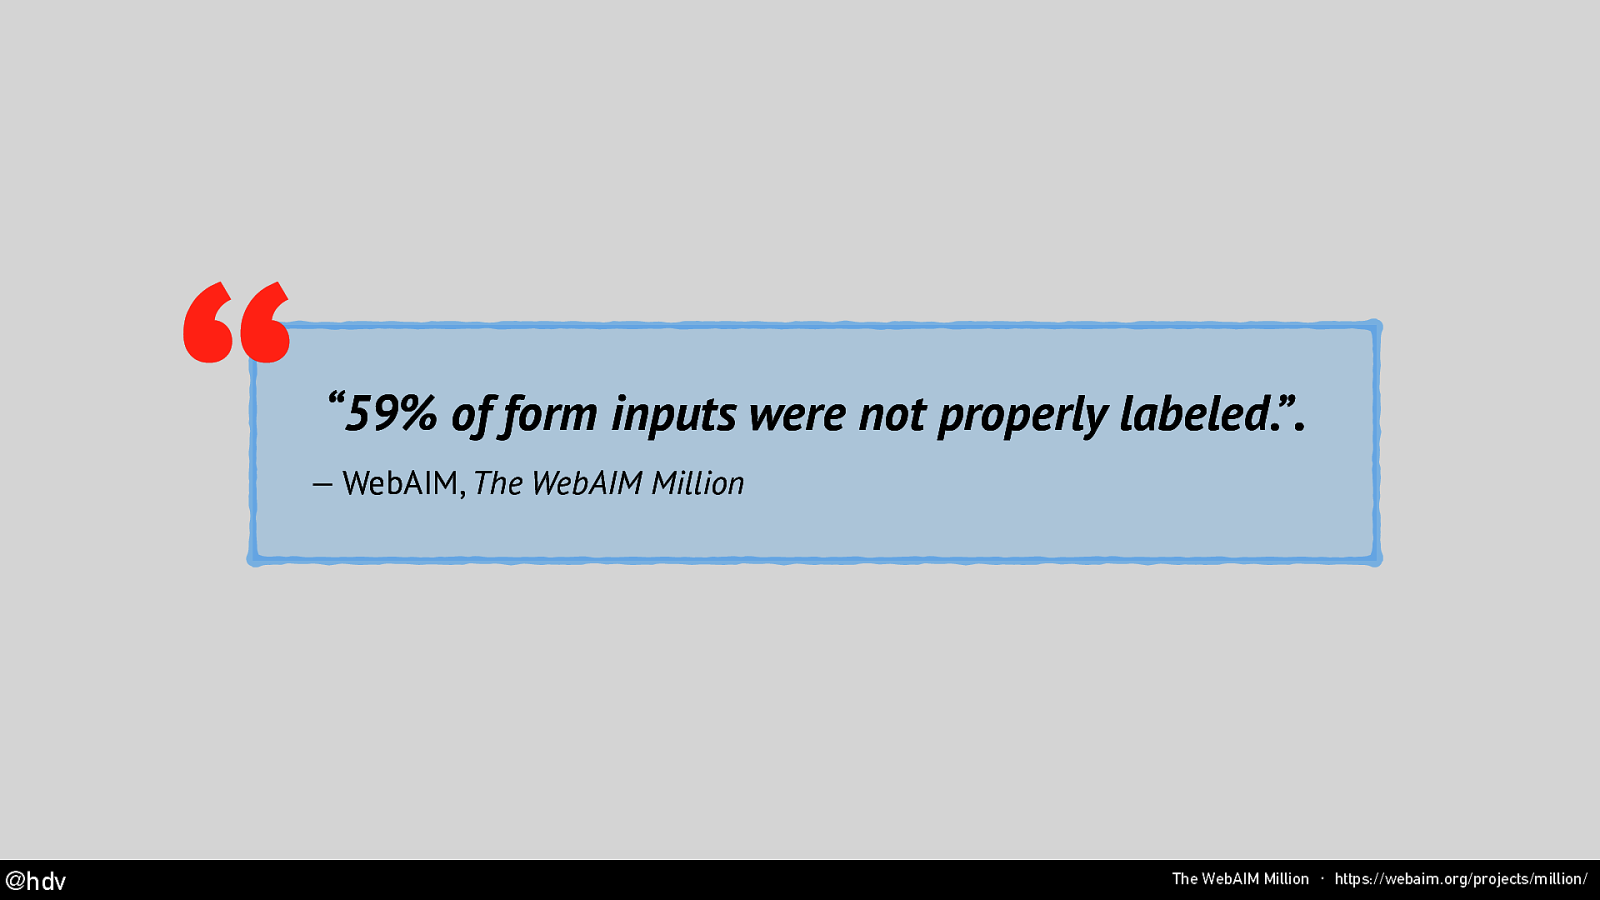
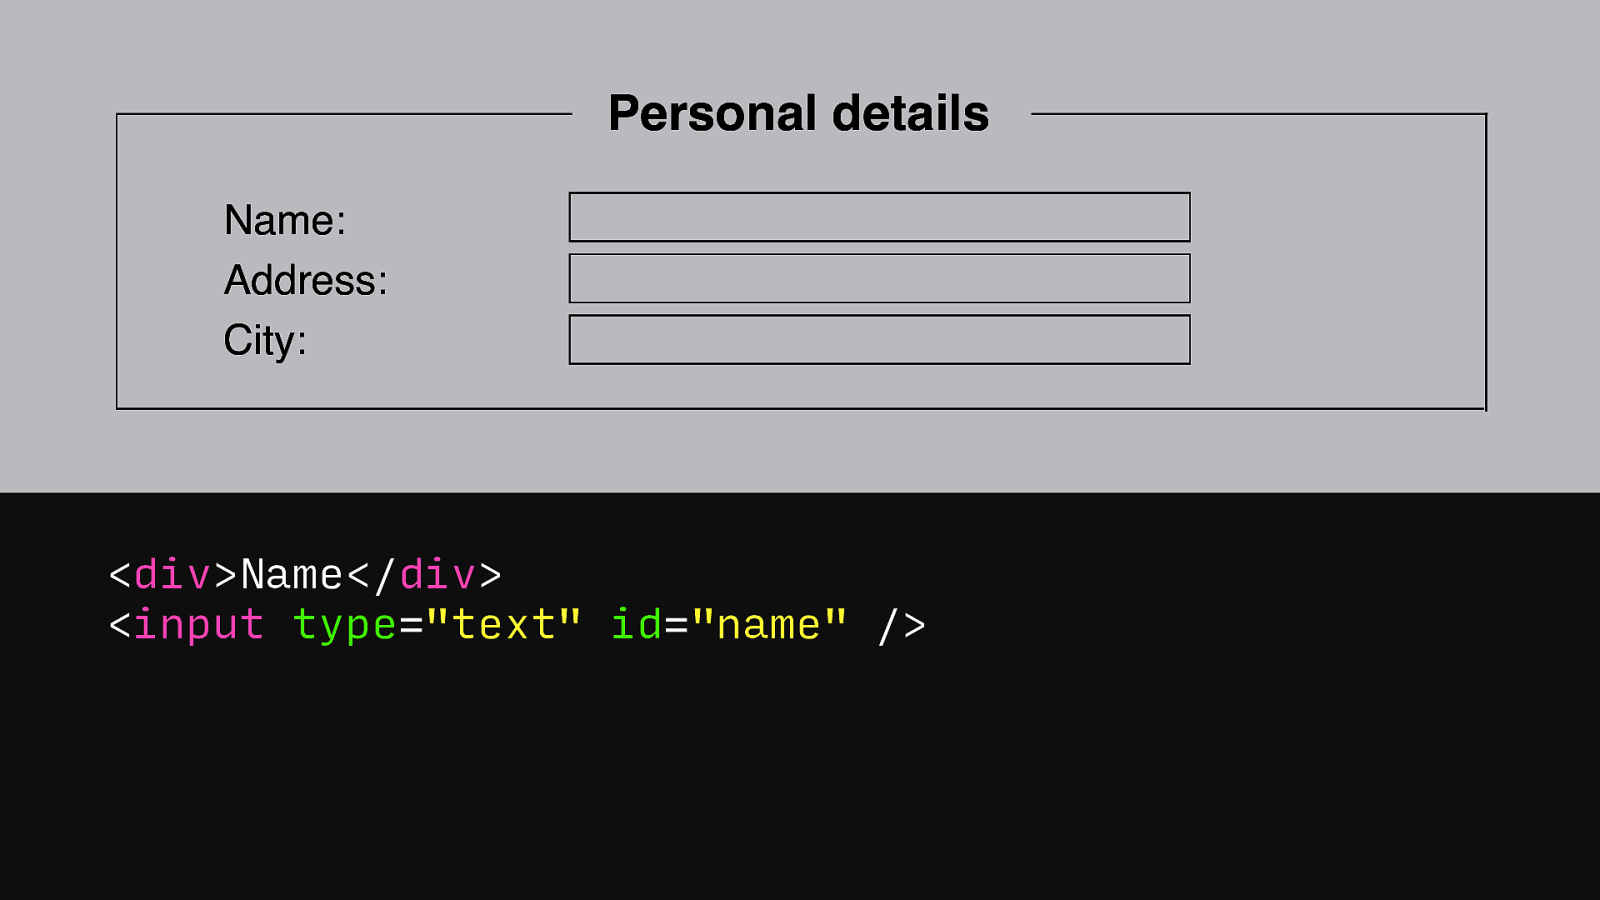
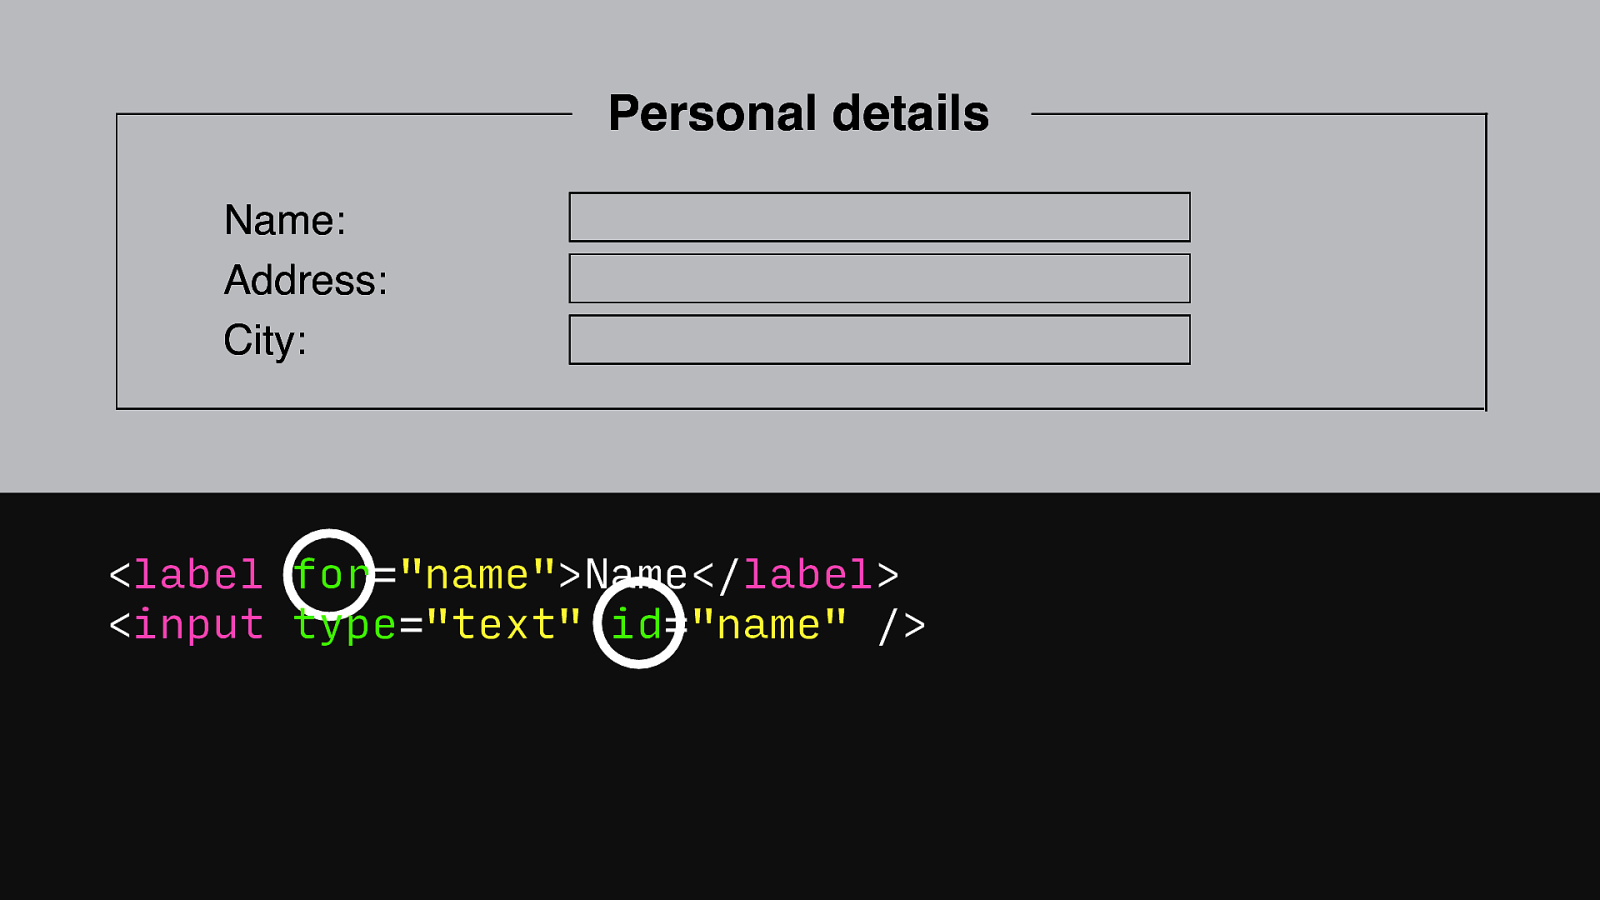
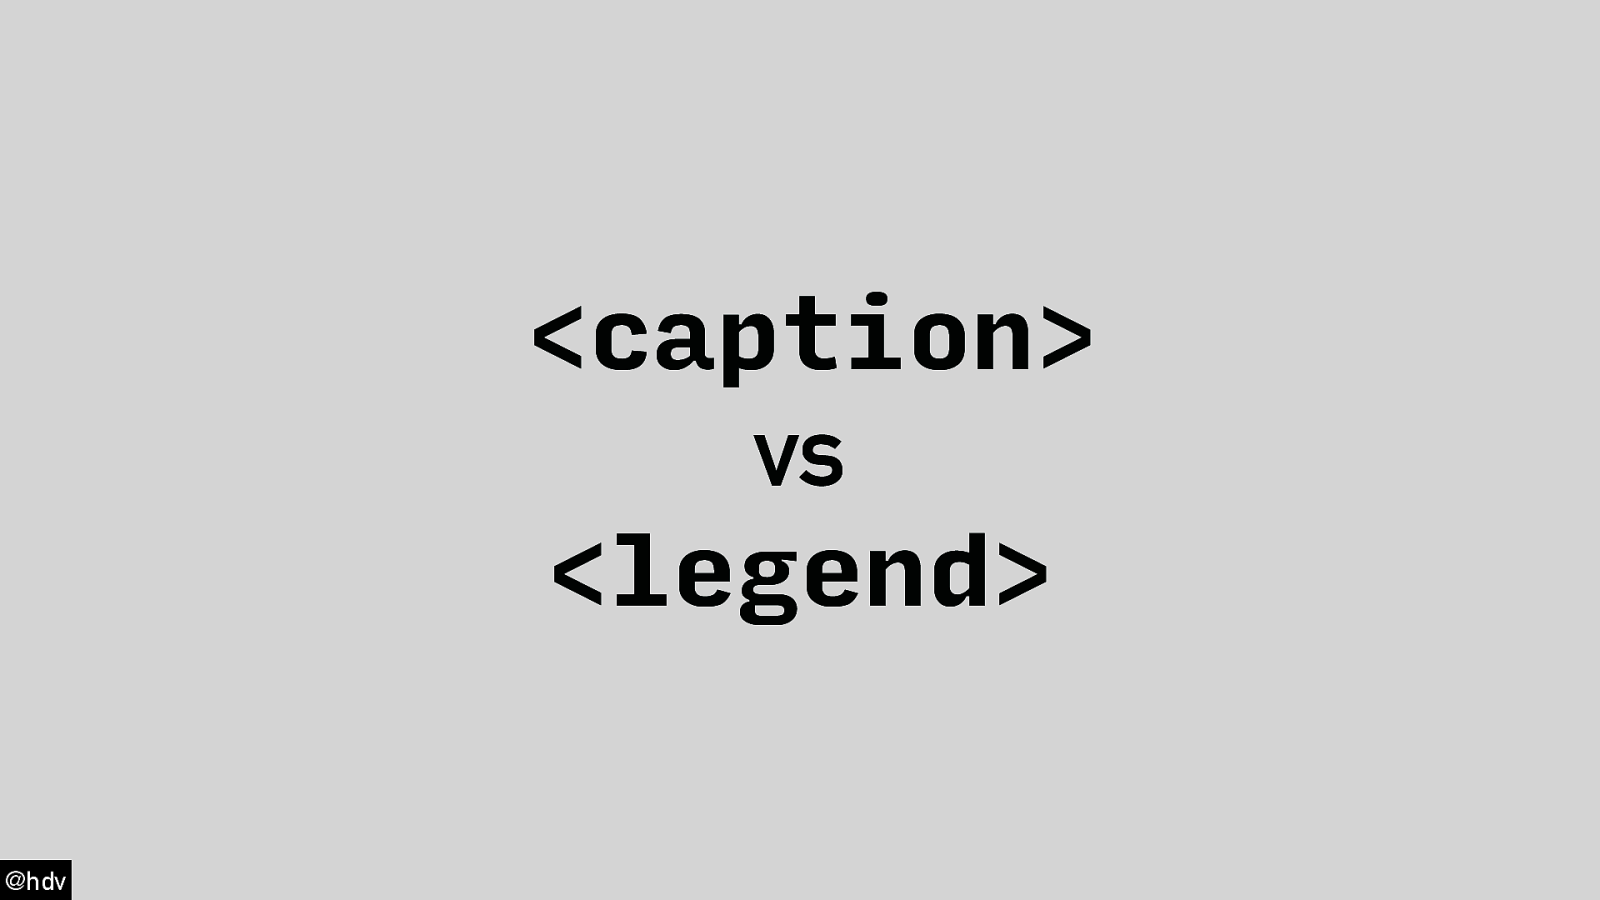
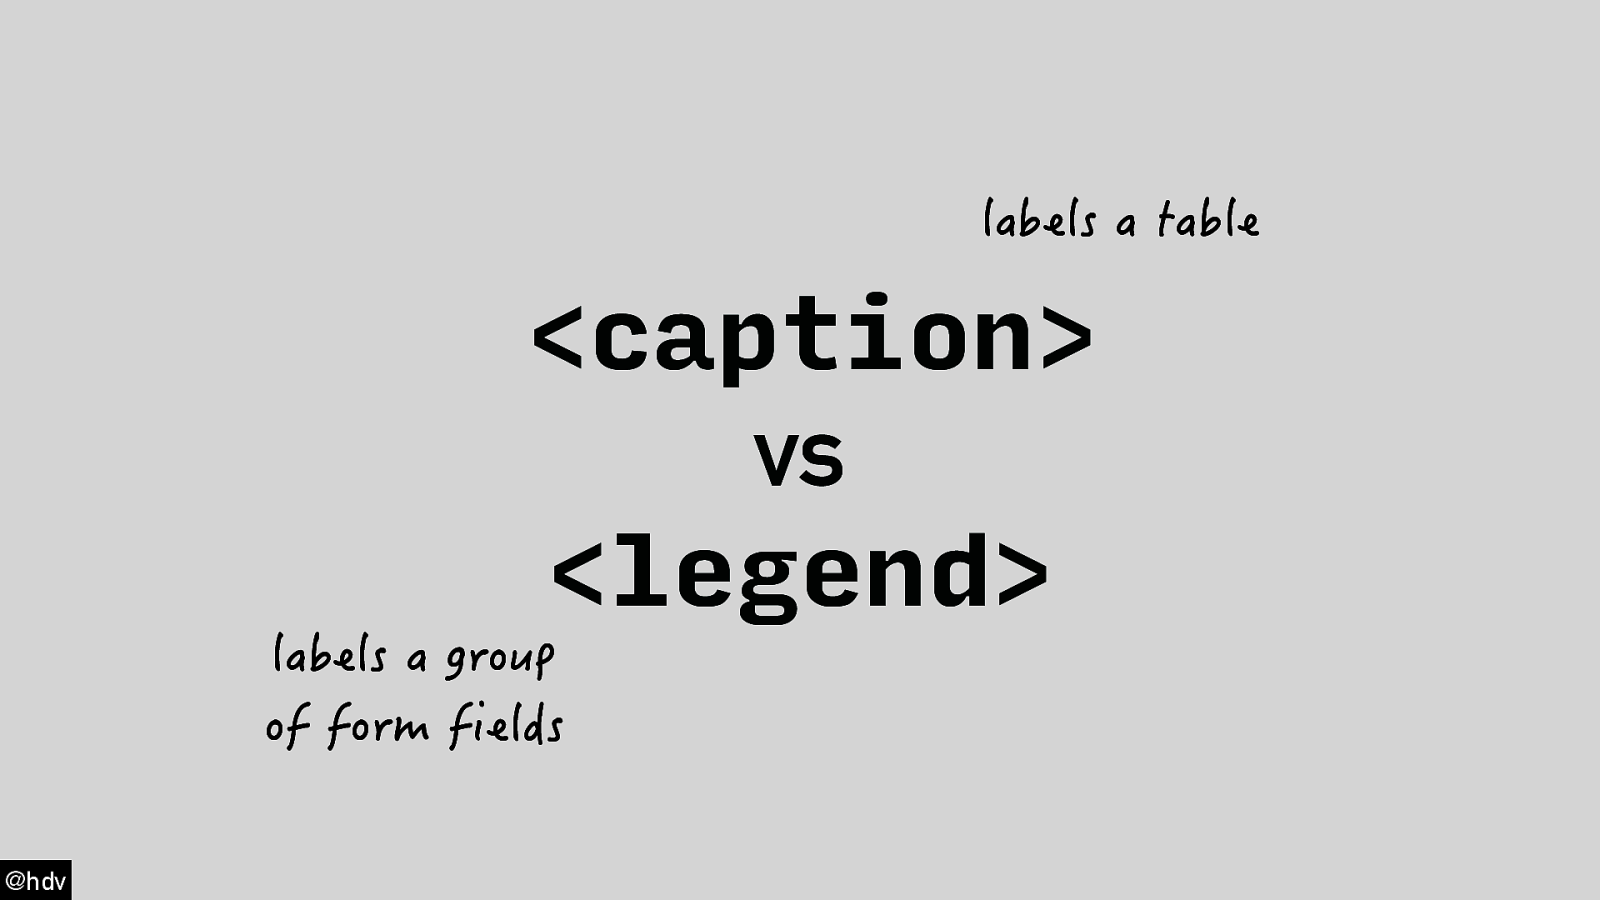
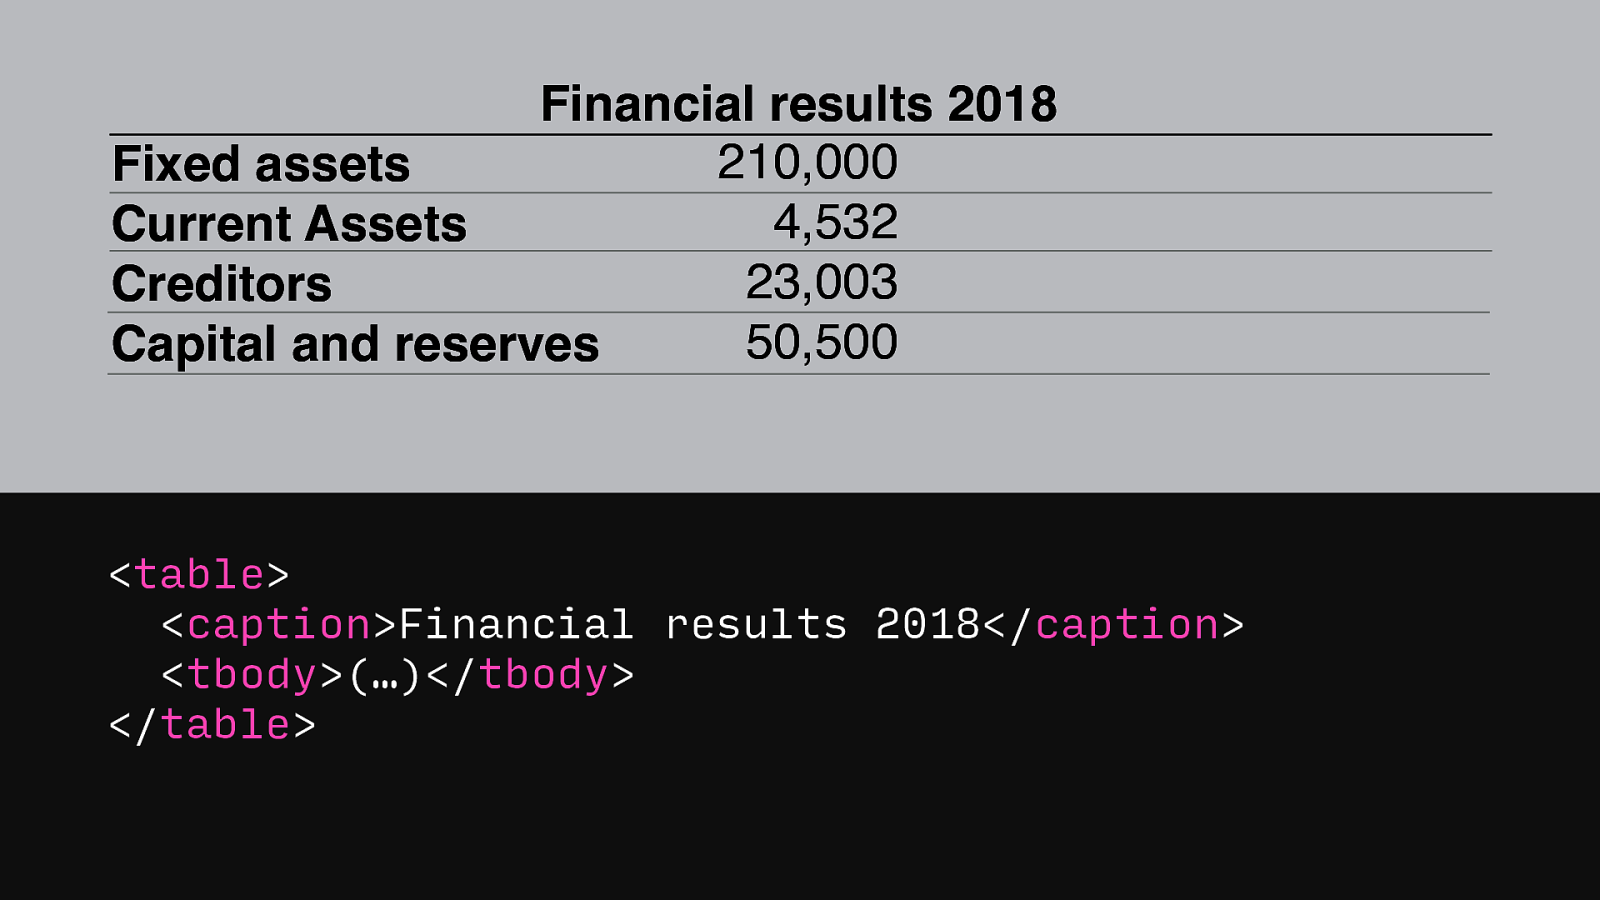
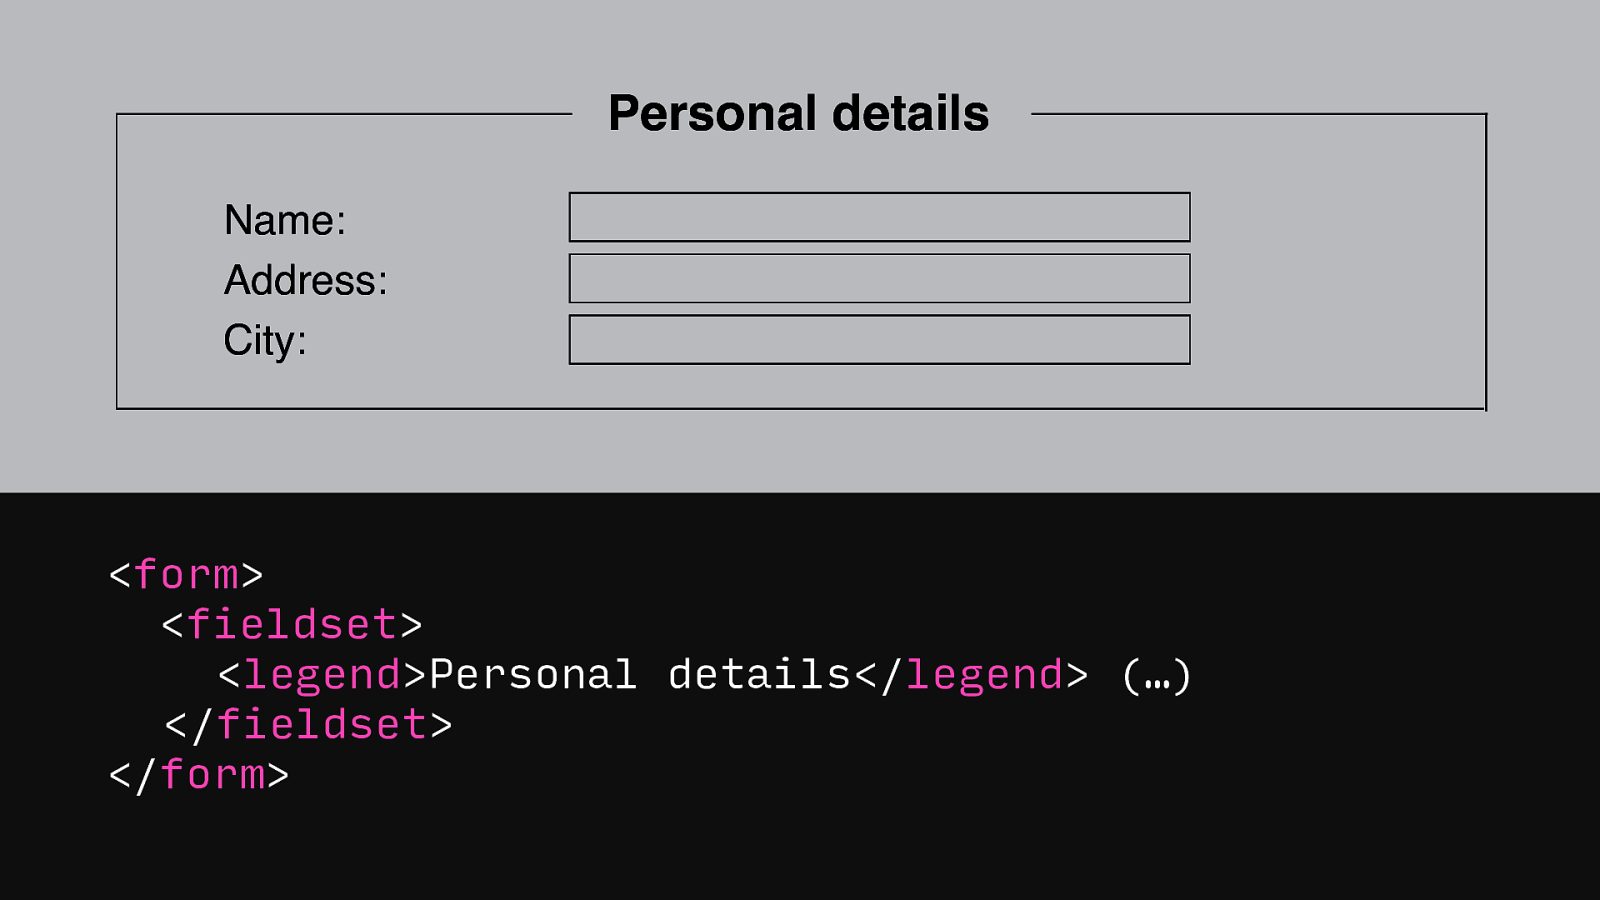
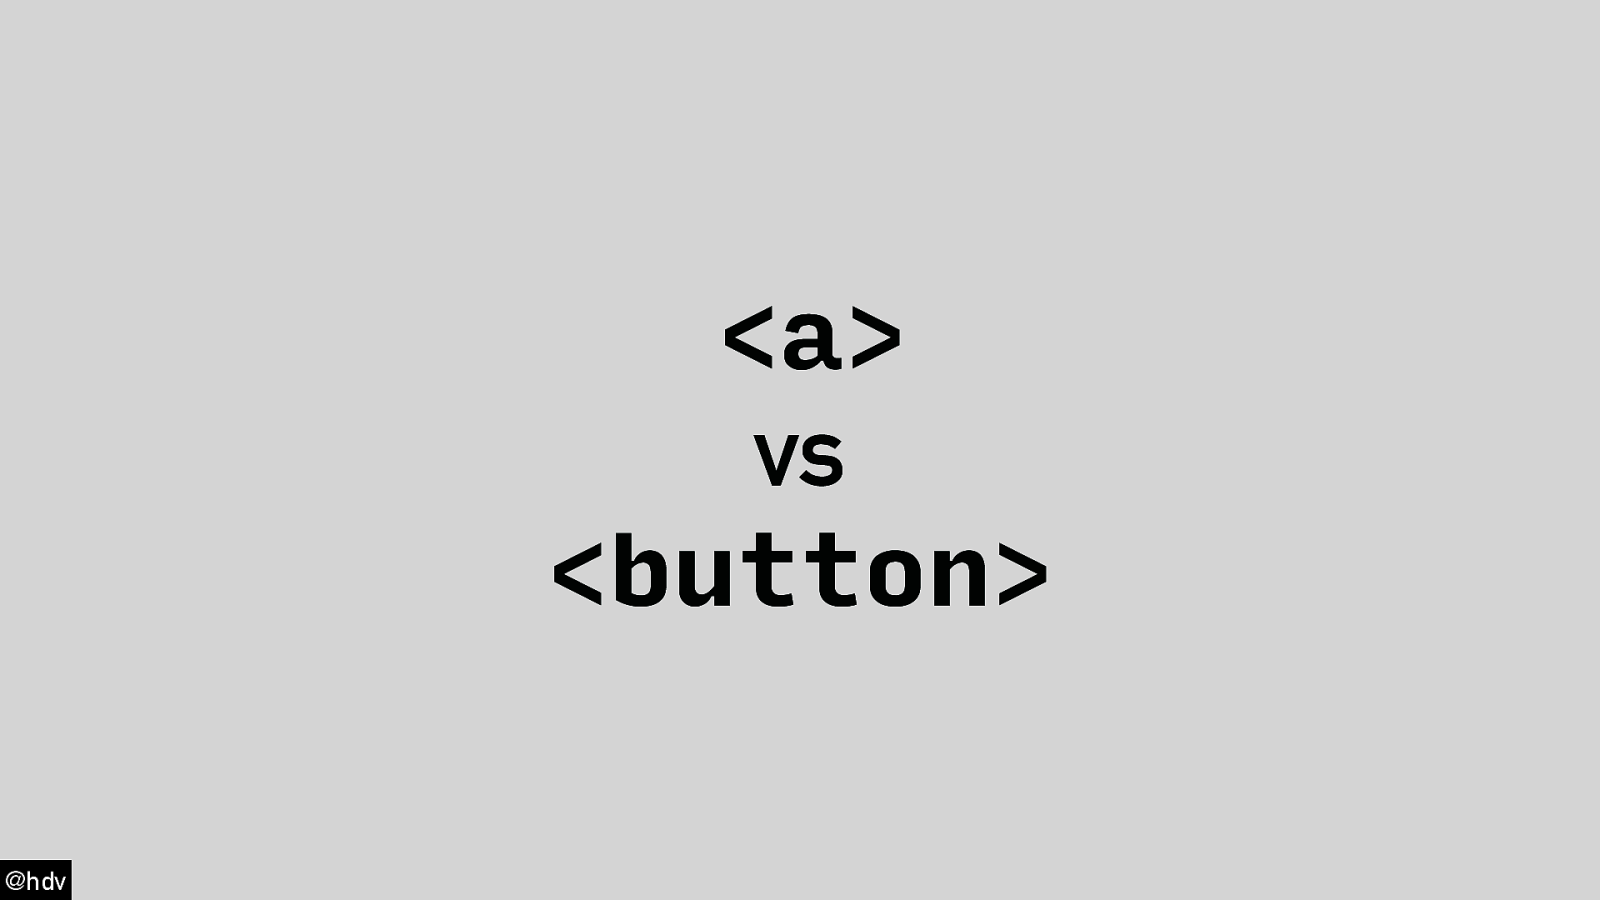
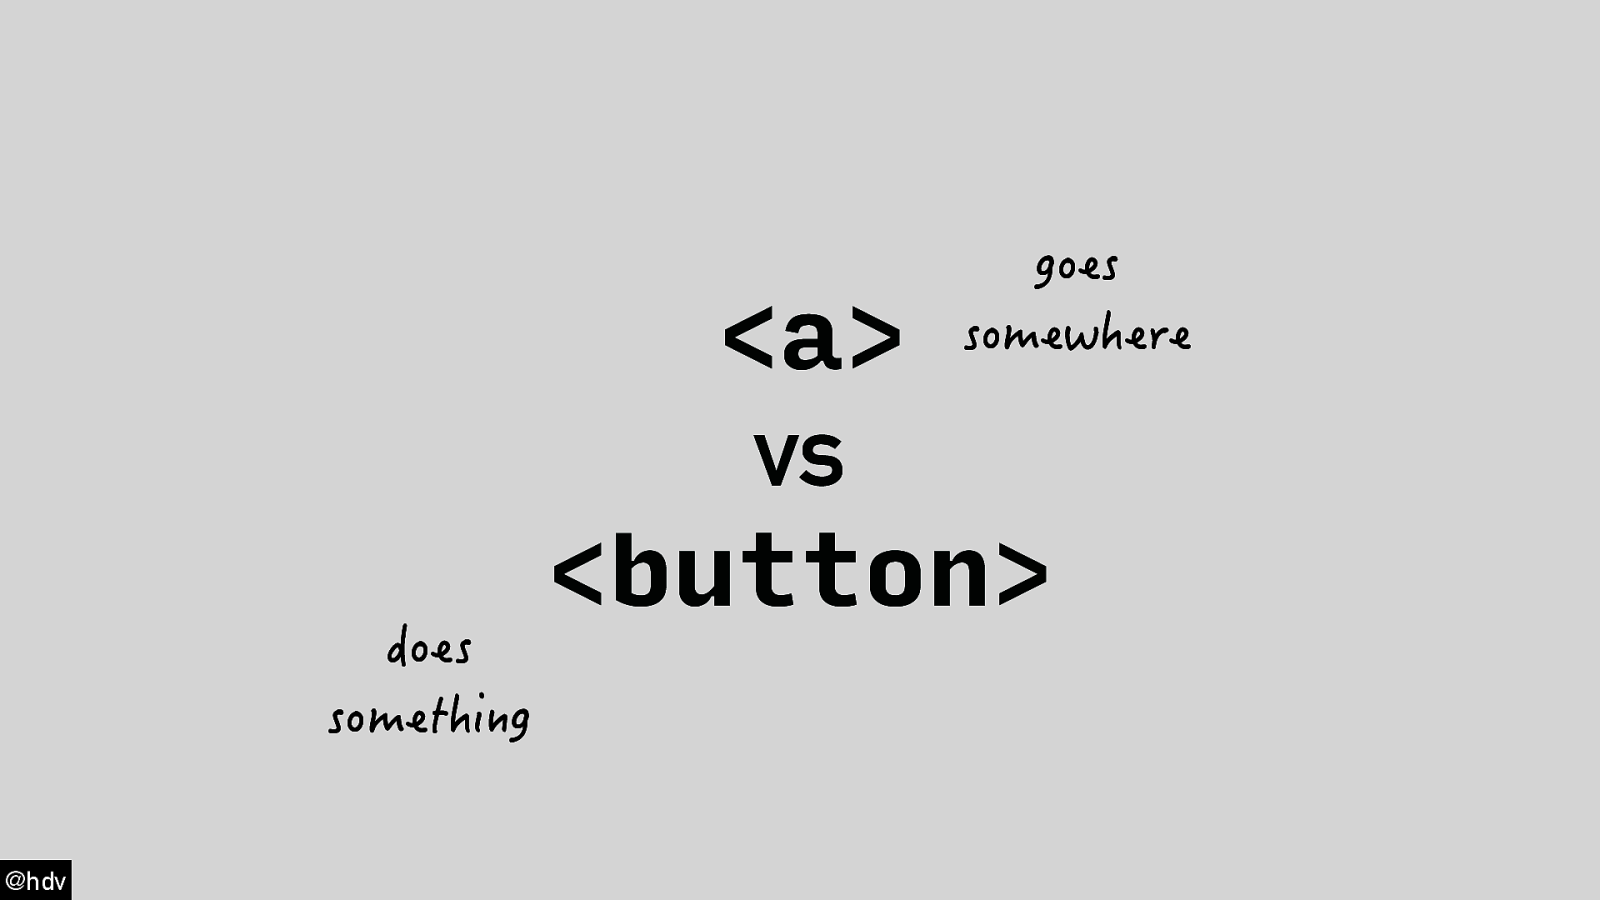
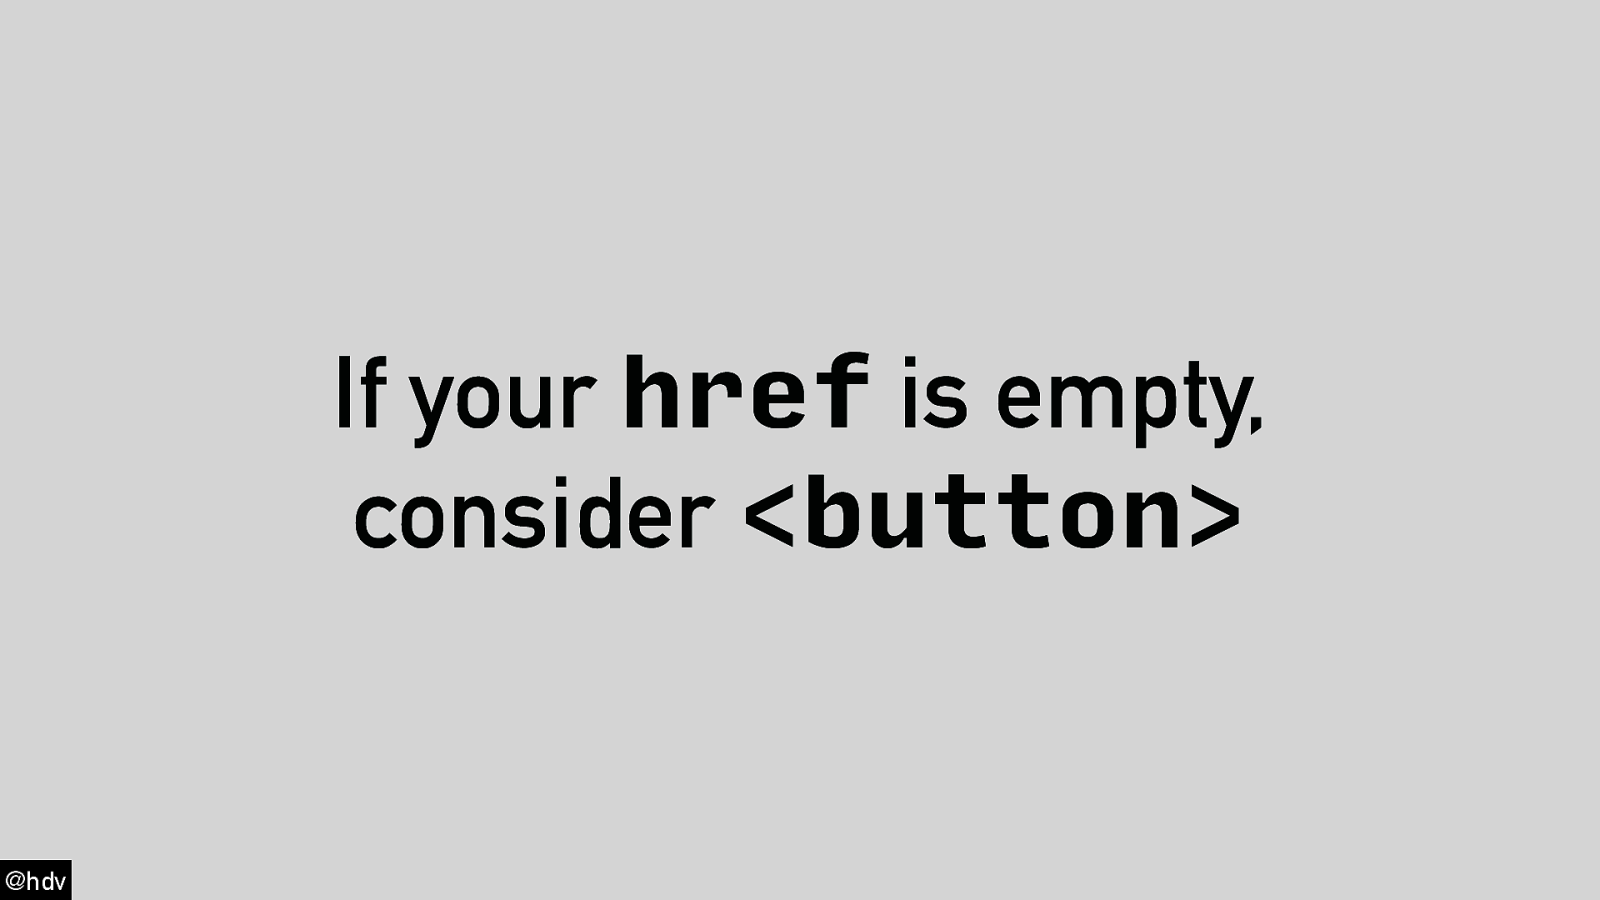
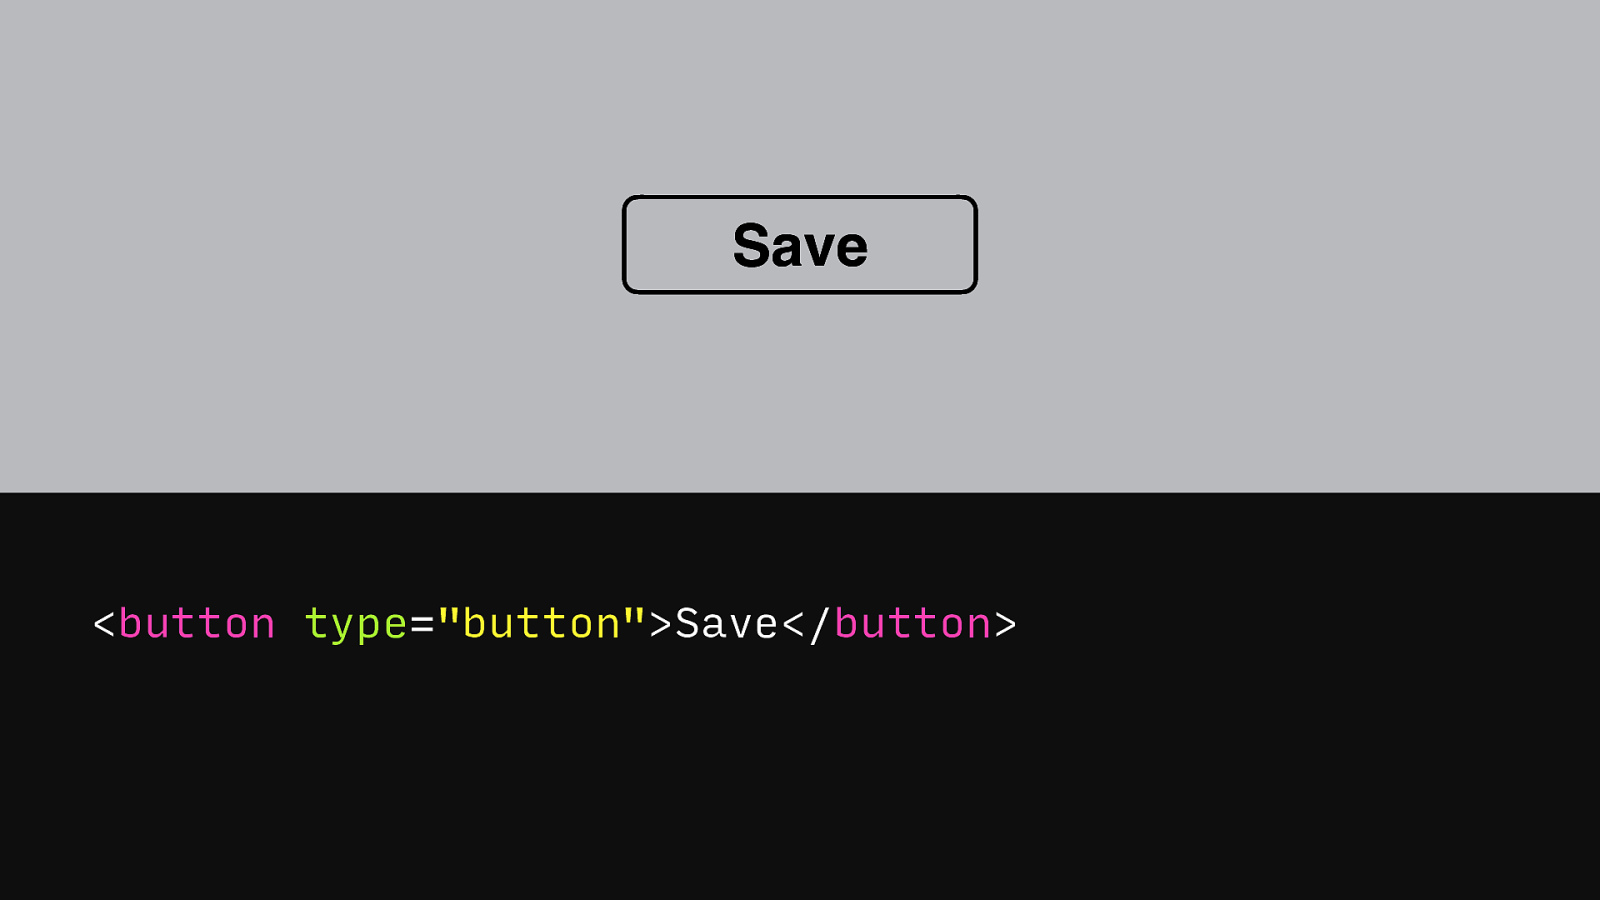
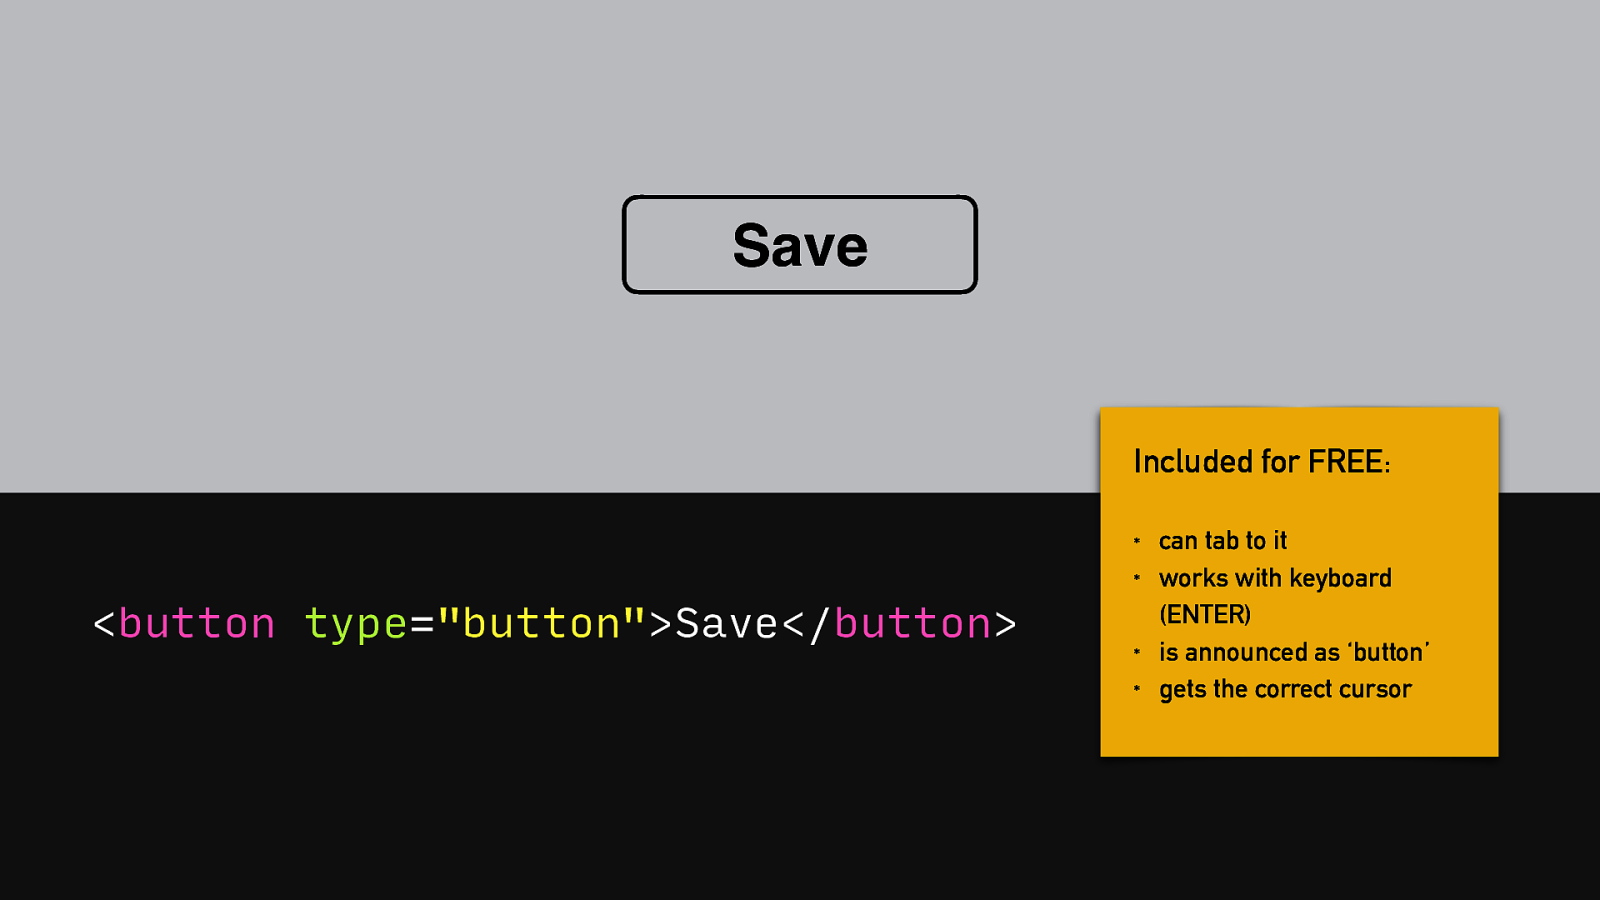
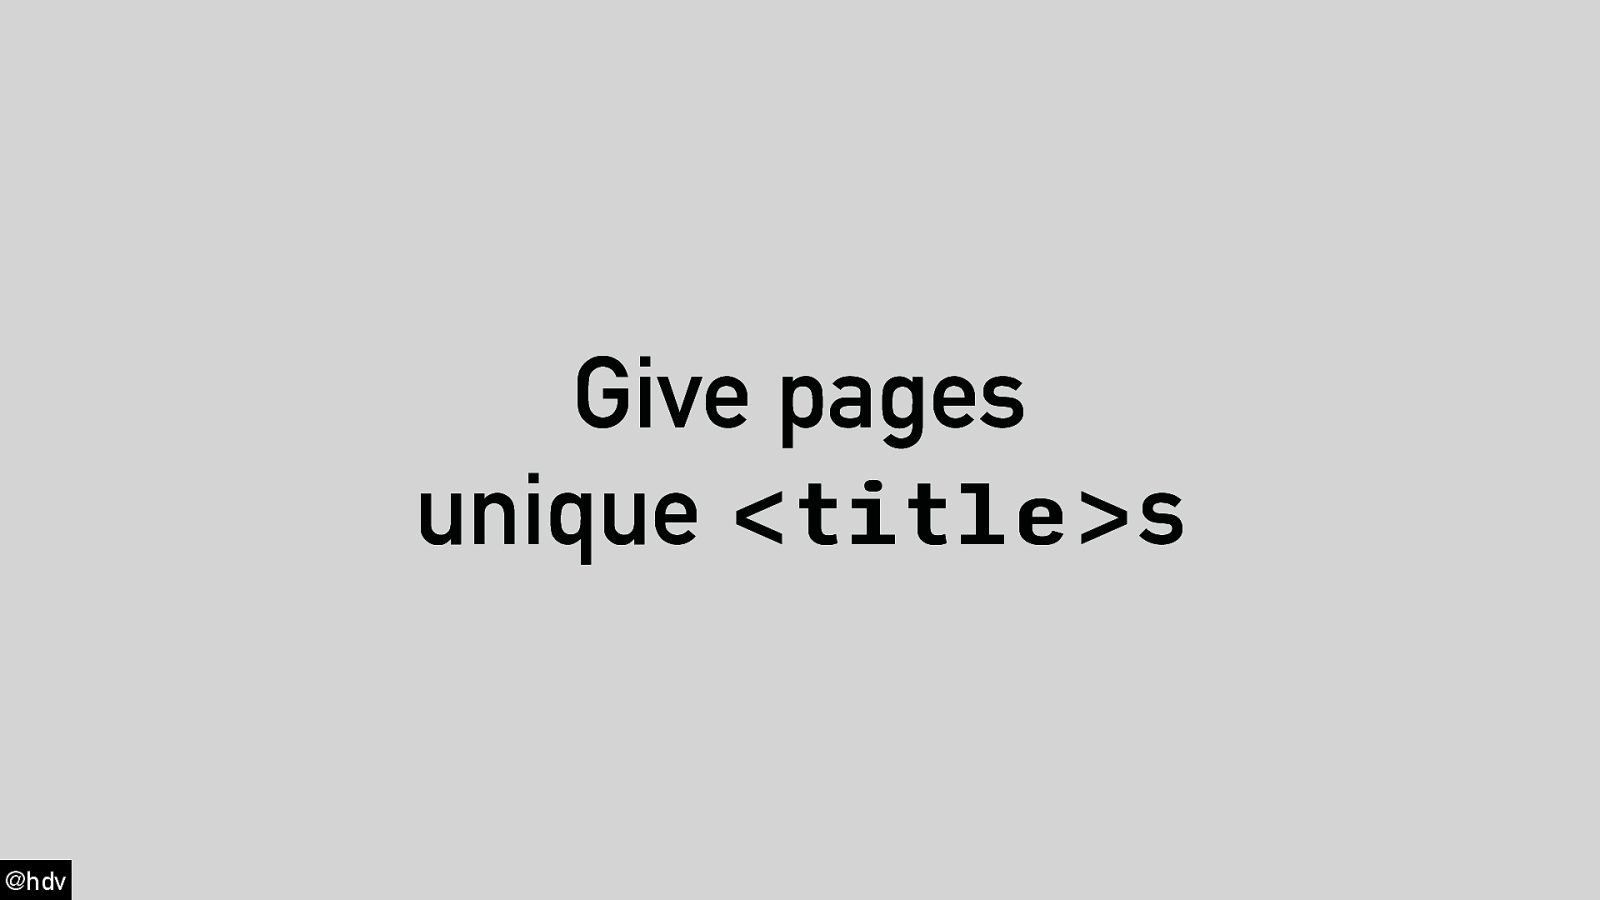
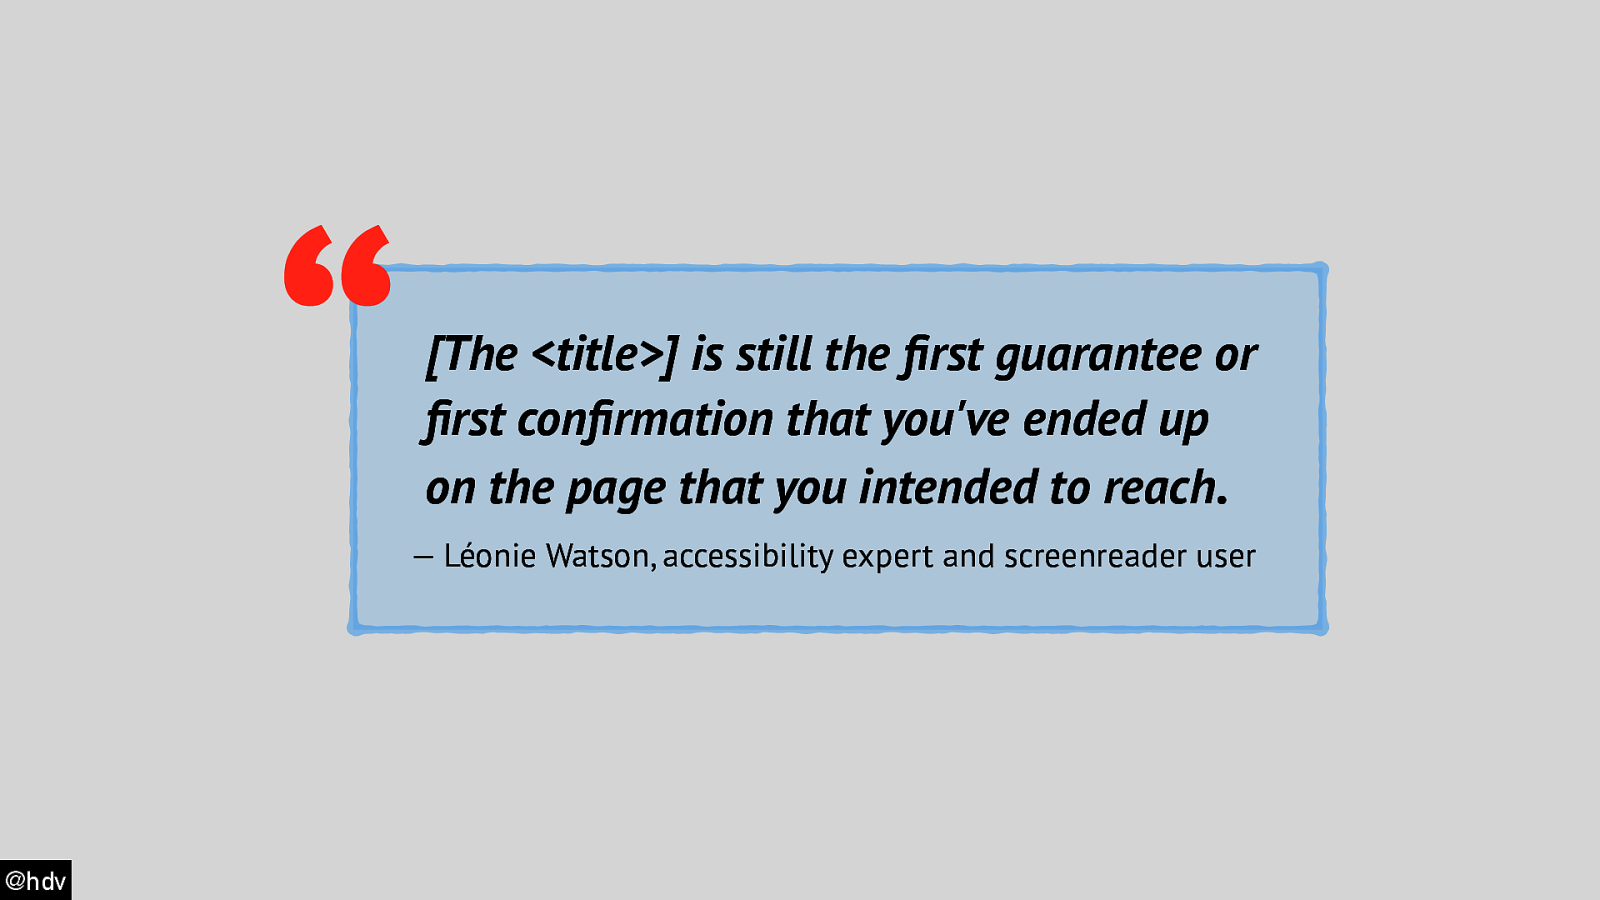
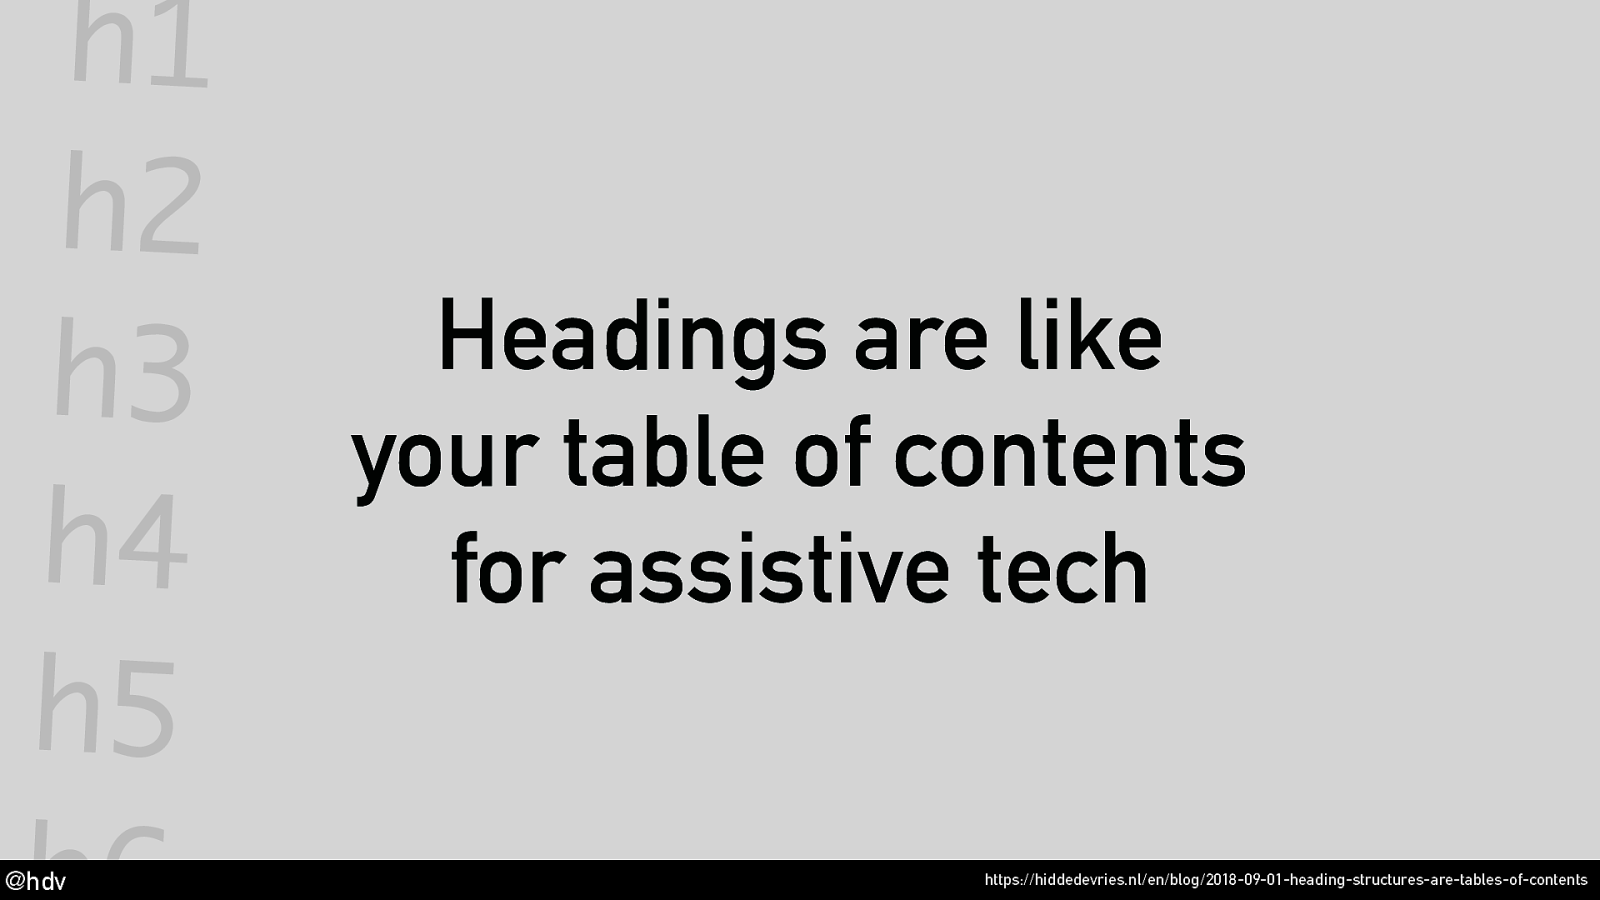
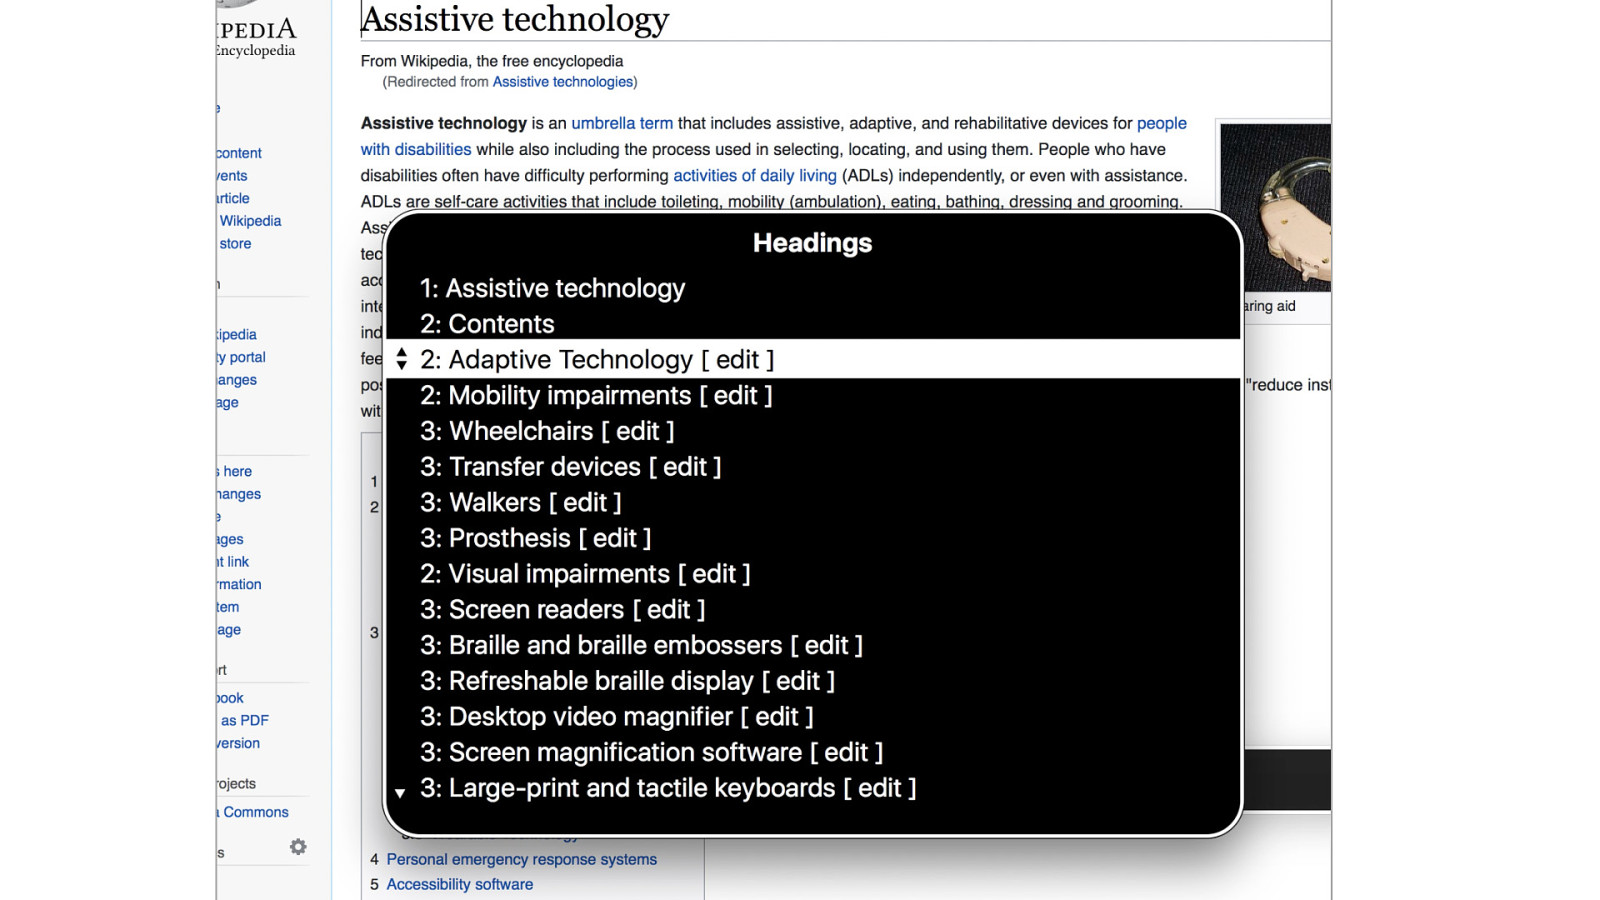
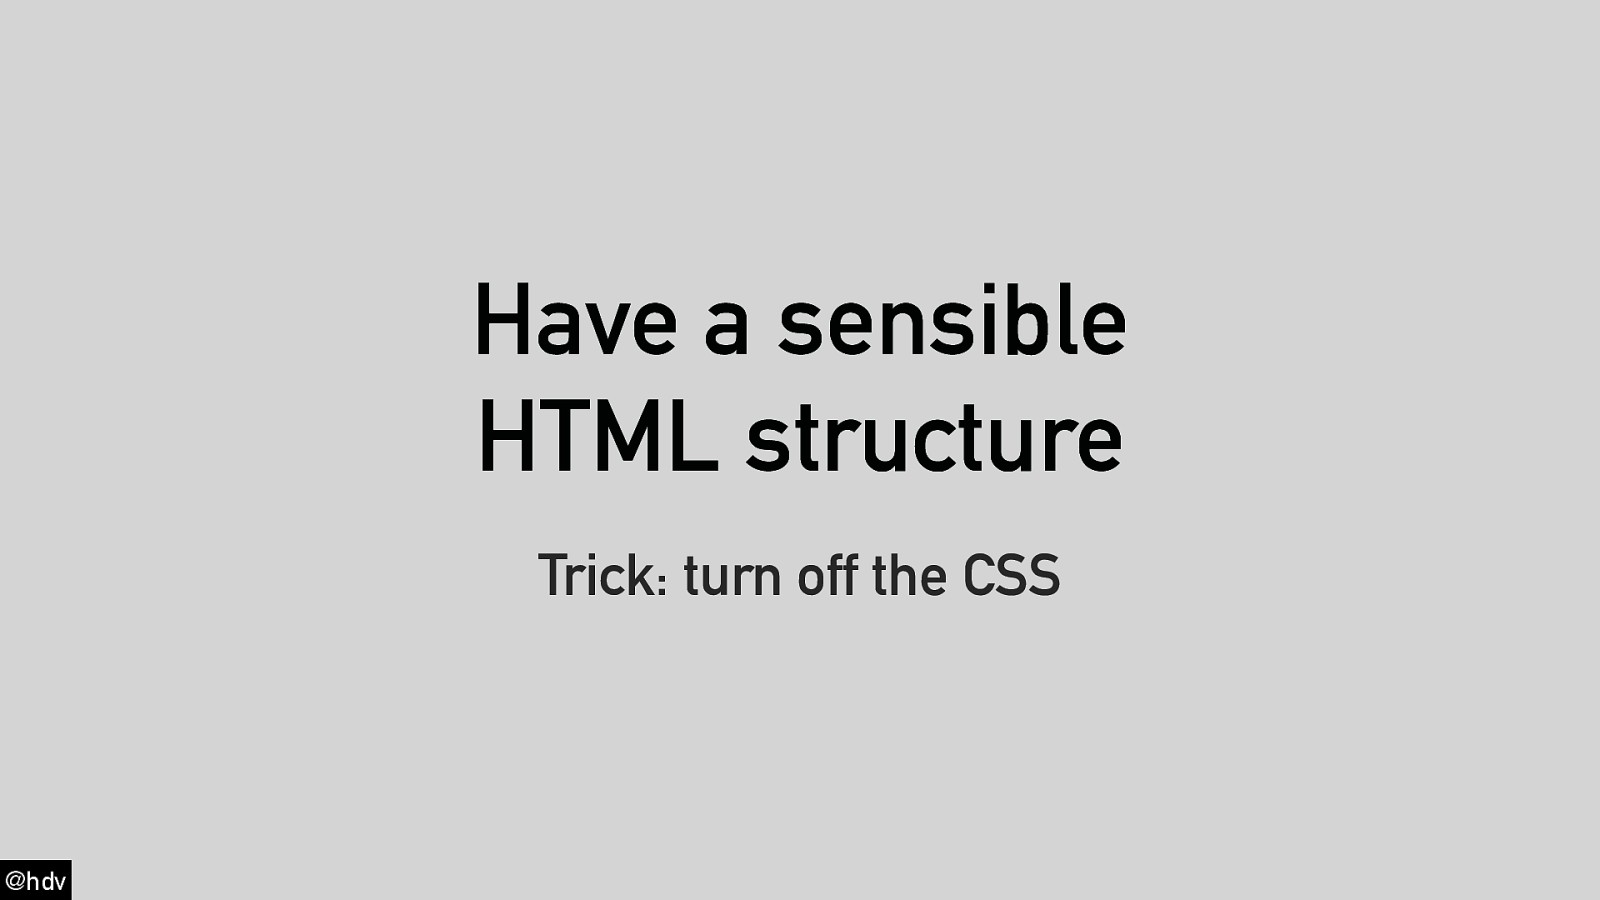
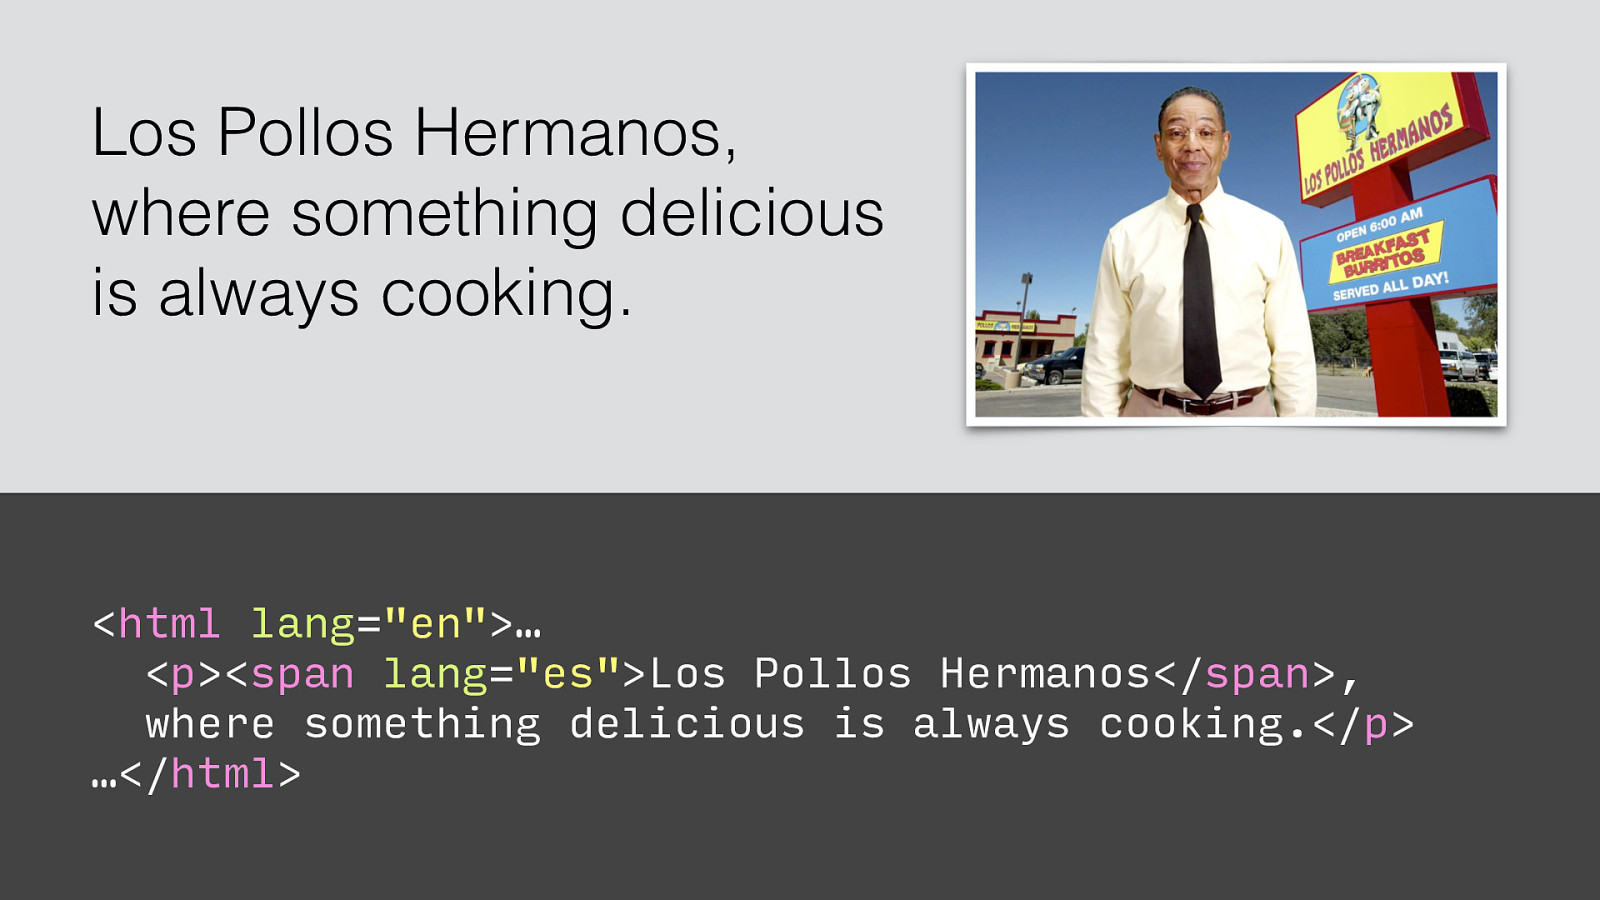
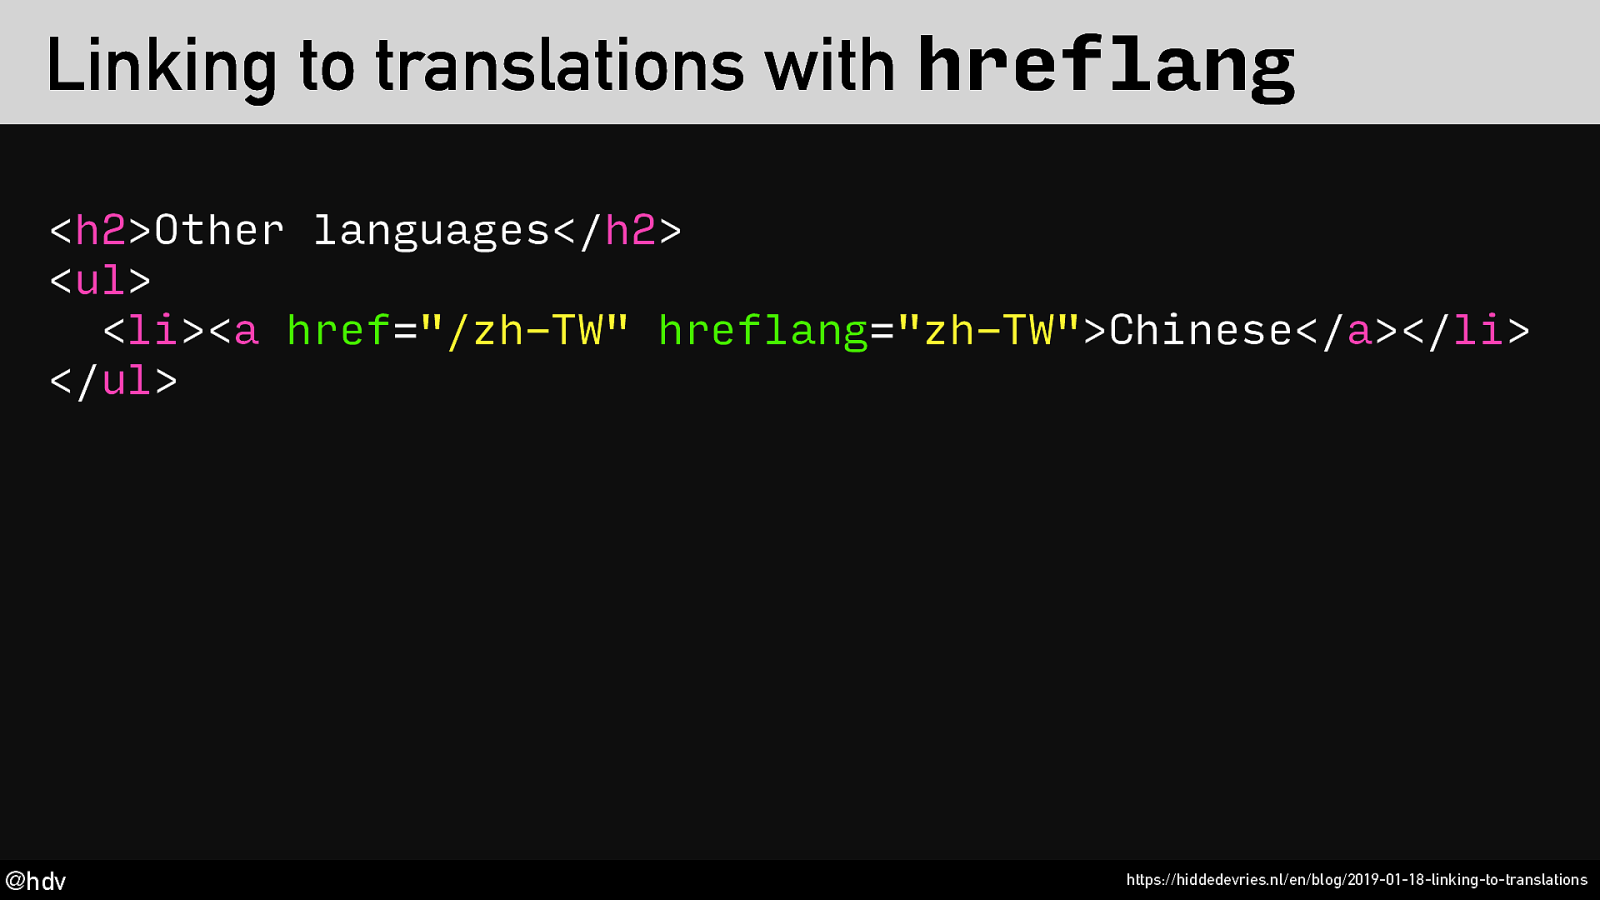
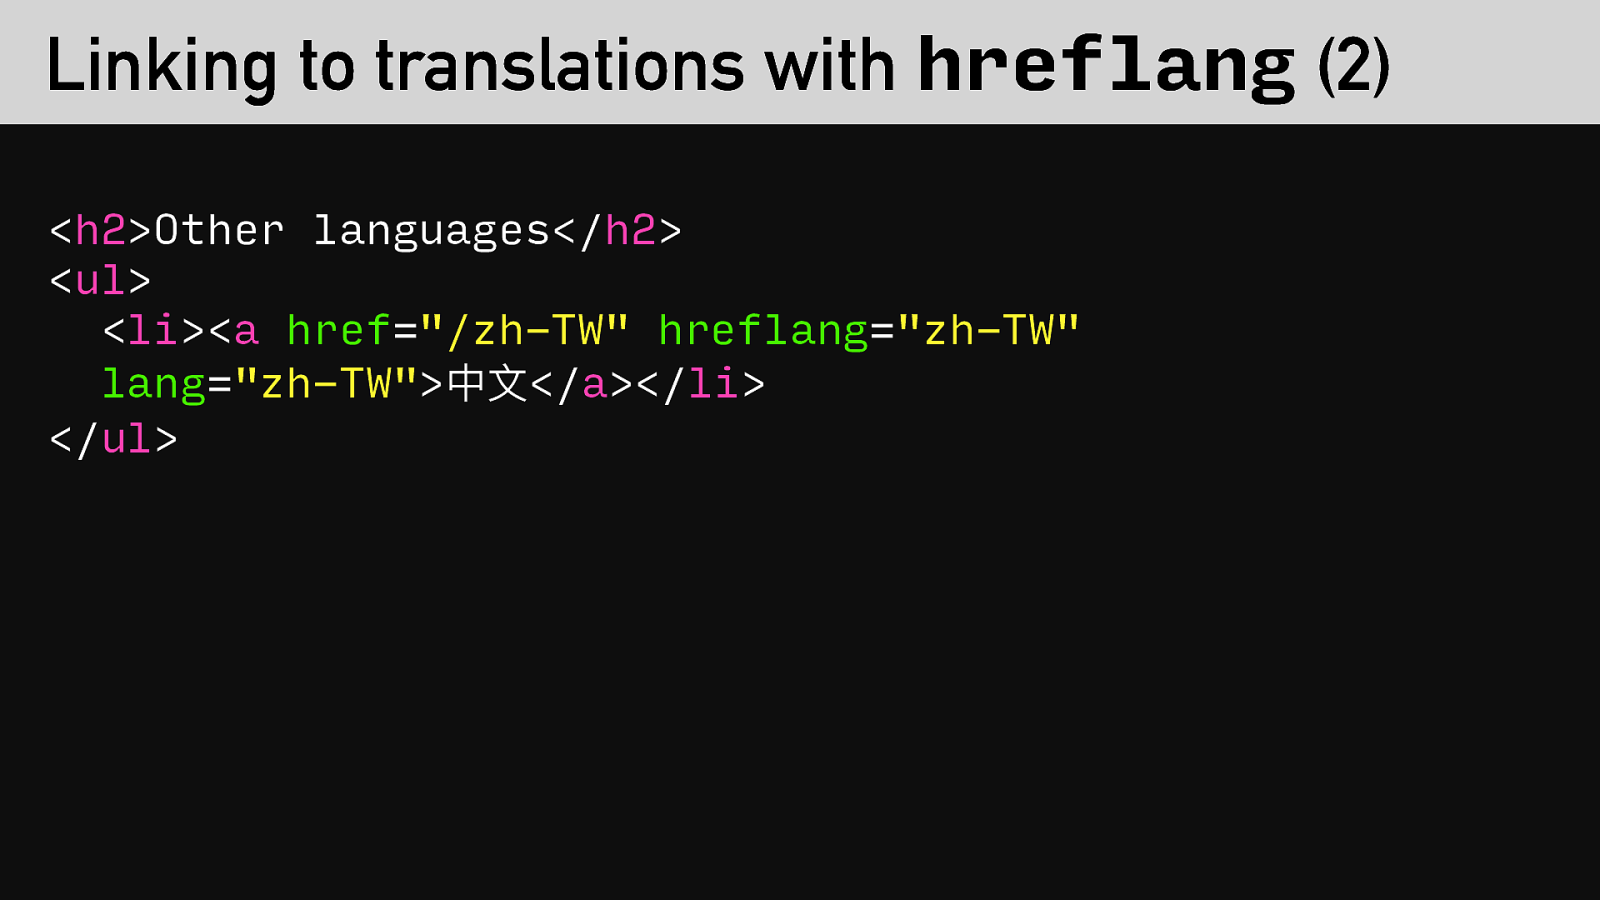
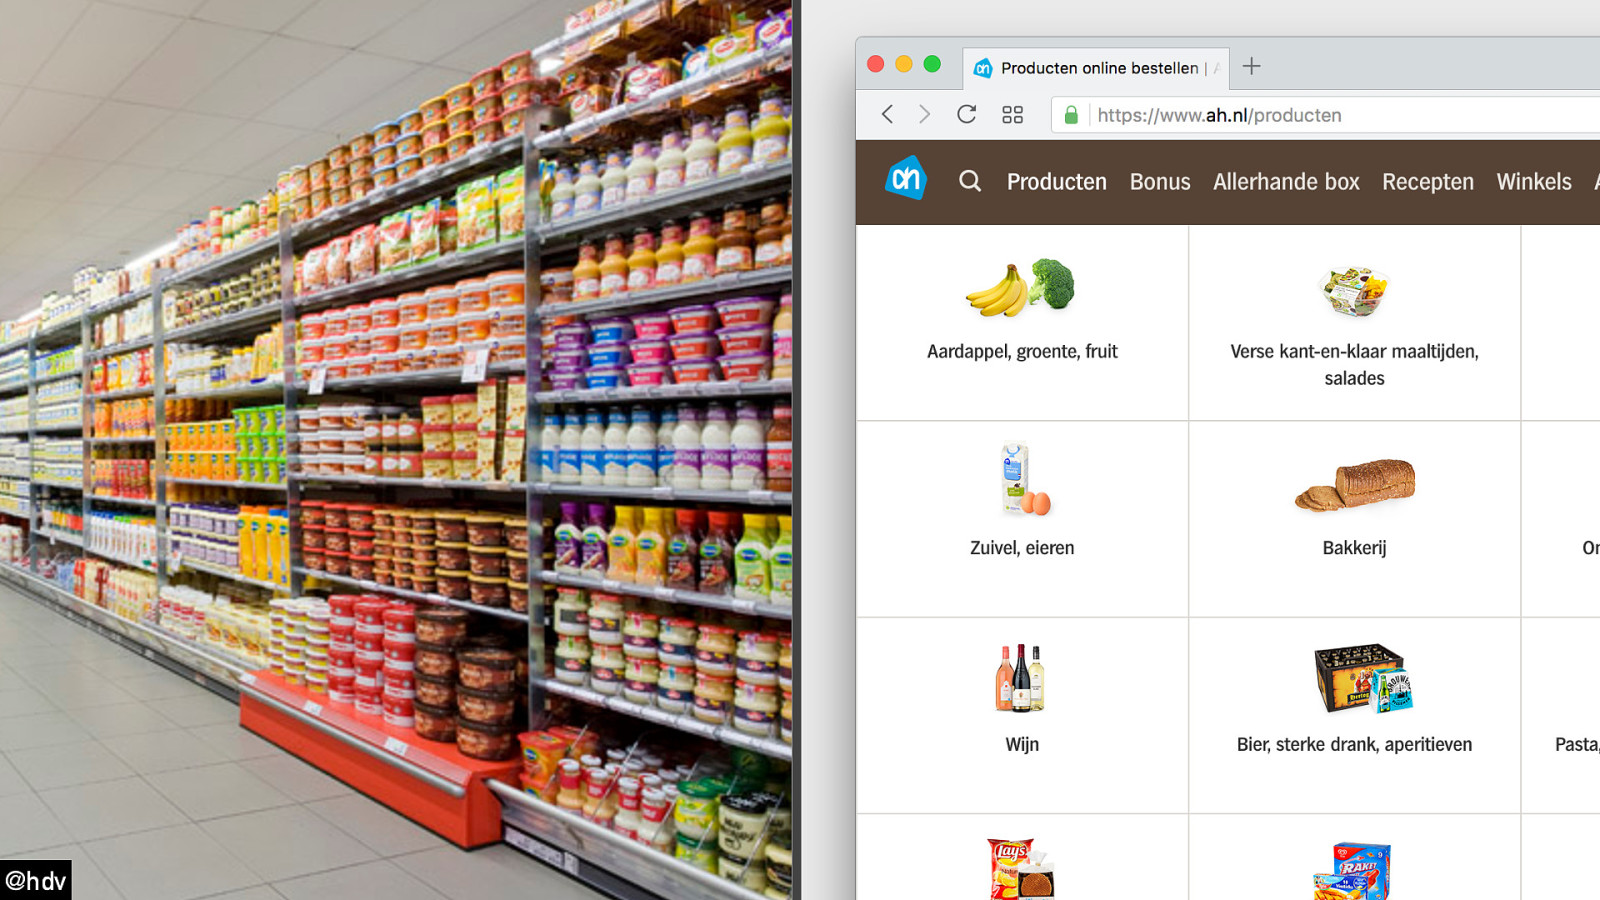
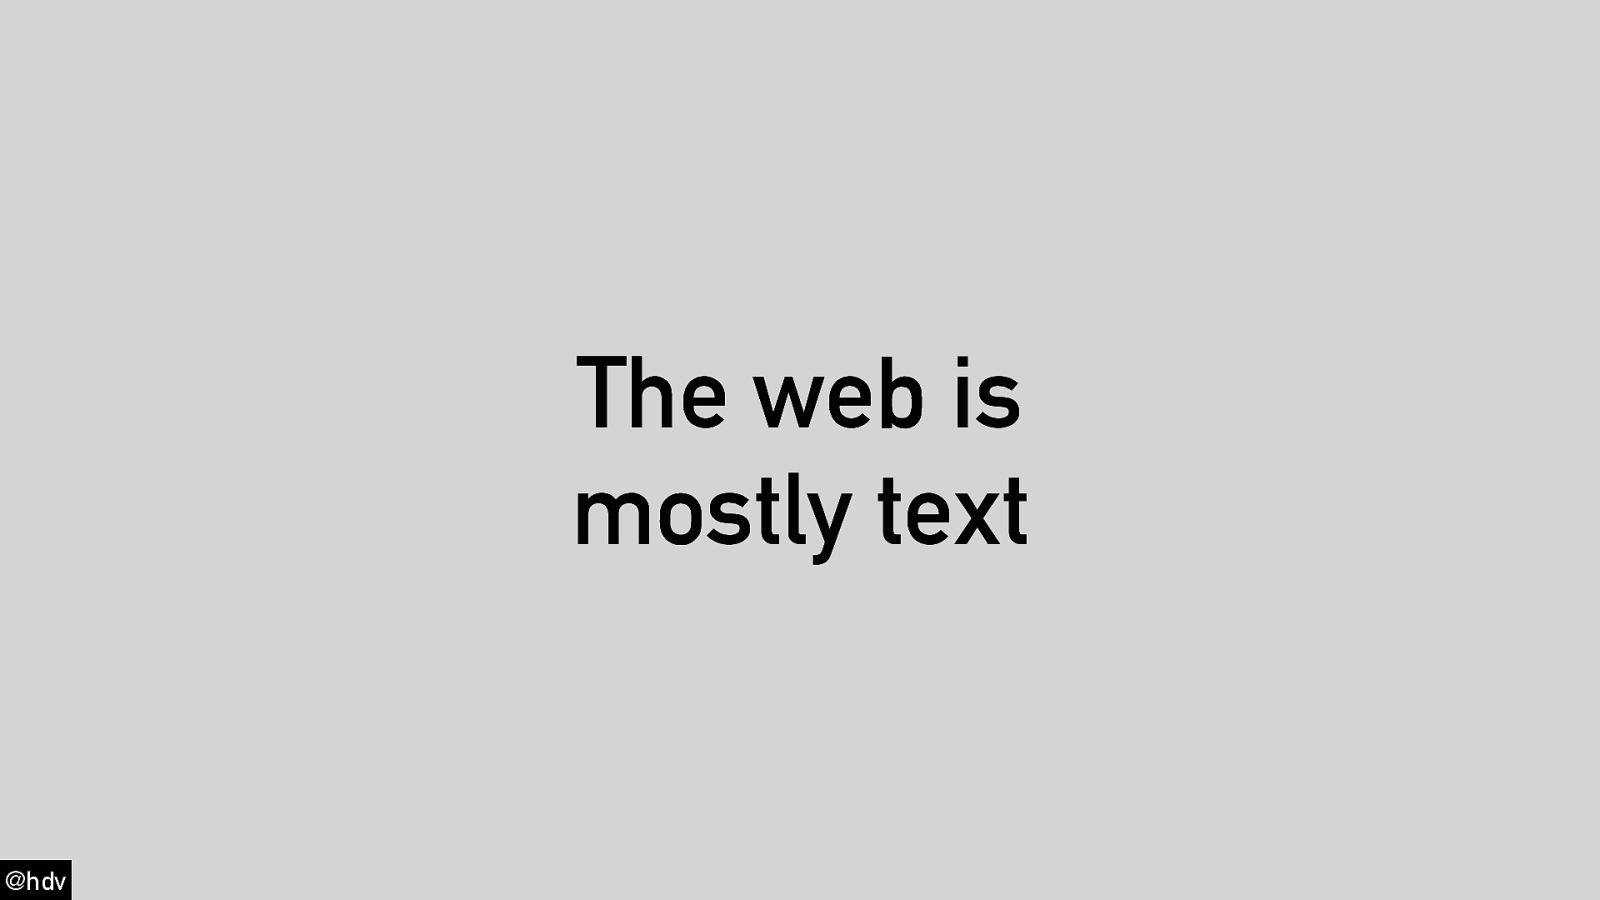
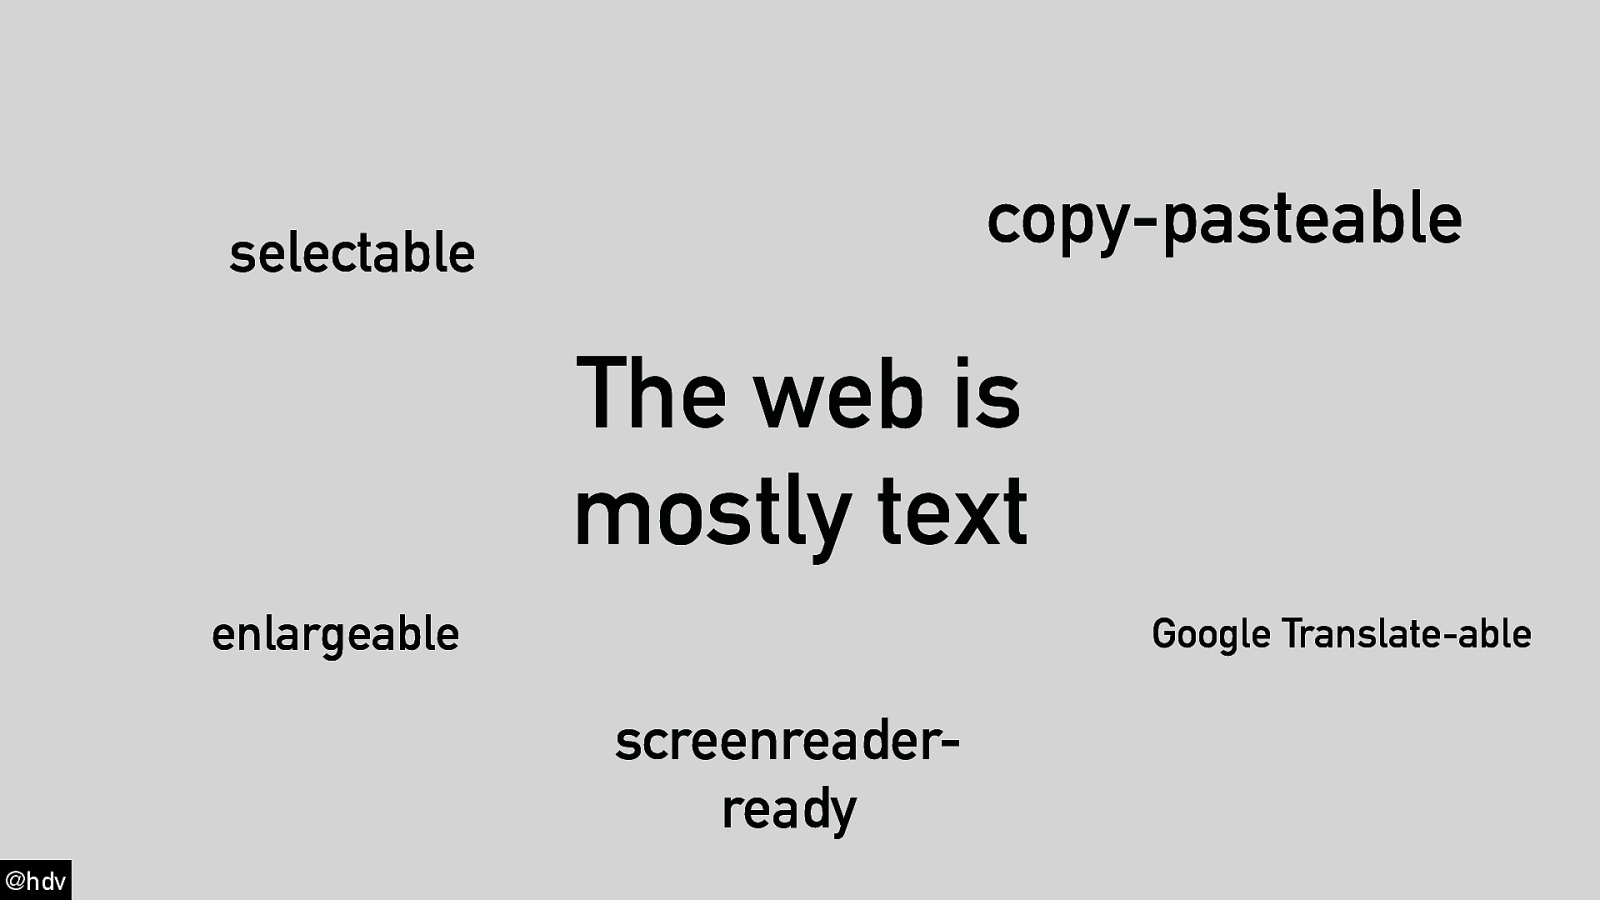
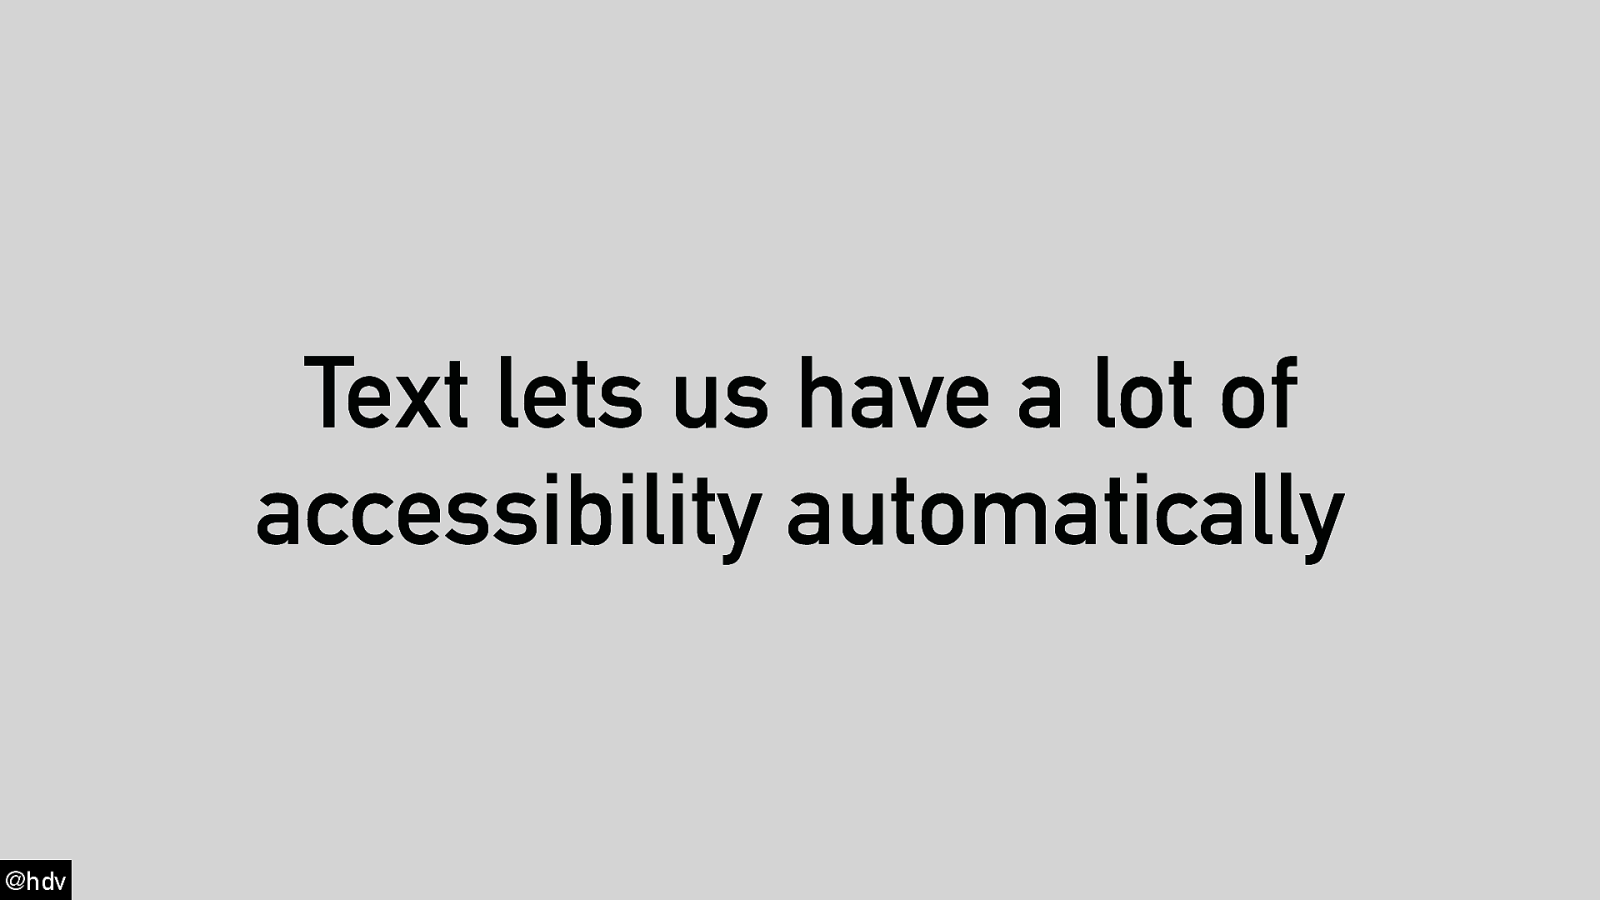
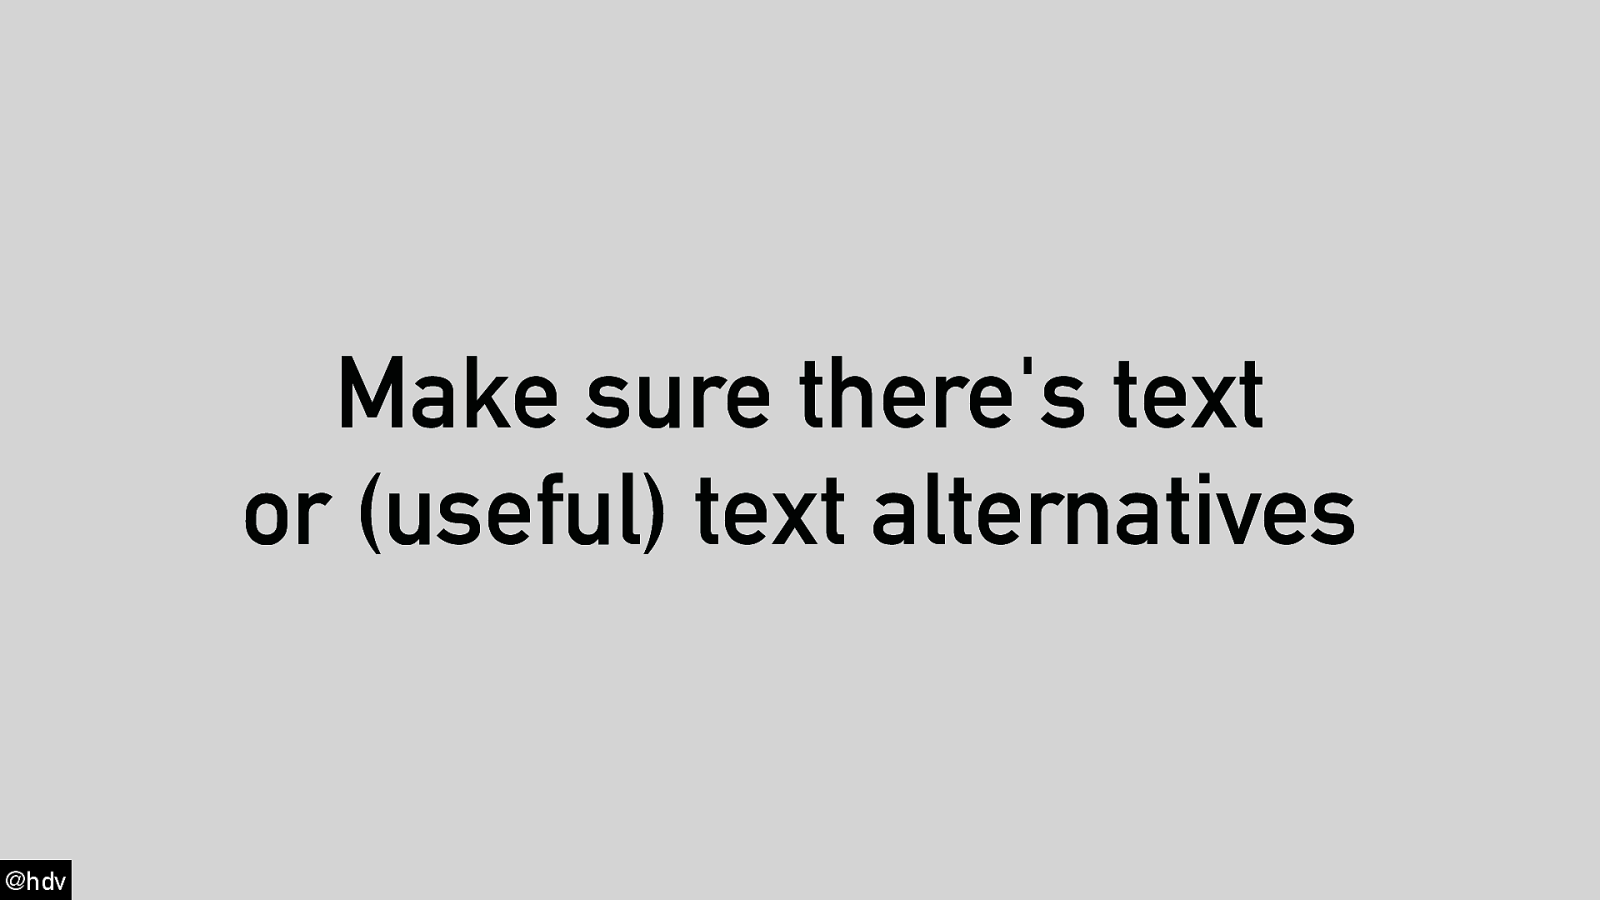
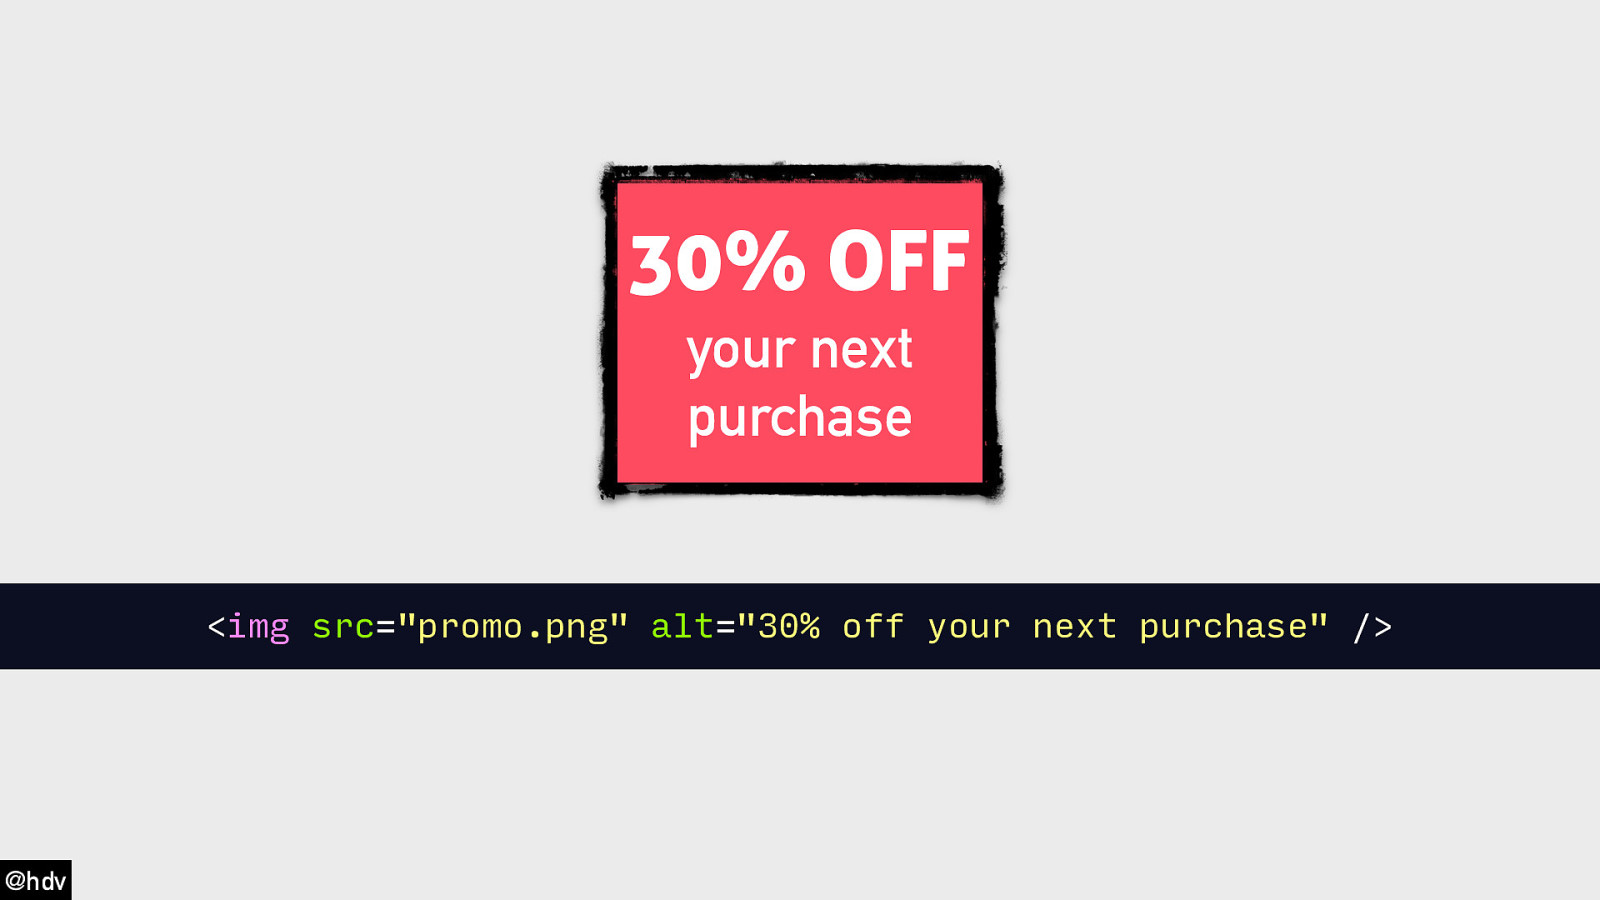
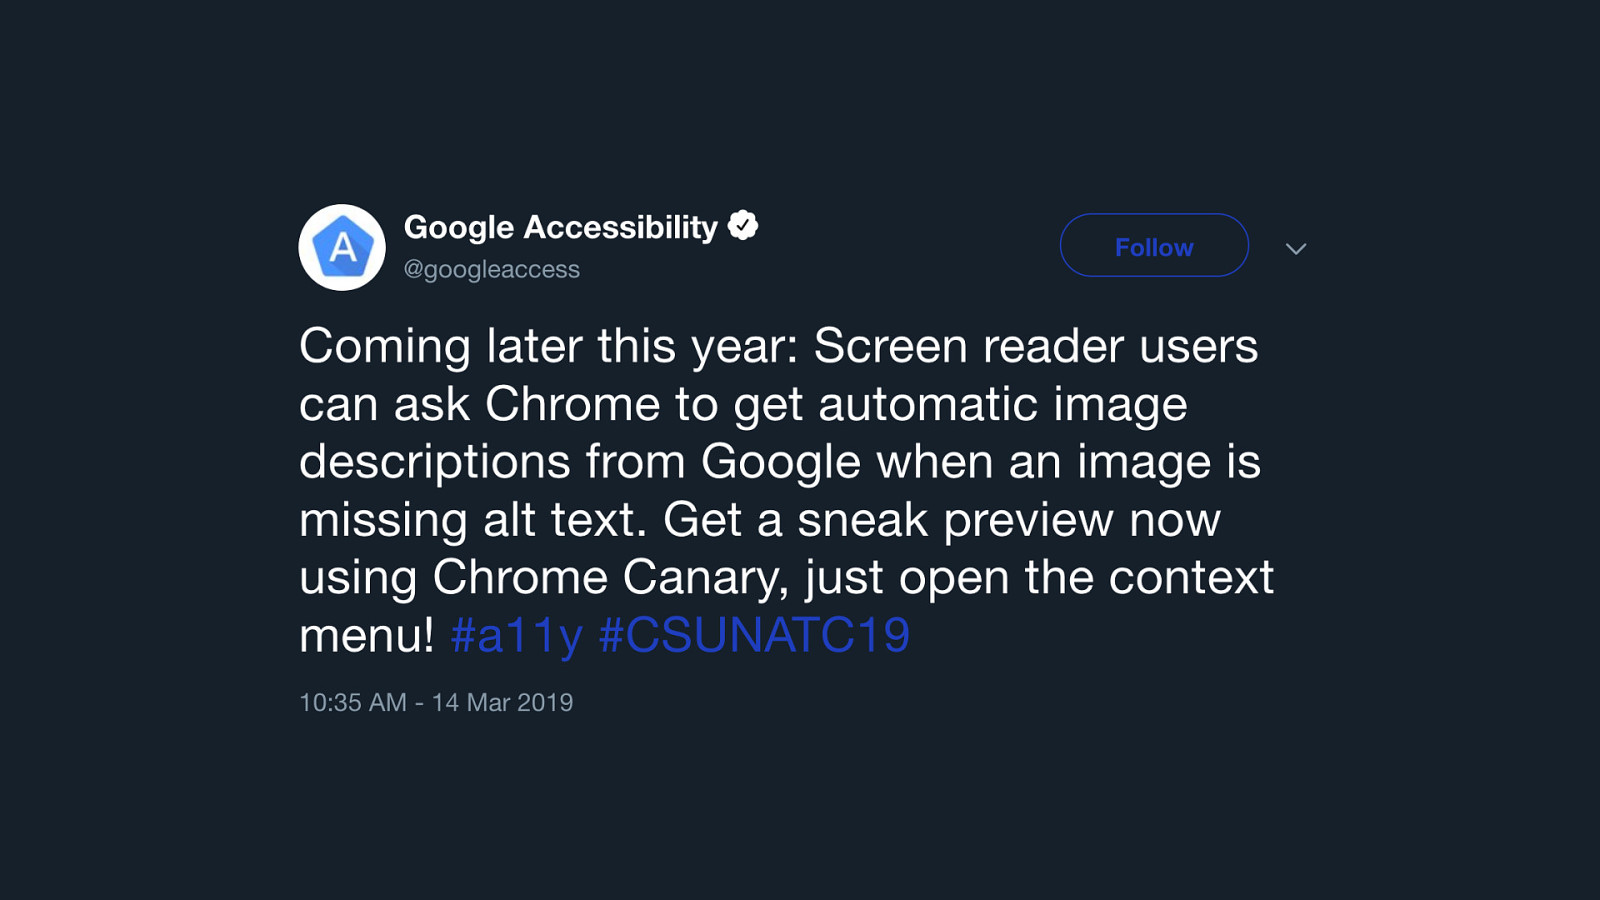
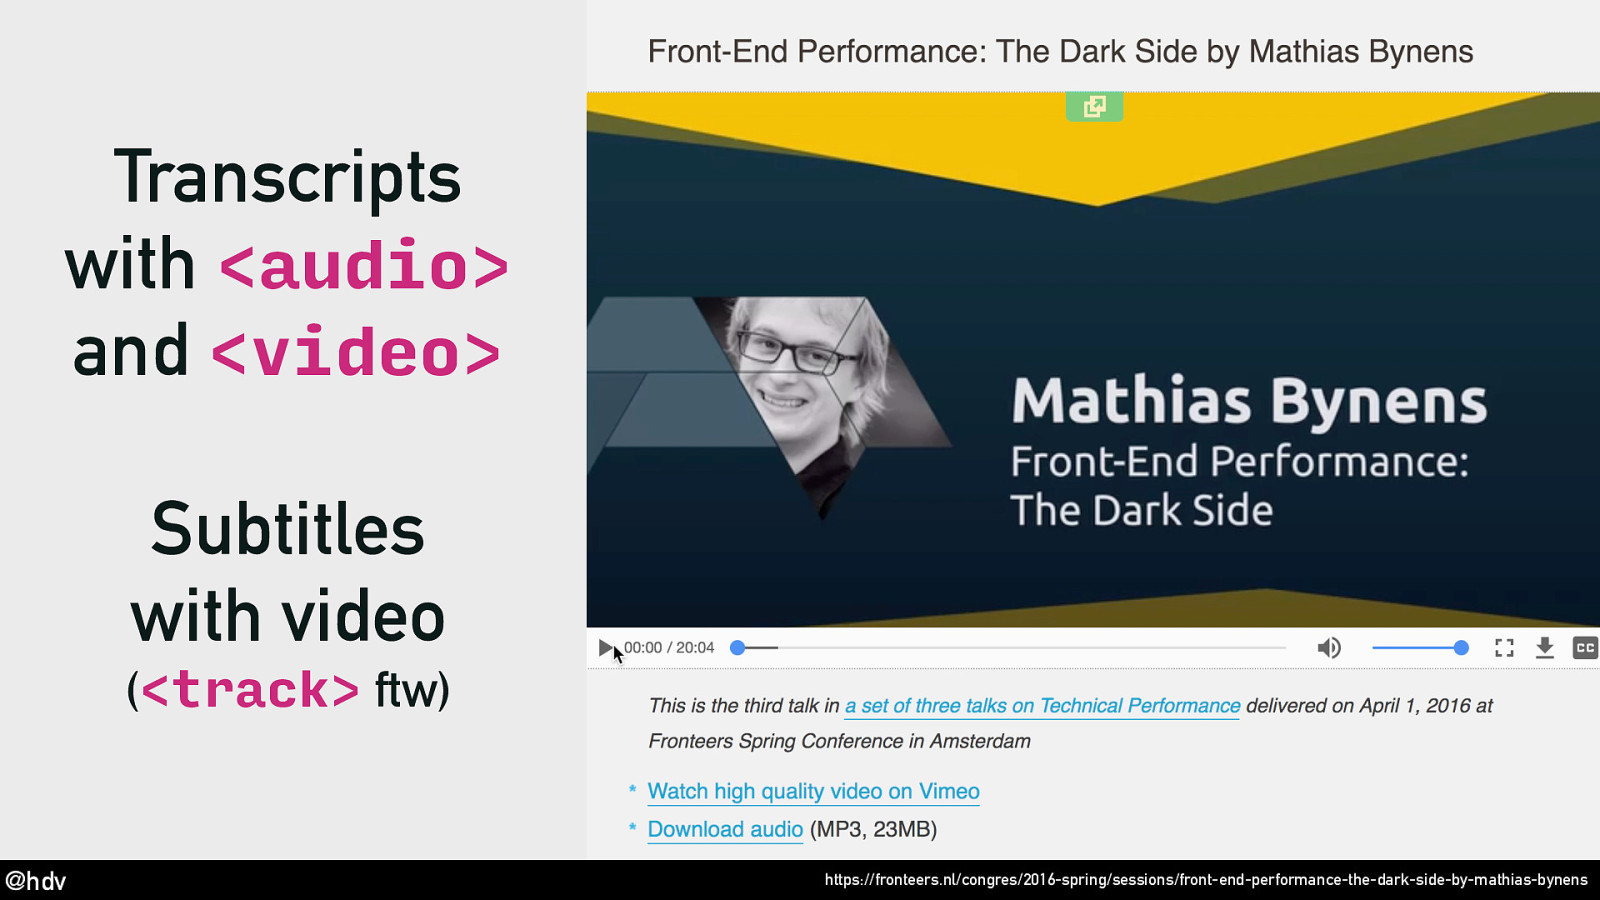
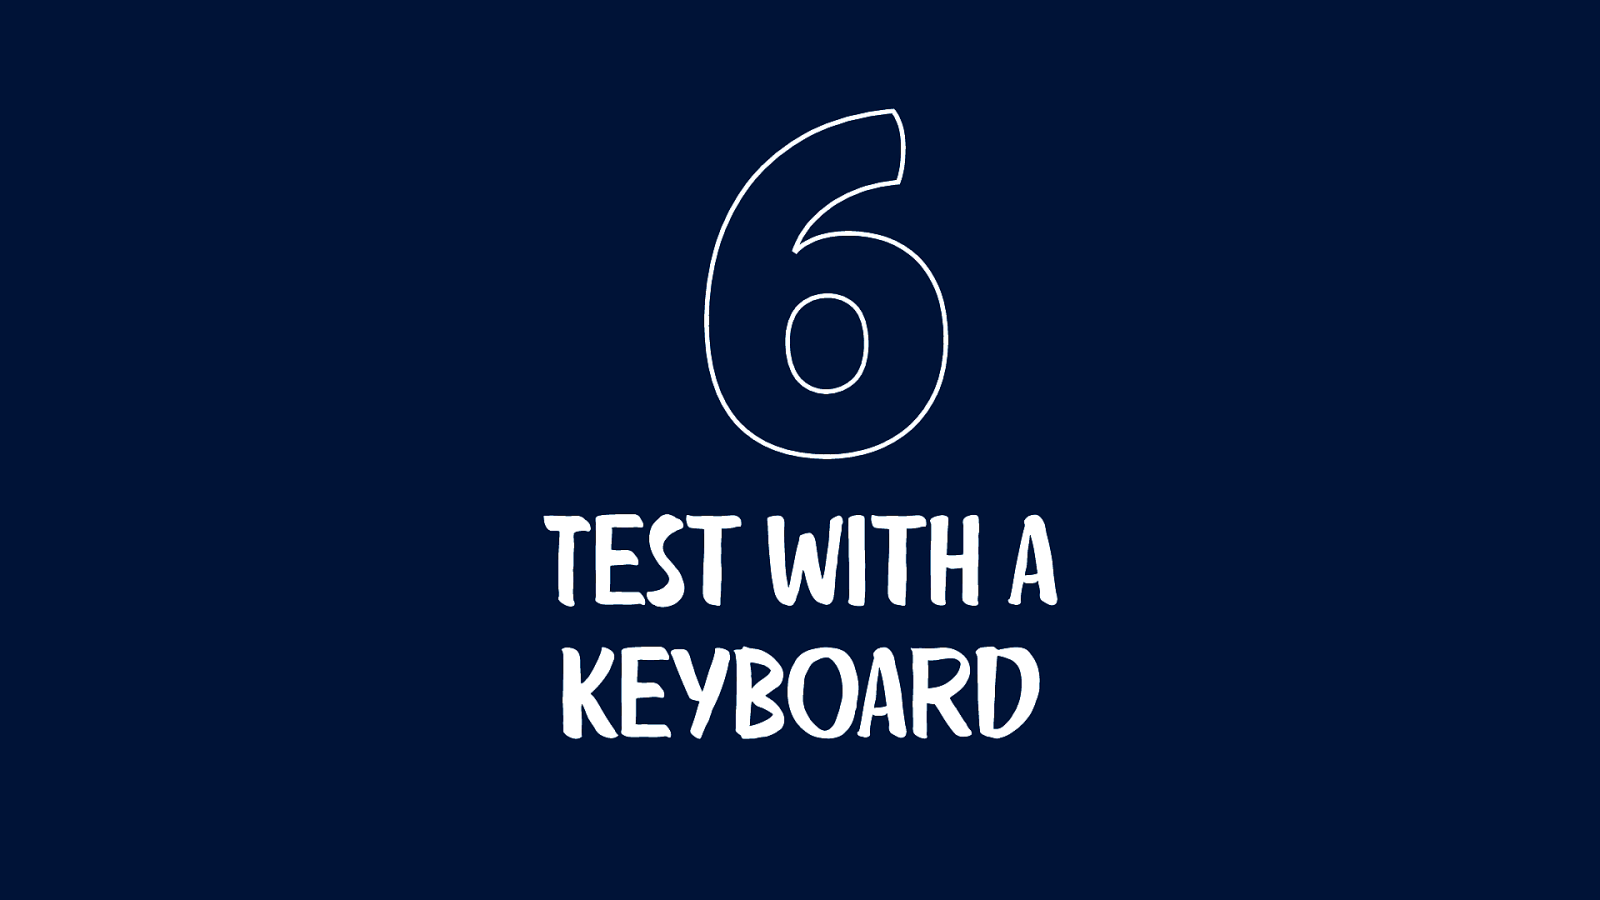
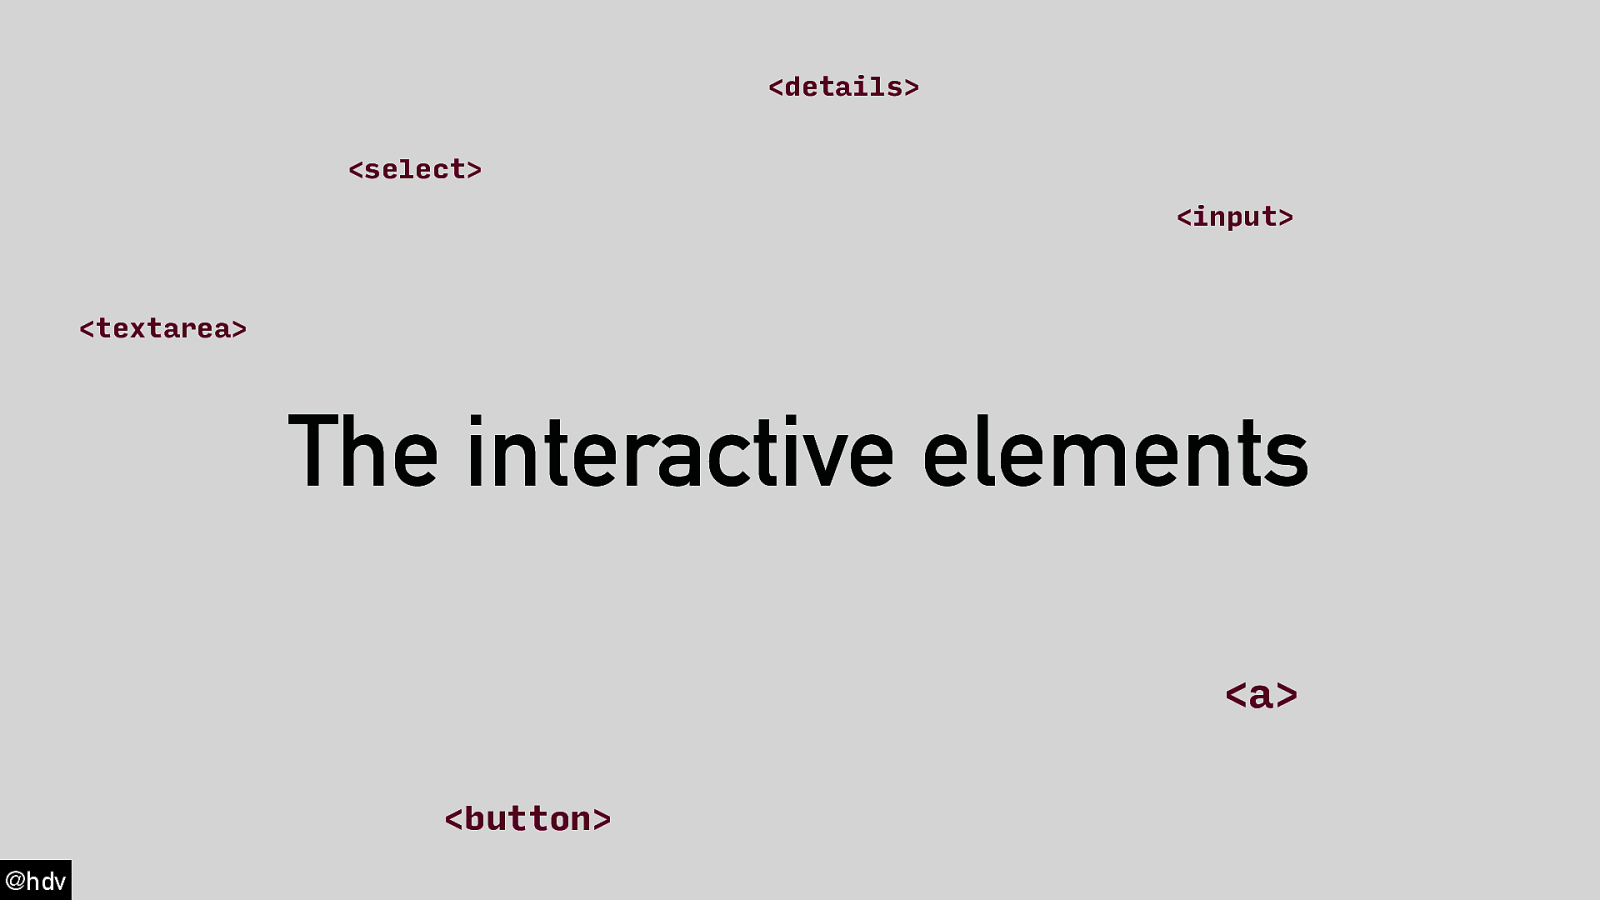
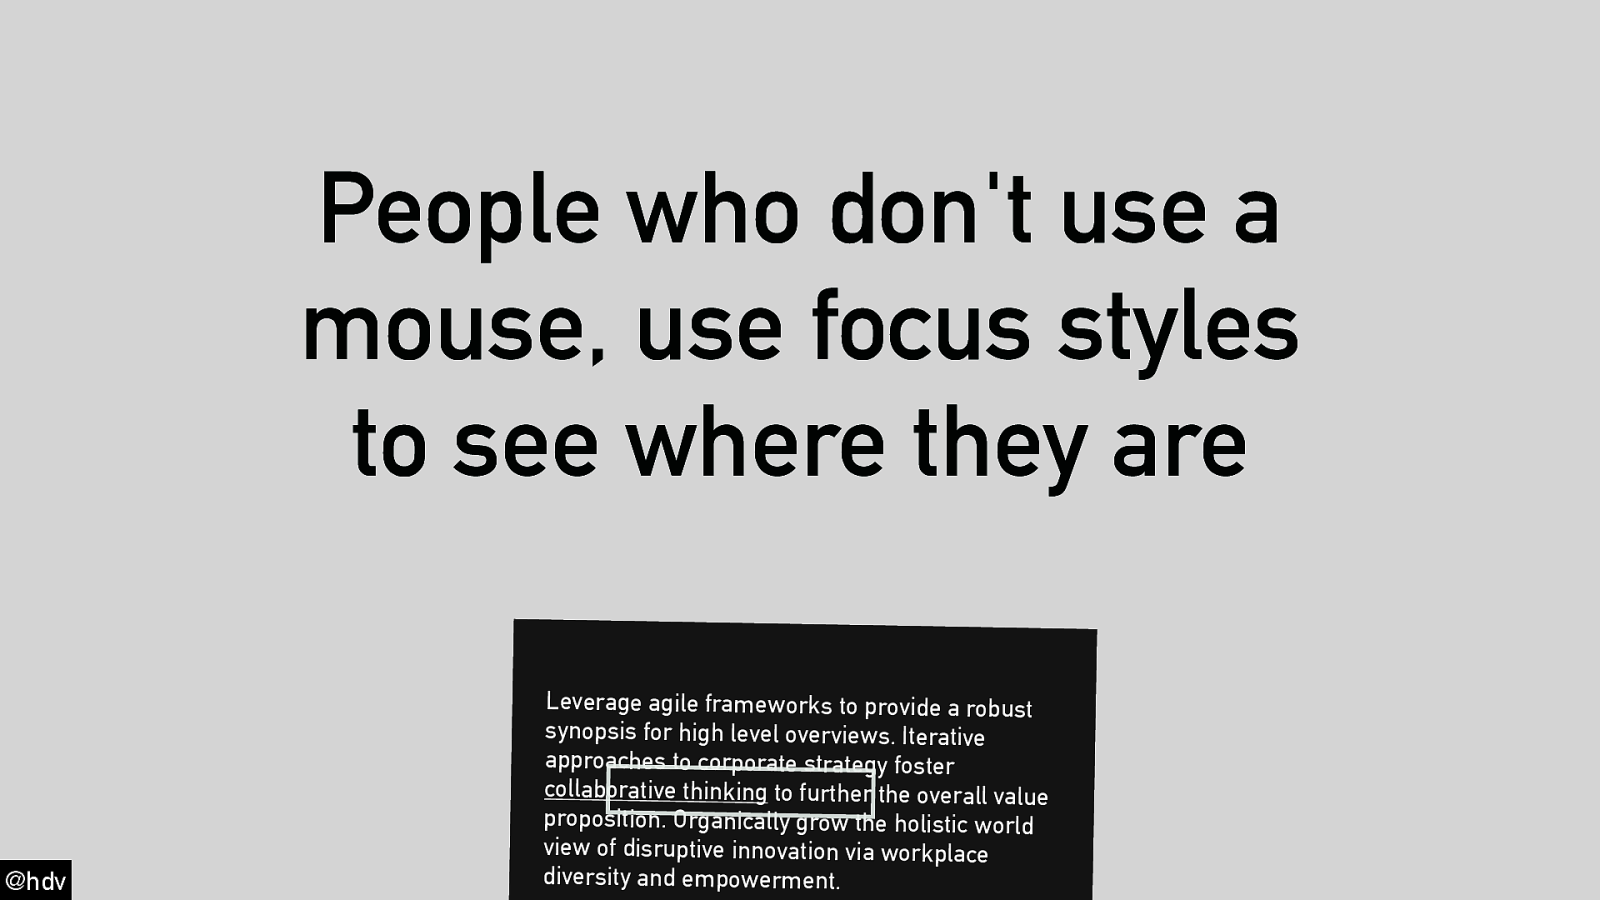
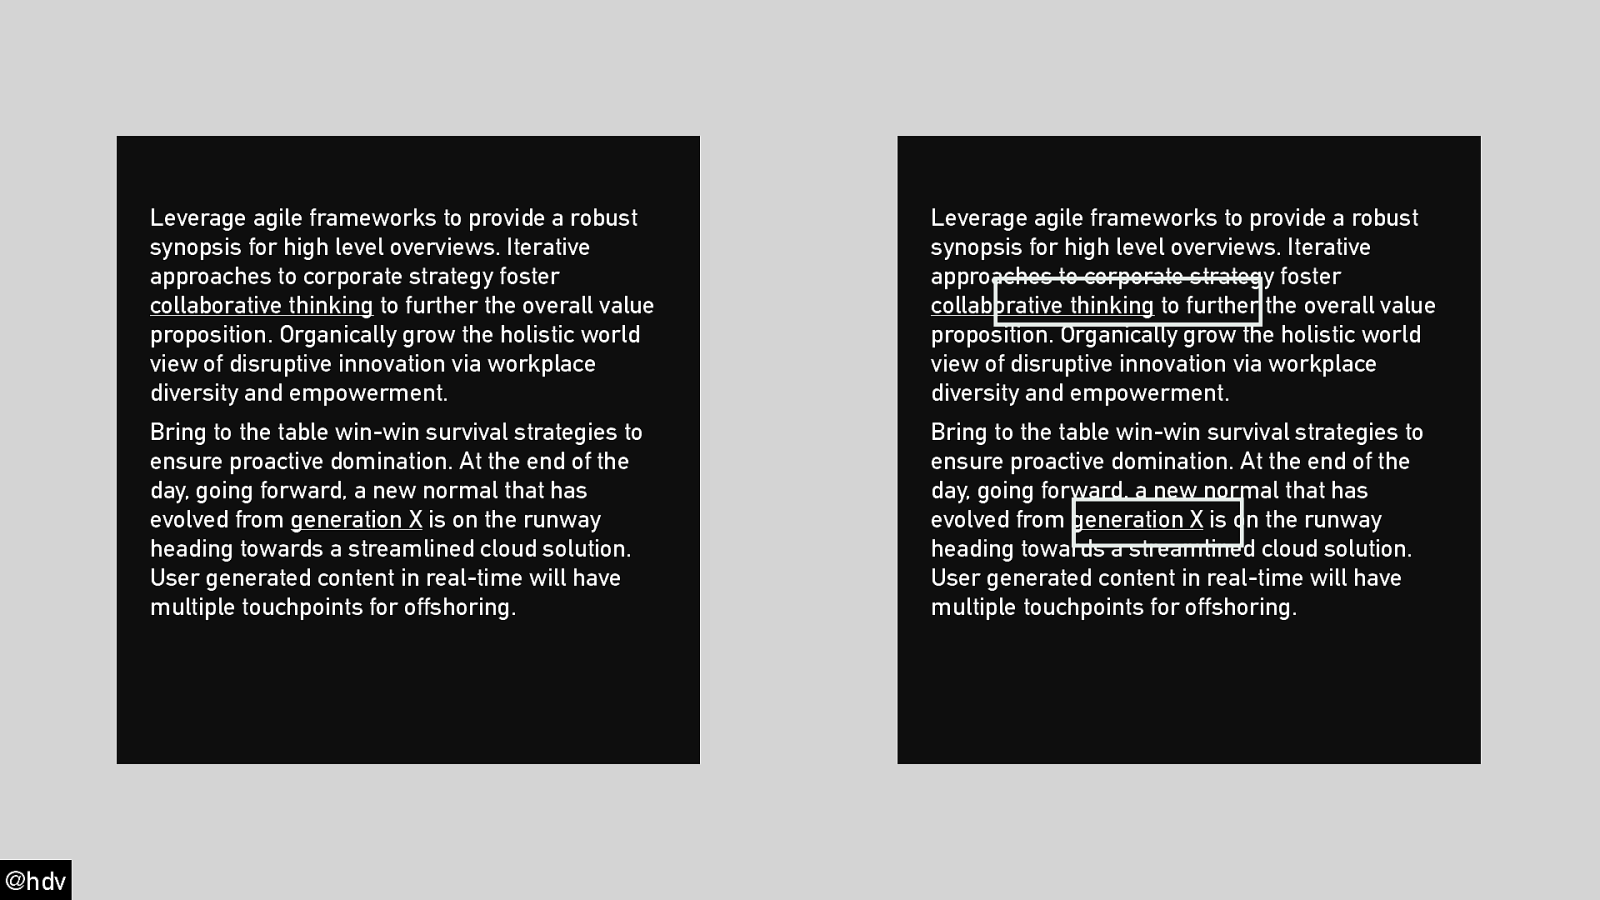
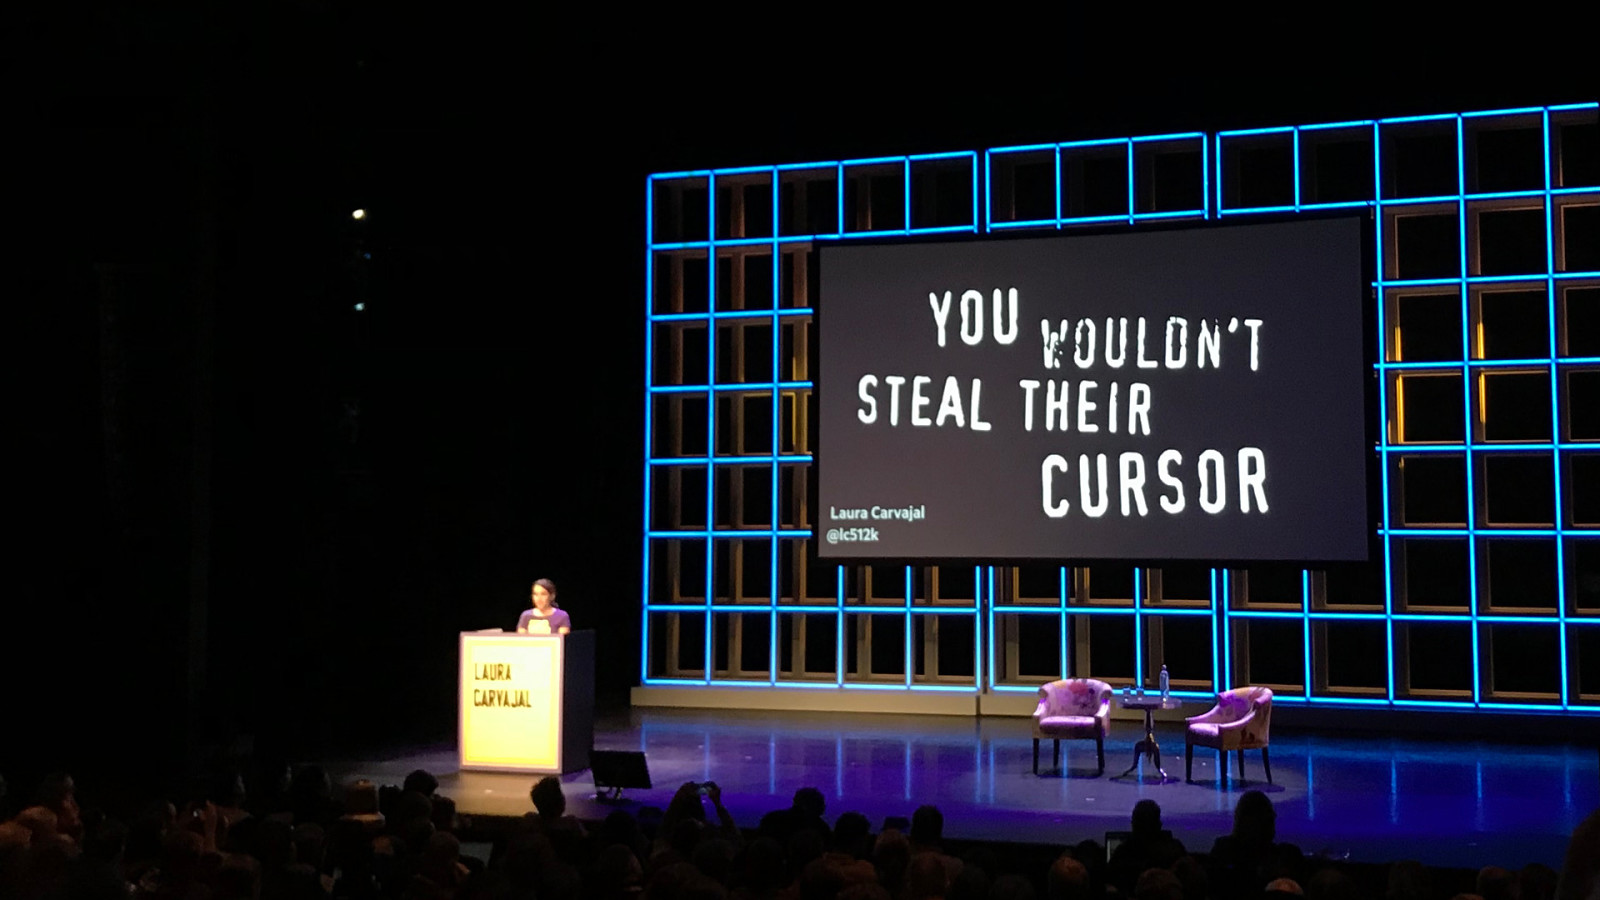
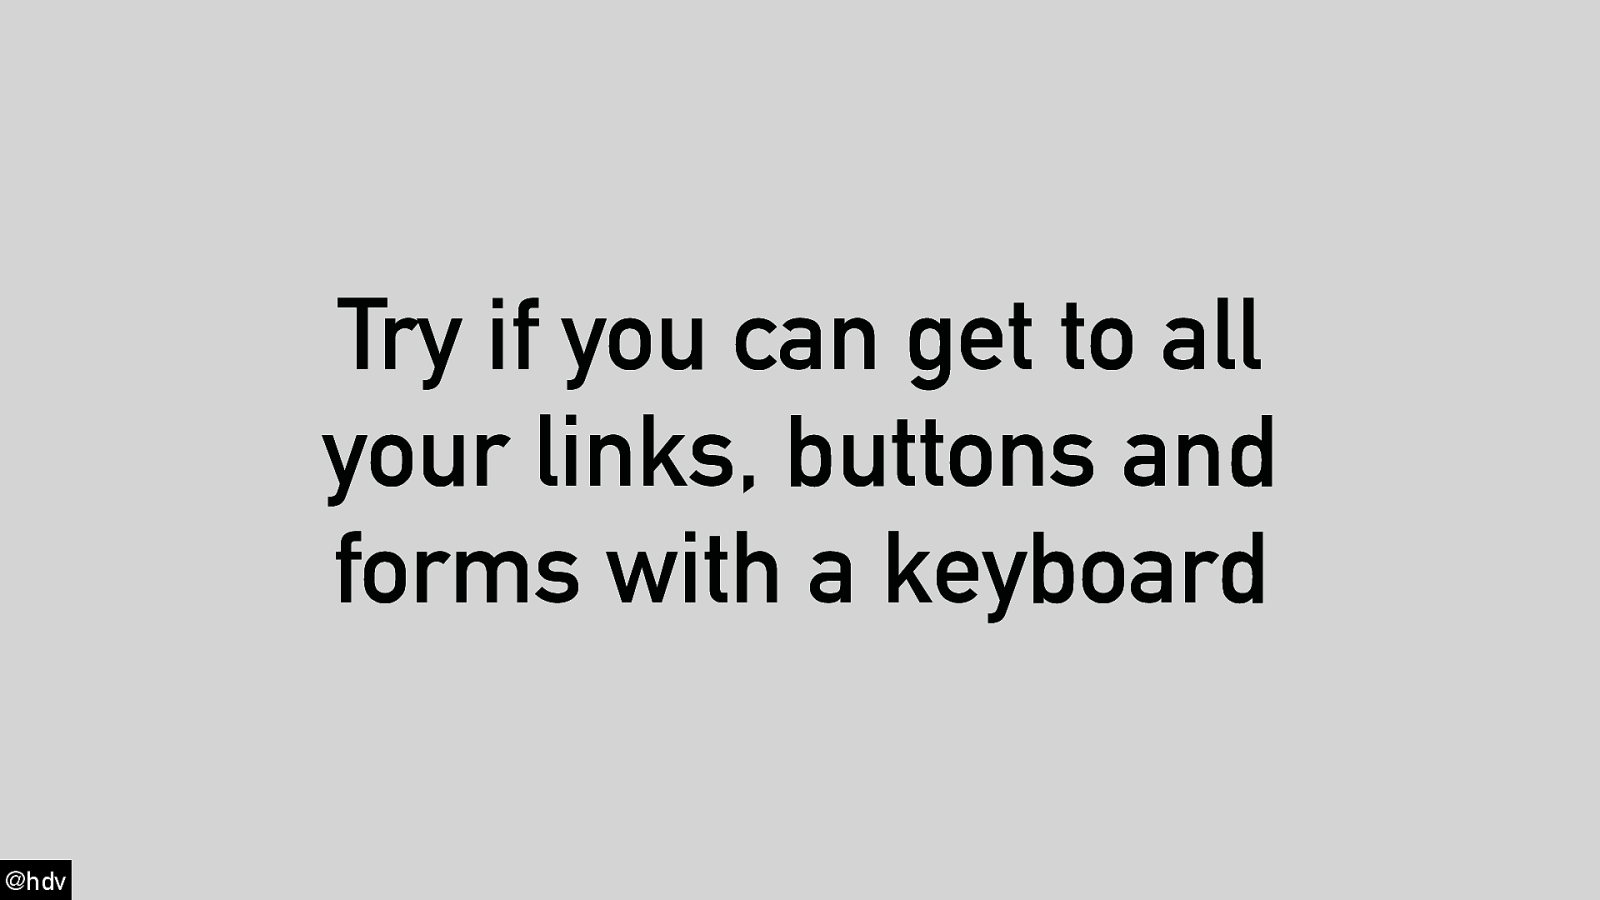
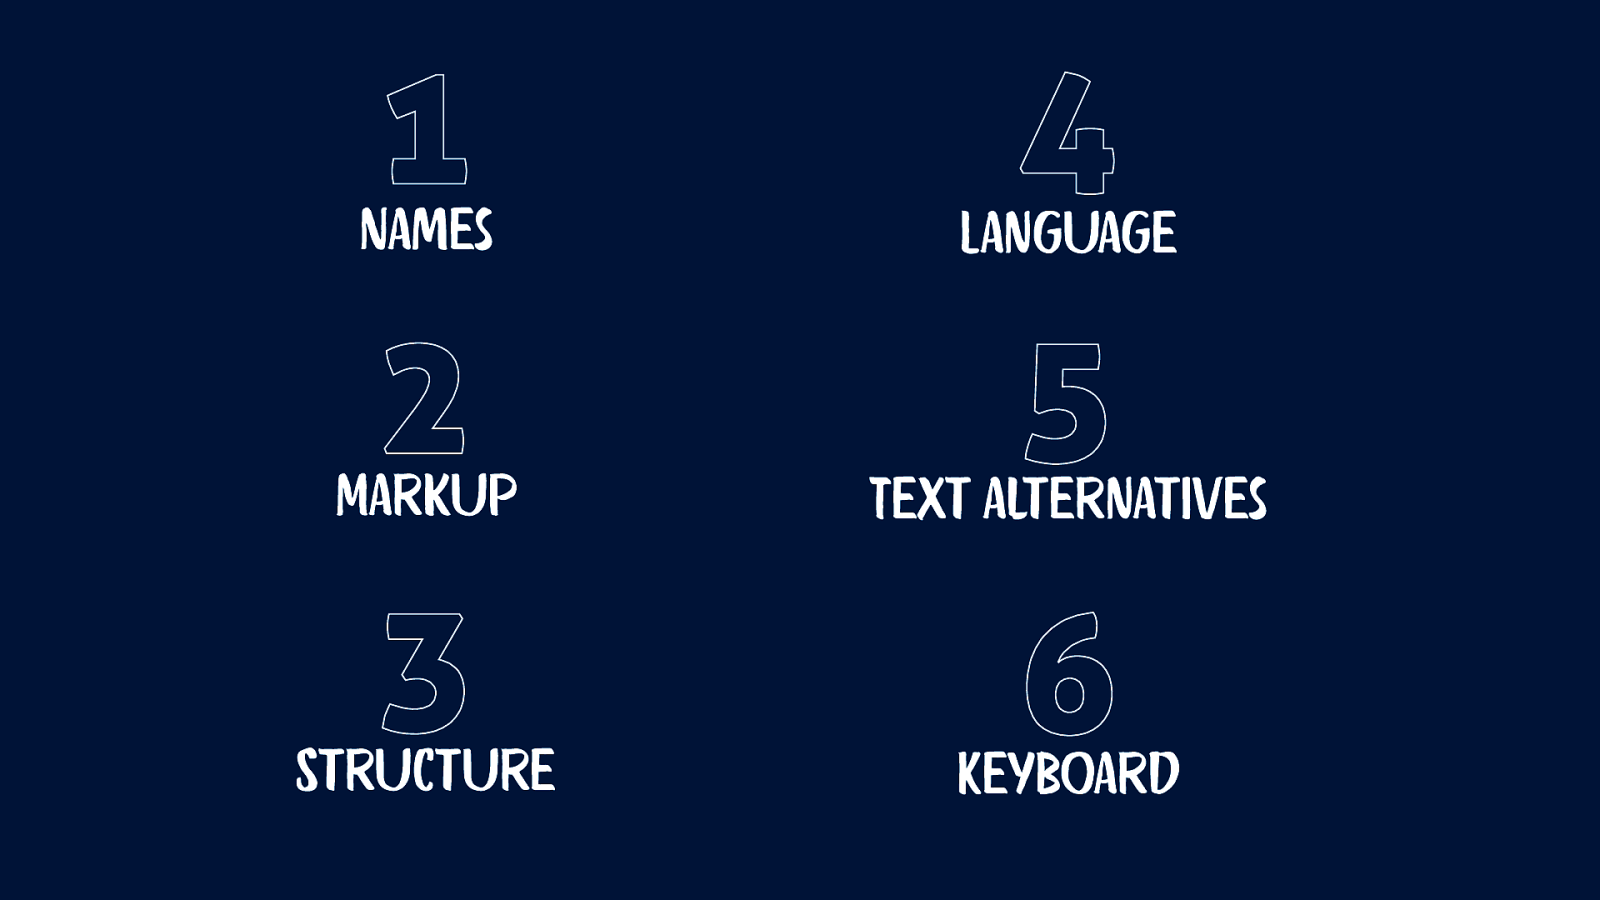
Hello there, this is Hidde. And I’m honoured to be here at Full Stack Utrecht. And, present to you today, about some ways to make your website more accessible. Let’s see. Do I have slides? Yes. So this talk is called ‘Six ways to make your site… …more accessible’. And it goes into kind of the things that I’ve come across as a front-end developer. And as someone who’s worked in front-end development for quite some time, and specialising in web accessibility. I do this for all sorts of different companies. Including Mozilla, W3C, the Dutch government, a bunch of different ‘gemeenten’ in The Netherlands. And I’m actually particularly excited to be in Utrecht. virtually anyway. Because I went to university there. And lived in Utrecht for a couple of years. This talk is all about accessibility. And before we get into the webbing stuff, let’s chat a bit about what happens in the real world. Because in the real world, we have a lot of accessibility stuff that we take for granted. And that makes, all sorts of sense to do. Like this elevator that is in a train station, in this case in Rotterdam. And a great thing about elevators is that they allow more people, to access a service. In this case, the train service. It allows people with suitcases, people with young children and strollers, even people who are using a wheelchair to access the train service, in a way that they could not normally do if they were just given some stairs. Because these people can’t walk the stairs, because of all sorts of different reasons. We make sure that they can, because we want these people to use these services. And doing web accessibility is kind of that, but on the web. You’re making sure that the web really works for people with disabilities, and lots of people beyond that as well. The great thing about the web is that it is accessible by default. This is a great kind of technical thing to know, and it makes our life as developer easier. But it’s also a promise that we kind of need to help fulfil. When the World Wide Web was invented very soon after, accessibility was put at the front and centre, at the W3C. The inventor of the World Wide Web, Sir Tim Berners-Lee, When he was at the London Olympics opening ceremony, he made these four words appear, ‘this is for everyone. Which apply, to the World Wide Web. He said, “This is for everyone.” And this could be interpreted in various ways. For instance, that everyone can have their own website. The web wasn’t designed in a way that, you need to go to some government agency, apply for a website from it, and then two years later you’ll be granted one. No, everyone can kind of create an HTML file, upload it to a server, and make it available on a URL. This is for everyone. The same goes for accessing the web. So, you don’t need to pay in order to use most of the web anyway. This changes a bit with the video on demand services and stuff like that. There are some paid services out there. But in general, the web is a resource, and it’s available for everyone, for everyone, broadly. And then lastly, the web were works everyone, at least that’s the idea behind it. So it has lots of stuff built in to make the web work for people with disabilities. And, today we’ll talk about a lot of those things and what you can do as a developer, to fulfill that ideal for the web. Now, these six ways are all things that I’ve come across. As I said, working as an accessibility consultant, and working as a front-end developer, they’re all kind of front-end development heavy. So there’s also lots of things that your designer friends, and your content friends need to take care of. But these are things that you can do as a front-end developer, or as someone who works on the front-end. Well, let’s start with the first one. Expose names. Now, exposing these is something you do for people who use Assistive Technologies. And Assistive Technologies are bits of technology that allow people to use the web in ways that are, kind of less than traditional but that make it really work for their specific situation. So for instance, someone who is blind, might understand braille. So the rest is braille bar, and you can attach to a computer, and it will in real time translate what happens on the screen, into braille. So you can feel your fingers, and it will have this tactile feedback. And, you can then understand what’s going on on the webpage. There’s things like screenreaders that will read out everything that happens on the web page to you, so that you can understand it, if you cannot see it. And there’s a whole bunch of other assistive technology. So, a lot of the things we talk about today are about making sure your web page is compatible, with these technologies. Most people think in terms of browser compatibility, but Assistive Technology compatibility is just as important. So when you send markup to the browser is going to generate a bunch of trees. The one that everyone is probably familiar with is the DOM tree. Now the DOM tree is a representation of your web page. So, of the HTML that you’ve sent through the client. And it’s kind of a tree view based off that. So, it may have corrected some of the mistakes you’ve made. If you’ve forgotten to close an element, or you’re starting with an H1 and ending with an H2, it happens to the best. The DOM tree is going to take care of that as well. And then kind of make sure that it’s all warm kind of consistent thing, that the browser can work with. And that you kind of work with in your JavaScript as well. So the DOM tree is there, many people are aware of that. But what most people don’t know, is that there is a secondary tree, which is the Accessibility Tree. It gets generated on demand. So if someone uses a particular things of technology, or if they open the accessibility tab in their browser, in this case, I’ve got Firefox open, and any Accessibility Tree, you’ll find things like roles, names, and properties, And these are all kind of accessibility related bits of meta information. And that’s only valid for you have a lot of control over what happens in that tree, and what ends up in that tree. You could say that the Accessibility Tree is kind of how your page gets exposed to Assistive Technology. So it’s really important, to be aware of it. And to make sure you optimise for it. Now, to explain a bit more about that. So, as I said, some people use Assistive Tech to browse the web. They usually have that tech themselves. So we don’t need to do much as developers to make sure that tech exists in the first place. Because it’s there, and users will come to your website, using this technology. So we don’t really need to worry about the tech itself. But we do need to make sure that the tech gets properly informed. Now, it gets an information about what happens on the screen from platform APIs. These are built into platforms like, Windows, Macintosh, Linux, also on mobile phones. They all have Accessibility APIs that are able to tell assistive tech, about what’s happening in the user interface. So it tells them about things like, someone has opened his window, or they’ve opened their browser, and they’ve clicked the favourites menu, or, they’ve right clicked, and these are the options that are available, that sort of thing, Everything that happens on the platform is known by the Platform APIs. And exposed to Assistive Tech through them. Now, if someone goes to your website, maybe the Platform APIs know what the browser is, and the URL bar, and that works fine. But as soon as your website loads, they have no clue what that is, because you filled it, and they’ve probably never seen it before. Now for this reason, the browsers have these Accessibility Trees. Because the Accessibility Tree isn’t aware of what’s happening on your webpage. And it tells the Platform APIs, which then tell the Assistive Tech. So the Accessibility Tree is really crucial in this process. Now, as I said before, it is based on the DOM Tree, which is itself based on the markup that you sent to the browser. So by writing the right markup, we can really influence how well our website is usable with assistive tech. And so that’s why in this talk, I’ll be talking quite a bit about markup. Because, it is quite important in this process. Now, we might be wondering, where can I find the Accessibility Tree? Luckily in recent years, all of the big browsers have implemented Accessibility Trees in their Dev Tools. So when you can actually look at them as a developer. So for instance, in Firefox, there’s a separate tab for accessibility, in Chrome and Edge, there’s information exists alongside the DOM information. You may have to look for it a bit, but ultimately you’ll be able to find the information right there. Now, as I said, this is about naming. This chapter was called expose names. So let’s think about naming the four of it. Now, as a young father I’m quite aware, if you got a child, you know, everything goes well, you have to go to the city, or at least to do it in Netherlands. And tell them that a child was born. And also what the name of this child is. So naming is your job. As a parent, you need to figure out, what you’re going to name your child. Now, what if you name your child Alice? And the second one is born, and you decided to name the second one, Alice as well. And then the third is born, and a fourth. And you kind of decide let’s name all of them Alice, Can you imagine the sort of problem that this will cause. For one, there will be lots of communication issues. You know your cooking and you’re shouting to one of your kids, “Hey, Alice, come help.” They will all show up or maybe none of them will. If the school calls and one of your children has misbehaved and they say it was Alice, it’s really hard to figure out which one of your children has misbehaved. In other words, it’s really annoying, right? If all your children are named Alice, it won’t work. Now, this is something we do on the web quite a bit, because when we do something like this, where we have four paragraphs, all have a link right underneath them that says read more. We basically do that. We have four different links, and they’re all named read more. And it makes it really hard to distinguish between these links. This isn’t so difficult when you’re a sighted user and you’re looking at the webpage, because you can figure it out from the context, or they’re all kind of go to different places. But if you’re a blind user and you’re using a screenreader, you have this little menu that lets you pull up a list of all the links. So it’s going to let you pull off the links. And it’s going to say, there’s four links on this page, and they are read more, read more, read more and read more. Now this is really difficult because then you don’t know where each one is going to go. And you have to go through each of them to figure out what the location is, for this URL. So, you’re going to figure out what these pages are by clicking on them, and that’s really annoying. And something we can avoid by making sure that these links have unique names, that describe what’s on the link destination. So whenever you use an anchor tag, you are basically naming the link. That’s a good one to remember. So when you’re naming the link, you want to make sure that it has a name that make sense. If you hear it out of context. So if a screenreader is going to read out a list of links, then it’s helpful is if interlink has a name that is instantly recognisable, and make sense out of context. So not read more of it something else. And this is a real thing. When a WebAIM, which is a group from US, they did research and they published that as The WebAIM Million, when they looked at the top web pages that are out there, I think 1 million web pages, hence the name. And they found that 25% of them had links with ambiguous links, like ‘continue’ and ‘read more’. So that’s a really big problem on the web. And sort of easy to solve, because the only thing that you need to do is make sure that you have link text, make sense out of context. Similarly, a label tag, names, or form fields. So whenever you use a form field, and when you use a label tag, to make sure that that form field has a unique name. So, again, in the WebAIM Million, they said that 60% of influence were not properly labelled. So it’s a really big issue. And what happens on a screenreader, is that it’s going to read out, here as an input. But it’s not going to say what the input is for. If you have something like this. So I have an input for the name. And I have a div right in front of it with the text name in it. If you’re a sighted user and you can see this, then that makes sense probably, because the word name is there. So you probably have to input a name there. Cool, makes sense. But if you cannot see this, then you’re a screenreader is going to say, “There is an input for text.” And you don’t know what the input is for. Now to solve that, you want to make sure you use a label tag that is associated with a id of the input. So when you do that by making sure that the for attribute on the label is the same as the id attribute on the input. Now, similarly, there’s caption and legend, A caption labels a table, and a legend labels a form. Now, if you are a bookkeeper or an accountant, and I actually know someone who was an intern at one of the big firms, I think PWC, he was blind. And you know, when you have to look through different financial results and they’re all on tables. Let’s say you have a page and has four different tables on them. It makes sense to make sure that they all have different captions, so that they’re easy to distinguish. That’s our goal here. So the content of that caption tag, you want to make sure that that’s something recognisable. If I will give you a list of all the captions, you should be able to figure out what each table is. So, maybe one is for the 2018 results, and one is for the 2019 results. And that’s the factor that really distinguishes these two tables. The fields had elements, is narrative group for a bunch of form fields. And then you can name that field set with a legend. And a second part is about choosing your markup. It’s one of the best things you can do for accessibility as a front-end developer. Really make sure that you’re using the right things to know a text. One thing that I see a lot in websites is that there is some confusion between the anchor tag and the button tag. Now, the difference is, it is really simple. The anchor tag goes somewhere, and the button does something. So whenever you go to a different page, that should be an anchor tag. And if you find out that your href attribute on the anchor is empty, then usually that’s an indication that you probably wanted to use a button tag instead. Because the button is something that allows you to do an action on the webpage. If you have a close button, or a save button, or maybe a next or previous button in a carousel, that’s usually a button tag. Never a div, or a span, or anything like that. It should be either an anchor or a button, if you can do something with it. Now using a button, something like save comes with a lot of benefits for free. For instance, you can tab to a button, buttons work with keyboard, which means you can press enter and submit, or activate them. Their are announced as buttons by screenreaders. And they get the correct cursor. So, all of that is built in for free. You can do all of that with the div. But it’s much easier to use a button because that has all that stuff built in to it. And styling a button with CSS, isn’t as hard as it used to be, and not as hard as they say. There’s a couple of CSS declarations, and you’ll need to apply. But generally it is quite easy to style button element, however you like it. If you’re in doubt about which HTML element to use, I can recommend developers.whatwg.org. This is the specification for HTML. And is also used by browsers to figure out how to implement HTML. But the developer edition has all the browser stuff taken out. So it has only the stuff that’s relevant for developers. So that’s perfect. I often use this to look up what an element to score, and how I’m supposed to use it. So it has a lots of very good information, and good examples of how to use HTML. It’s the quickest way to find out. And, much better information than a website like W3 schools, that often shows up on Google. Now the third tip I have, is to provide structure in your HTML document. It’s something that makes your side a lot more helpful for users of Assistive Technology. Now, one way to provide structure, is to give a title to your page that is relevant, and timely, and unique. So title is that element that you find in the head. And often when you do web development, you don’t really touch it. Because, it’s part of some general generic template that you don’t really do anything with. But it is really important that the title tag shows up in a browser with, something that is very relevant. When I watched a video via Leonie Watson, who is an accessibility expert, and a screenreader user herself. She said that the title is the first guarantee for her, a confirmation, that she’s ended up on the page that she wanted to ended upon. So, it tells her right on the page I wanted to go to. And because it gets read out when you go to a new page. And when you arrive at a page, whether you’ve come from somewhere else, or you open a new tab, the screenreader is going to read out the title elements. So, make sure that it has some content that really explains what is on this current page, and what is unique about it. Now, headings are another way to really provide good structure. And, one way I like to see them, is as a table of contents for Assistive Technology. The reason for that is that in a screener, you can pull up this menu, that allows you to see all the headings that are on the page. And this is actually a method to navigate a web page that is used by blind users quite a lot. They have the option to read out the whole web page to them. But just as people who are sighted don’t read the whole web page to figure out what’s going on. Someone who cannot see you will not want to hear the whole page. So a heading really provides a shortcut. It gives you a list of headings, and it will let you jump right through the heading. So in that sense, it is a bit like the table of contents. So make sure, whenever you use an element that started with H like H1, H2, H3, make sure it has content that you could jump to, that makes sense at a title for a section. And if you don’t have that, so if maybe your using a H2 for something that doesn’t really describe a section, consider using something completely different. Maybe putting in DIV instead. Because if you use a H element, you want to make sure that it is something that people can jump to, and that kind of explains what’s in a given section. But something else that I always recommend is to have a sensible HTML structure. And what I do when I test websites for accessibility, is that I turn off the CSS to see, what the structure looks like. The bare naked structure. People do this on CSS Naked day, if you’re familiar with that. That’s a day and year where websites serve their website without CSS, just to figure out what the structure looks like. And if your structure is good, it will work quite well without CSS. So turn off CSS is asked to figure out if you have a sensible HTML structure, and if the order in your HTML make sense. The fourth tip I have for you today is to specify language. And, this is something that you do in the HTML element, for the document. So the whole page gets specified there, with a lang attribute, and you put in the short codes for the language. So, if the web page is in English, you do a lang “en”. And that tells the browser, all of the content in the web page, isn’t that language. This gets used by a variety of things, including screenreaders, to figure out which voice to use. If you have, maybe you are a touch screener new user, you have a Dutch voice, as well as an English voice installed, then it can switch between those voices, based on the language that is specified. Now, it could’ve been the case that some part of your feeds are in a different language. Maybe you have a name that is in Spanish, then you can also specify that, by adding a span element and saying, “This span is in this language.” If you have translations, you can also use the related hreflang attribute, and that kind of specifies what the web page that you linking to is in. So in this case, I have a link to a Chinese version of this webpage and hreflang is telling the user that this page is in the Chinese language. So, maybe it can already free load the voice for that. Or do something else clever with that information. If you write in Chinese, that this is the Chinese version, then you can also combine it with the lang attribute to say, the link name is also in Chinese. So, the page that you’re linking to is in Chinese, and also the link itself is written in Chinese. So when you can combine hreflang and lang in one element, if you wanted to. So tip number five, it’s about text alternatives. One day a blind friend of mine told me about supermarket visit. And she explained that, she always has to get some help. Like she has to ask, an assistant in the supermarket, or bring her husband with her, just in order to figure out basic stuff like, how much silver is in this ketchup? Or what’s on special this week? Where do I find the avocados? These kind of things he couldn’t find out. And this made her really happy with the supermarket’s website. Because on the website, she was able to figure out all of those things by herself. And the reason for that is that the web is mostly texts. The web is really a big opportunity for people who are blind, because when they’re in the real world, they might need an assistant to figure out what stuff is. If they’re on the web, they’re able to use the text that is on the webpage. As long as the text is specified properly by web developers like ourselves. So this is where we can really make a big difference, for people who kind of see the web page. And the web is mostly to text, so that makes it really good for web accessibility. Because you can select text, you can copy-paste text, you can make it larger, it works for screenreaders. It is Google translatable. All of those things are, making sure that the web lets us have a lot of accessibility automatically. Because we specify it in text, all the software can then automatically do useful stuff for users. So, that is really good. This is why it’s so important that we use text everywhere. And it’s also important if you don’t have text, to make sure that there are texts alternatives. For instance, if you have an image that says 30% of your next purchase, and this image was, particularly difficult to put in text because of the font, it was very expansive or something like that. You decided to put it in an image, really to make sure that that alt attribute has the contents of the image in it. So that everyone can enjoy that discount, and is aware of it. Google announced last year and CSUN conference that they are working on something for Chrome that lets people have automated image captions, when an image that doesn’t have alternative text. Well, this is really cool, and they’re using AI for this. It’s really cool to have automated stuff there, but it’s also really hard to get right. And so far the AI powered alternative text that we’ve seen, it’s just not as good as what humans have been able to come up with. And that’s because a lot of that is very context sensitive. For instance, if you have a list of people who work in your company, and they have photos, then usually you don’t want alternative texts with the photos, because the name of the people is already in the content. So you’ve specified the names in text already. Their images are kind of decorative with the text. If you’d have alternative text there, and you’d have the same names twice. Basically it really depends on the context. And the context is something that is very hard to guess for AI. AI is notoriously bad at figuring out context. Now, alternative text is also something you should do with audio and video elements. For instance, on the Fronteers website, we have these videos from our conference talks. And the cool thing here that we’ve done, is have the full transcripts of the video typed out. And, you can click on part of that to go through the right part of the video. This is helpful if you’ve searched for this video by Mathias Bynens, and you want to figure out what exactly he says about optimising images. So you can use CTRL+F in your browser, find the right part and then click it. So you can do all sorts of cool things with that as well. And the last thing I want to say, is that it is really important to test with a keyboard. That again, is something that can really make your webpage a lot better for people with disabilities. Keyboard usage on web pages is something that really happens between the interactive elements. So this is a specific set of elements that are activatable by a keyboard. It’s things like the input elements, like things in forms, anchors, textareas buttons, those kinds of things, the details element. All of these things they are interactive elements. They are supposed to be usable with a keyboard, unless you’ve done something like outline non in your style sheet. But outline: none is something that is really bad. People who don’t use a mouse, they use focus styles to figure out where they are. So, let’s say we have a bunch of texts with some links in it. The way that you will know which link you’re about to click, if you’re using a mouse, is simply because that is the one that you’re mouse cursor is hovering above. That’s how you know I’m about to click this link, ‘collaborative thinking’. So the mouse cursor is helping you there. If you don’t use a mouse, you can’t see that. So, you’d have to have something that replaces that. And that’s what kind of focus outlines are for. They draw a box around the link text, so that you know that you’re currently on that part of the content. If you think these are ugly, or if you work with designers who say, “I don’t want to see that focus outline. I don’t want to see it because it is ugly.” Then tell them, “You know, streetlights are also ugly… …but they help you see where you are in the dark… …if you walk home, they’re just extremely helpful… …We could turn them off because they’re ugly… …but then you wouldn’t be able to see where you are.” And that’s the same thing for links in web pages. If you don’t have focus now, you cannot see where you are if you’re not using a mouse. And there are lots of people, that don’t use a mouse for all sorts of reasons. Or as Laura Carvajal beautifully put it at Fronteers a couple of years ago, “You wouldn’t steal their cursor. And you wouldn’t do cursor: none, in your CSS to get rid of someone’s cursor.” Which actually you can do at CSS. You can get rid of the cursor, so that people cannot see they are. You wouldn’t do that, no one would. So don’t get rid of the focus outlines either, because they are really important. And, just one thing if you’re testing your web pages, make sure that you can get to all the links, and all the buttons, and all the forms, with just a keyboard. So these are the things, the six things that I wanted to get you in today. Make sure you have good accessible names. And whenever you use one of those naming elements that I talked about, make sure that they are useful names. There’s markup that’s really important. So make sure you’re really aware of the HTML standard, and what is possible with it, and then use the right element for the job. Make sure you put in a lot of structure, with good heading elements, and titles. Always define your language. Have text alternatives, and make sure everything works with keyboard, just as well as it works with a mouse. So this are my six things. I am really looking forward to hearing some of your feedback. I’ll be showing up for a live Q and A after this. For now, I want to tell you that the slides are available on Notist. So that’s, on my website and talks, hidde@hiddedevries.nl. And you can follow me on Twitter, @hdv. Now, thanks very much for attending today. Thanks for making the time. And, I look forward to answering your questions in the Q and A right after this.
Slide 1
Slide 2
Slide 3

Slide 4
Slide 5

Slide 6
Slide 7
Slide 8
Slide 9
Slide 10

Slide 11
Slide 12
Slide 13
Slide 14

Slide 15
Slide 16
Slide 17
Slide 18
Slide 19

Slide 20
Slide 21
Slide 22
Slide 23
Slide 24
Slide 25
Slide 26
Slide 27
Slide 28
Slide 29
Slide 30
Slide 31
Slide 32
Slide 33
Slide 34
Slide 35

Slide 36

Slide 37
Slide 38
Slide 39
Slide 40
Slide 41
Slide 42

Slide 43
Slide 44
Slide 45
Slide 46
Slide 47
Slide 48
Slide 49
Slide 50
Slide 51
Slide 52
Slide 53
Slide 54
Slide 55
Slide 56
Slide 57
Slide 58
Slide 59

Slide 60
Slide 61

Slide 62
Slide 63
Slide 64
Slide 65